
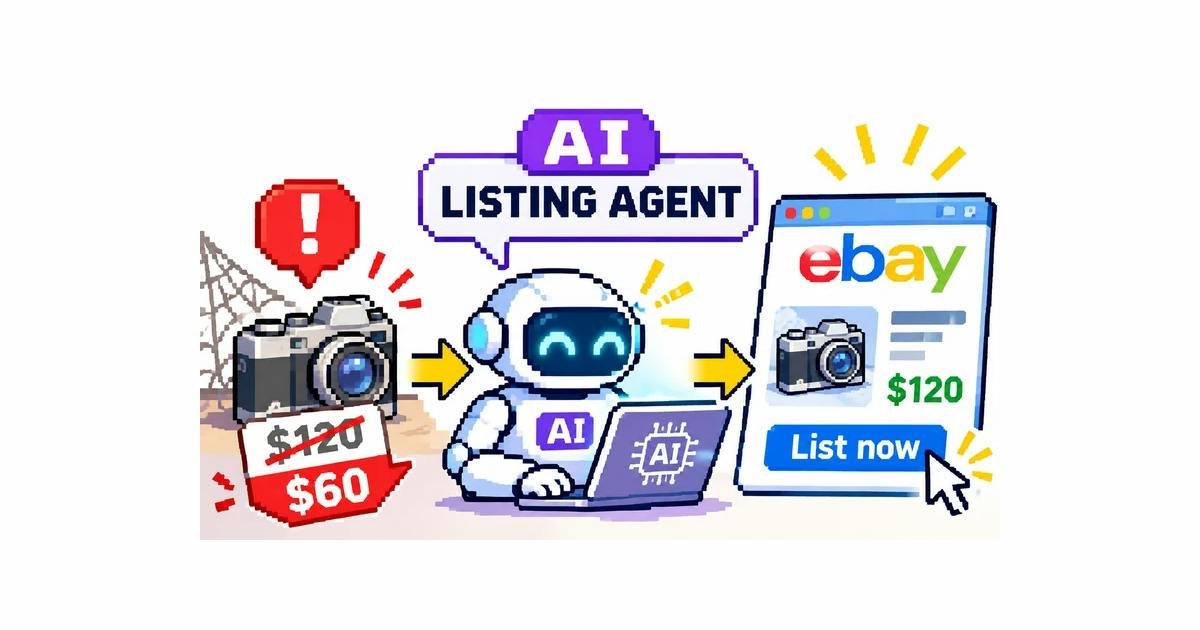
The AI agent that lists my eBay items can group my photos, identify the item, price it from comps I hand it, and build the listing. It can’t open its own eBay developer account. eBay wants a person for that, and for a few more screens after it. So this eBay API setup guide splits the work in two. You handle six eBay pages and paste three values into one file on your own disk. Your agent does the rest from a terminal: the privacy page, the consent link, the token trade, the policy check. Every step heading says who’s up: You, or You and your agent. Inside a step, a plain instruction is yours. A line that starts with “Ask your agent” is its turn, and you get to watch the JSON scroll by. Your agent builds the listing. The List now click still waits for your yes. Who does what in eBay API setup Step You Your agent Before you start Bring a seller account, a GitHub account and an AI coding agent. Answer the adoption questions Copies the code to a private folder, installs it, runs the tests 1. Developer account Register, wait for approval — 2. Production keyset Create it — 3. Unlock the keyset Answer eBay’s account-deletion form — 4. Privacy page Give it a name, a contact and your AI service Fills the template, publishes a Gist 5. RuName Complete one form — 6. .env file Paste three values Creates the file, sets Production 7. Consent Accept on eBay, copy one address Builds the link, trades the code for a token 8. Business policies Create shipping, payment and return policies Checks them, opts you in if you say yes 9. account.json Make the picks it can’t, approve a new location Writes the file, applies your adoption answers, runs five checks Think of the refresh token from step 7 as your car key, and the pipeline as a valet with a rulebook. The valet parks the car: your agent builds an unpublished offer that buyers can’t see. It doesn’t drive out of the lot until you nod, because publishing needs your explicit yes. One honest catch. The key itself can do more than the rulebook allows, so it lives in .env on your disk and never in a chat. Pink numbers in a screenshot match the step numbers under it. The labels match eBay’s screens as of November 2026. eBay renames things now and then, so if a label differs, trust the linked eBay page. Everything here comes from ebay-listing-agent, the listing pipeline I run on my own seller account. Your agent needs the repo before step 1, so grab the link now. Why this eBay API setup goes straight to Production eBay offers a Sandbox, a pretend marketplace for testing. The repo’s own guide starts there. This one doesn’t. Your listings live in Production, and a Sandbox test user starts with no business policies and no inventory location. Building those in the Sandbox is a side quest. So your agent connects to your real seller account from the start, and the pipeline’s rails do the protecting: The Lister workflow stops at an unpublished offer. Buyers can’t see it. publish without --confirm prints a summary and refuses. Your agent shows you that summary and waits for your yes. The two commands that change your seller account, setup --opt-in and setup --create-location, refuse without --confirm too. Your agent can remove an unpublished offer you don’t want with delete-offer. The command refuses anything already published. Warning: This setup connects your agent to your real seller account. Keep the Cert ID and the refresh token in .env only. Do not paste them into a chat. Do not commit .env to git. Before you start You bring: An eBay seller account in good standing, with payments set up. Your listings go here. The US marketplace (EBAY_US). Other marketplaces are untested. A GitHub account. Your agent publishes one small page there in step 4. An AI coding agent that can run terminal commands, such as Claude Code, Cursor or Codex CLI. Your agent does: Clones the repo and copies core/ into a new private folder. A copy, not a fork: on GitHub, a fork of a public repo is public, and your listing folders will hold your offer IDs. Installs Python 3.10+, ImageMagick 7 and the GitHub CLI (gh) if they’re missing, then the Python packages, then runs the tests. Walks you through ADOPTION-QUESTIONS.md: your price limit for review, the confidence it needs before it lists, which policies to use. It writes your answers down and applies them in step 9. Your answers about shipping and returns decide what you create in step 8. A prompt you can paste: Read ADOPTION-GUIDE.md in github.com/matbanik/ebay-listing-agent. Do steps 1 to 3 with me. We’re setting up eBay in Production, not the Sandbox. Stop before eBay API access. Say “Production” out loud like that. The repo’s guide suggests the Sandbox first, and a diligent agent follows the repo. 1. You: join the eBay Developers Program Your seller account can’t call the API. eBay runs its developer program as a separate building with its own front door, so you need a second account. It can use the same email as your seller account. It’s still a different login. Open the eBay Developers Program registration page. Complete the form. Enter your email address a second time where the form asks. Accept the API License Agreement. Complete the robot check. Select Join. Wait for approval. Approval can take about one business day. You cannot create keys before approval. eBay may ask for a business email address. Give it one if you have it. 2. You: create your eBay Production keyset If the Cert ID ever leaks, Rotate (Reset) Cert ID under it gives you a new one. A keyset is your app’s ID card: three values that tell eBay which app is knocking. You need the Production one. Open Application Keys on the developer site. Under Production, create a keyset. Give it any application title, for example “my-ebay-lister”. Check that the Production section shows App ID (Client ID), Dev ID and Cert ID (Client Secret). Keep this page open. You need it again in steps 3, 5 and 6. The App ID identifies your app. The Cert ID is its password, so treat it like one. The Dev ID isn’t used. The two boxed links under the App ID, User Tokens and Notifications, are the doors to steps 5 and 3. A fresh Production keyset also says “Your Keyset is currently disabled.” That’s normal. Step 3 is the unlock. 3. You: unlock the Production keyset The reason buttons are blurred on purpose. The picture should not choose for you. eBay won’t switch on a Production keyset until you answer one question: when an eBay user closes their account, how does your app find out? Apps that store eBay user data must listen for those deletion notices. Apps that don’t can apply for an exemption. The form sits behind the Notifications link under your Production App ID. You can also open the Production notifications page directly. Caution: Select only an exemption reason that is true for you. If no reason is true for your app, do not apply. Use the endpoint route at the end of this step. If a confirmation box opens after the toggle, read it. Select Confirm only if its statement is true for you. The form says: “Failure to provide correct information may result in penalties or having your account disabled.” Select Marketplace Account Deletion. Enable the Exempted from Marketplace Account Deletion toggle. Select the Exemption reason that is true for you. Describe what you store under Additional information. Select Submit. Open Application Keys again. Check the Production keyset for the message “Your Keyset is currently disabled.” Message still there? Stop. Go on to the privacy page in step 4 while you wait. Do not start the consent in step 7 until the message is gone. Here’s what you’re deciding about. The pipeline runs only on your own seller account. It never signs in other eBay users, and it keeps no buyer data. It does keep files about your own listings on your disk: titles, prices, offer IDs and listing IDs. eBay’s wording, “any eBay data,” doesn’t say whether that counts. I can’t make that call for you, and neither can your agent. If no reason fits, or eBay turns the exemption down, the other route is to subscribe an HTTPS endpoint that answers eBay’s notices. The repo doesn’t ship one, so you host it yourself, and the consent in step 7 waits until it works. eBay’s account deletion guide explains it. Some developers on eBay’s forum report keysets that stayed “Non Compliant” after they applied, so look at the keyset before you move on. 4. You and your agent: publish a privacy page eBay won’t create a RuName in step 5 without a privacy policy URL. Writing one sounds like homework. Most of it is your agent’s job, because the repo ships a template. Give your agent an app name, your name or business, a public contact and the AI service you use. Ask your agent to complete PRIVACY-TEMPLATE.md. It saves the result as privacy-policy.md. Ask your agent to publish privacy-policy.md as a public GitHub Gist. Does gh ask for a login? Run gh auth login yourself. Follow its prompts. Read the page your agent publishes. Check the name and the contact. Record the Gist link. You paste it into the RuName form in step 5. A prompt you can paste: Complete PRIVACY-TEMPLATE.md for “My eBay Lister”. Owner: [your name or business]. Contact: [the email or page you’ll publish]. AI service: [the one you use]. Save it as privacy-policy.md, publish it as a public Gist, and give me the link. The template has five short parts: what the app accesses, what it stores, who it shares with, how to delete it, and how to reach you. It also has a line for naming any AI service that analyzes your photos. Your agent reads your photos to identify items, so name the service you run it on. It doesn’t oversell itself, either: “This is a starting point, not legal advice.” The publish itself is one line for your agent: gh gist create --public --desc "Privacy policy: My eBay Lister" privacy-policy.md 5. You: create your eBay RuName The privacy URL must start with https:// and can't be eBay's own policy. A Gist link passes both. RuName is short for “redirect URL name.” It’s eBay’s nickname for your redirect settings, and it looks like your app’s name went through a shredder: YourName-YourApp-ab12-cdefgh. The consent step needs it. Each keyset has its own RuName, so make this one from the Production keyset. Get to the form: On Application Keys, select User Tokens under the Production App ID. Open Get a Token from eBay via Your Application. Select “You have no Redirect URLs. Click here to add one.” Does eBay ask for a legal address? Complete the form. Select Continue to create RuName. Complete the form. The pink numbers match this list: In Your privacy policy URL, paste the Gist link from step 4. In Your auth accepted URL and Your auth declined URL, enter any HTTPS address. My setup uses https://example.com. Enter a Display Title, for example “My eBay Lister”. You see this title on the consent page in step 7. Save the form. Copy the RuName. You paste it into .env in step 6. Why can the accepted URL be any HTTPS page? Nothing has to run there. After you accept in step 7, eBay sends your browser to that address with a one-time code tacked on, and you copy it straight from the address bar. eBay’s form adds: “If you leave these fields blank, the eBay default accept and reject pages will be used.” The address you copy then looks different. Step 7 shows both. eBay also won’t take its own privacy policy as yours: the URL must be HTTPS and “should not be eBay’s Privacy Policy URL.” eBay’s Quick OAuth Guide asks for an “OAuth Enabled” RuName. If your form shows that option, enable it. 6. You and your agent: fill the .env file .env is a plain text file that holds your keys on your own disk. Your agent creates it. You put the secrets in, so they never pass through the chat. Ask your agent to create .env from .env.example, with EBAY_ENVIRONMENT=production. Open .env in a text editor. Paste the App ID after EBAY_CLIENT_ID=. Paste the Cert ID after EBAY_CLIENT_SECRET=. Paste the RuName after EBAY_REDIRECT_URI=. Paste the RuName, not a URL. Leave EBAY_USER_REFRESH_TOKEN= empty. Step 7 writes it. Save the file. When you’re done, the five lines that matter look like this, with your values in place of the brackets: EBAY_ENVIRONMENT=production EBAY_CLIENT_ID= EBAY_CLIENT_SECRET= EBAY_REDIRECT_URI= EBAY_USER_REFRESH_TOKEN= The RuName line is where most people trip. The setting is called redirect_uri, so a URL feels like the right answer. eBay wants the RuName. A URL there is the most common cause of redirect_uri errors. If the Cert ID ever leaks, open Application Keys and select Rotate (Reset) Cert ID with a grace period of 0, so the old one stops working at once. Paste the new one into .env. Refresh tokens survive the rotation, so you don’t have to repeat step 7. 7. You and your agent: consent and the eBay refresh token This is the handshake. You tell eBay, as the seller, that this app may manage your listings. eBay hands your browser a one-time code. Your agent trades the code for a refresh token, the long-lived key the pipeline uses from then on. Five minutes is the whole window, so read the list first, then go. Ask your agent to run auth-url. It gives you a consent link. Open the consent link in your browser. Does eBay ask for a login? Enter the username and password of your seller account. Do not use the developer account. Read the permissions on the consent page. Accept them. Copy the whole address from the address bar of the page that opens. Paste the whole address into the chat. Ask your agent to run exchange-code with it right away. Check that your agent reports "stored": true. Does it report invalid_grant? Start again from the top of this list. Here’s what the two addresses look like. Your agent hands you the first one. You hand back the second. You open (the consent link from your agent): https://auth.ebay.com/oauth2/authorize?client_id=&redirect_uri=&response_type=code&scope=https%3A//api.ebay.com/oauth/api_scope%20... You copy (from the address bar, after you accept): https://example.com/?code=v%5E1.1%23i%5E1%23...&expires_in=299 The part after code= is new every time. It works once and expires after 299 seconds, which is what expires_in=299 is telling you. Your address can carry other parts, such as state=. Copy all of it. Your agent picks out the code. Is that safe to paste into a chat? The code works once and dies in five minutes. eBay trades it for a token only together with your Cert ID, and the Cert ID stays in .env. So the code is useless without the Cert ID. Two places do see it: the chat, and the site behind your accepted URL, which can log the address you land on. Neither one gets your Cert ID, and once your agent trades the code, it’s spent. The consent link does show your App ID and RuName. That’s normal: every OAuth consent link carries them. Left the accepted URL blank in step 5? Then eBay sends you to its own page, and the address starts like this: https://signin.ebay.com/ws/eBayISAPI.dll?ThirdPartyAuthSucessFailure&isAuthSuccessful=true&state=null&code=v%5E1... Yes, “Sucess.” That’s eBay’s spelling, not mine. The code= part is in there too, and exchange-code reads it from any address. This path also keeps the code off a site you don’t run. My own setup uses example.com, so I haven’t run this path myself. What Lasts Who handles it Code 299 seconds, one use You copy it once Access token 2 hours The tool renews it on its own Refresh token About 18 months Repeat this step when it runs out If something goes wrong: invalid_grant: the code was already used, or more than five minutes old. Get a fresh link and paste faster. redirect_uri error: .env holds a URL, or a Sandbox RuName, instead of the Production RuName. invalid_client: the App ID and Cert ID came from different keysets, or EBAY_ENVIRONMENT isn’t production. 8. You and your agent: create eBay business policies A shipping policy is a business policy too. It is not under Shipping Preferences, just below. Business policies are saved answers to the questions every listing asks: how does it ship, how does the buyer pay, and what happens on a return? Your agent attaches them to each offer by ID. Its tool can read policies but has no command to create them, so this part is yours. Ask your agent to run policies first. It lists the policies you already have. If you already have a free-shipping policy, a payment policy and a 30-day return policy, skip to step 9. If policies says your account isn’t opted in to Business Policies, your agent can run setup --opt-in --confirm, but only after you say yes. Then ask your agent to run policies again. Once the opt-in error is gone, create your policies. The repo’s own notes put that wait anywhere from a few minutes to 24 hours. Open My eBay. Select Account. Select Selling in the menu on the left. Select Business Policies. The Manage your business policies page opens. Select Create policy at the top right. Select the policy type. Create three policies this way, one at a time. Shipping policy With Offer free shipping on, the Buyer pays fields go grey at $0.00. The pipeline’s pricing bakes the shipping cost into the item price, so it wants a free-shipping policy. Skip calculated shipping. The repo’s adoption questions give it as the example of a policy that can fail on package errors. Under Cost type, select Flat: Same cost to all buyers. Enable Offer free shipping. Enter a Policy name, for example “Free domestic shipping”. Select the Shipping method that fits your items. Select the Handling time that fits your items. Select Save. Payment and return policies Create a payment policy. Enable Require immediate payment when buyer uses Buy It Now. Select Save. Create a return policy. Enable Accept returns under domestic returns. In Allowed within, select 30 Days. In Return shipping paid by, select Buyer. Select Save. Ask your agent to run policies again. Check that all three policies appear. My payment policy requires immediate payment, and the repo’s default return policy is 30 days with the buyer paying return shipping. eBay’s form adds its own nudge: “Offering a minimum 30-day return policy helps your listings qualify for Top Rated Seller Benefits.” 9. You and your agent: write account.json and run the checks Your policy IDs and inventory location are different from everyone else’s, so they live in account.json, a private file next to .env. Your agent writes it with setup. That command doesn’t interview anyone. It keeps choices already saved in account.json. Otherwise it takes the only candidate, such as your one location or your one 30-day return policy. When it can’t choose, it says so in its choices and waits for a flag. Your part is making the picks it can’t. Ask your agent to run setup --dry-run. It reports what it found and what it can’t decide. Read the choices with your agent. Does a line say “found: pass”? Tell your agent which policy or location to use. No inventory location? Give your agent your ZIP code, city and state. Approve the --create-location command. Ask your agent to run setup --dry-run again with your picks. Does problems still list anything? Repeat steps 2 to 4. Ask your agent to run setup with the same picks. It writes account.json. Ask your agent to apply the rest of your adoption answers. ADOPTION-QUESTIONS.md names the key or file for each one. Check the price limit and the fee rate in the pipeline section of account.json. Ask your agent to run the five checks below. All five should succeed. Your picks travel as flags. Your agent passes a policy ID with --fulfillment (that’s eBay’s name for shipping), --payment or --return, and a location with --location-key. Two adoption answers ride along the same way: --disallow-fulfillment marks a shipping policy your agent must never use, and --return-14-day names a 14-day return policy if you keep one: python tools/ebay_api.py setup --dry-run --fulfillment --return --location-key HOME-01 The location command your agent runs after your yes looks like this: python tools/ebay_api.py setup --create-location --location-key HOME-01 --postal-code --city --state --confirm Item 7 above is easy to miss, because setup reads your eBay account, not your adoption answers. It fills pipeline with the repo’s defaults: review anything over $200, ask below 0.70 confidence, a 13.6% final value fee and $0.40 per order. Those win until your agent edits the file, and later setup runs keep the edits. Your other answers, such as your photo source and backups, go into the workflow files and AGENTS.md. ADOPTION-GUIDE.md steps 5 and 6 list every edit. Its step 7 adds a validation run on a made-up headlamp listing that touches nothing on eBay. Then the five checks from step 9: python tools/ebay_api.py setup --dry-run # "problems": [] means ready python tools/ebay_api.py policies python tools/ebay_api.py categories "flashlight" python tools/ebay_api.py browse "flashlight" --limit python tools/ebay_api.py reconcile Here’s a real setup --dry-run from my own account, trimmed, with IDs masked. It’s a re-run, which is why every choice says “kept from account.json.” The line you’re looking for is "problems": []. { "file": "/account.json" "written": false "choices": { "merchantLocationKey": "kept from account.json" "fulfillment": "kept from account.json" "payment": "kept from account.json" "return": "kept from account.json" }, "problems": [], "next": "Ready: the Lister copies these IDs into offer.json; validate_payload.py checks them" } "written": false means the dry run looked and left the file alone. Your first item: who does what That’s your eBay API setup done. From here, you drop photos in a folder and your agent runs five workflows, one after another. Your part shrinks to a few check-ins: Workflow You do Import Drop the photos in. Check the grouping Curator Correct the identification if it’s wrong Evaluator Paste sold comps from Terapeak when it asks Lister Nothing. It stops at an unpublished offer Review Read listing-draft.md, then approve or reject Why Terapeak by hand? The tool’s Browse command sees what other sellers are asking right now, not what buyers actually paid. An asking price is a ceiling, not a sale. So the Evaluator asks you for sold comps, and Terapeak in Seller Hub has them. That’s the valet at work. It parks every car neatly in the lot as an unpublished offer, and anything above your price limit waits for you before it’s even parked. Nothing leaves the lot until you hand over the ticket, and the ticket is your yes in the Review step. Get ebay-listing-agent on GitHub, give your agent ADOPTION-GUIDE.md, and tell it “Production, not Sandbox.” If a label in this eBay API setup guide no longer matches eBay’s screen, open an issue on the repo so the next seller doesn’t have to hunt for it.
A Step-by-Step Guide to eBay API Integration With AI Agents
Full Article
Original Source
Read the full article at Hackernoon →KhanList aggregates and links to publicly available news content. We do not host full articles from third-party sources. Always verify important information with original sources.