
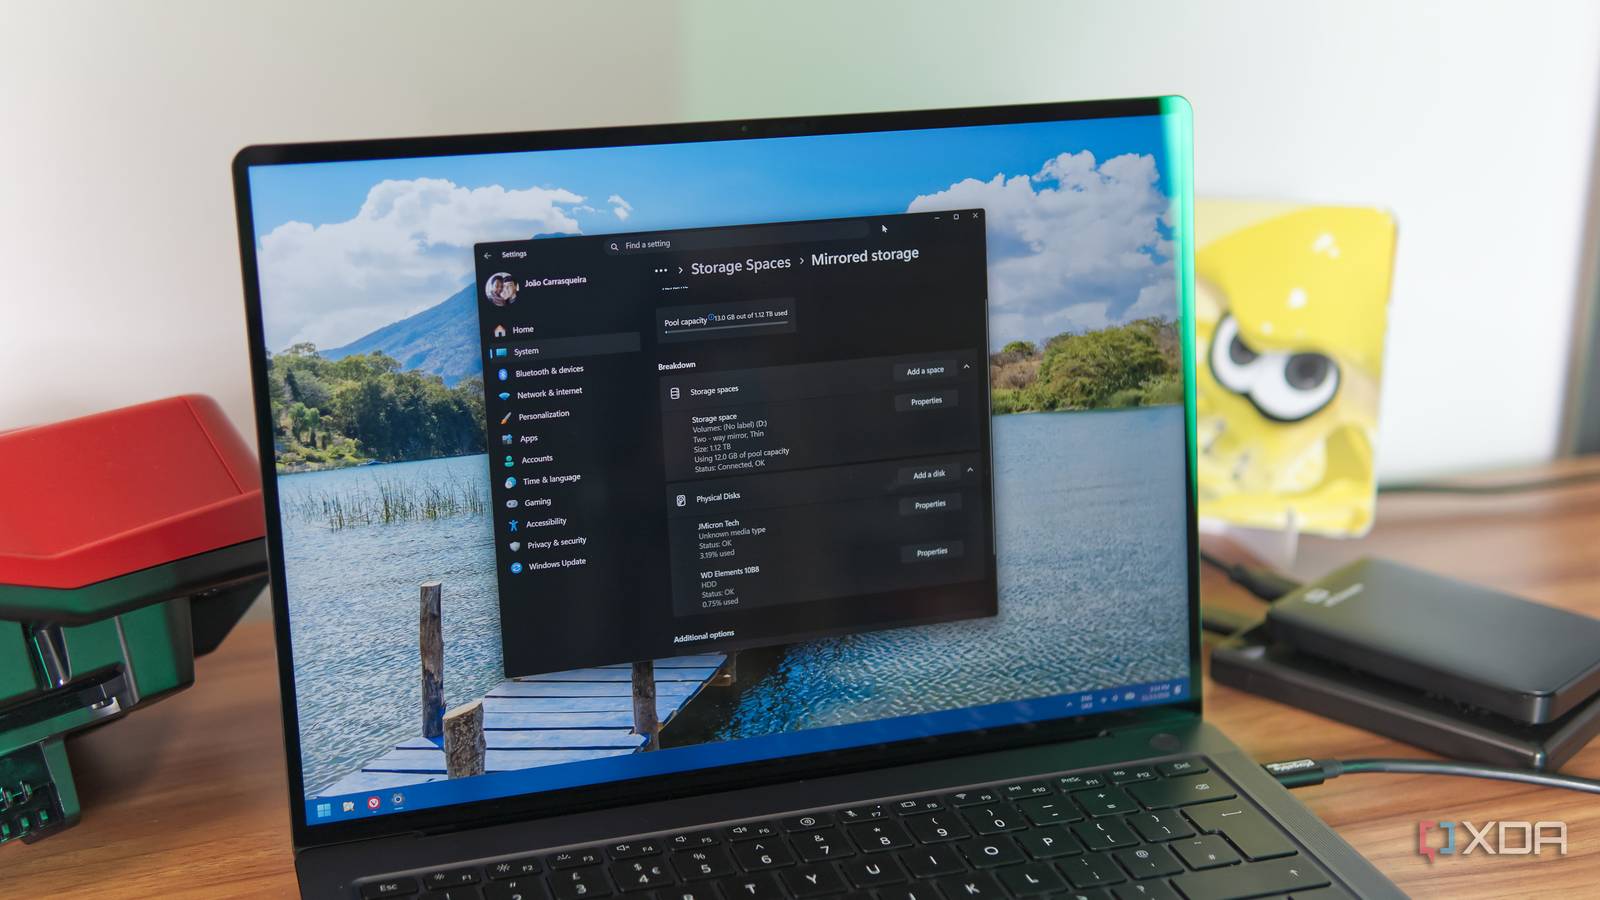
Published Nov 13, 2026, 4:30 PM EST João has been covering the tech world for over 7 years, with a heavy focus on laptops and the Windows ecosystem. I also love all things tech and videogames, especially Nintendo, which he's always happy to talk about. Prior to joining XDA in 2021, he worked at Neowin: https://www.neowin.net/news/poster/jo%C3%A3o-carrasqueira/ If you have a NAS, or even just a high-end gaming PC, you've probably heard of RAID before. It's (typically) a hardware-level feature that lets you combine multiple hard drives so that they're recognized as a single drive, either for additional performance or redundancy. While it's very useful, it's not something everyone is comfortable setting up by themselves. However, Windows has a built-in tool that gives you most of the benefits of RAID with a much easier setup process. It's called Storage Spaces, and I used it to bring together two old external drives with redundancy. How does Storage Spaces work? It's like RAID, but in software Storage Spaces was introduced in Windows 8, and much like RAID, it's designed to let you combine multiple drives into what's called a storage pool. A storage pool can have any size and include multiple drives, and from that storage pool, you can then create virtual drives (known as storage spaces), along with choosing how you want data on that virtual drive to be handled across the drives inside the storage pool. A "simple" storage space offers no resiliency, meaning data on any of the drives in that space is lost if any of those drives fail. Instead, the idea is to provide increased performance by splitting stored files between the two disks, since you're no longer limited by the bandwidth of a single physical drive. This is the equivalent to a RAID 0 configuration. Two-way or three-way mirrors completely mirror the data across your drives, protecting you from failures while also potentially improving performance. This is most similar to RAID 1. Then there's the Parity option, which splits data across multiple disks using striping. This allows for more efficient use of the available space while also offering some redundancy, but it's a bit different. Single-parity gives you one fault tolerance for one drive, but you need at least three in total for it to work. Dual-parity is aimed at large deployments and offers fault tolerance for two drives, but it requires at least seven drives to be in the pool. These settings are most similar to RAID 5 or RAID 6. One cool thing about Storage Spaces is that they also work across most interfaces, so you can create a storage space with any of these drive types, whether they're HDDs, SSDs, or even plugged in via USB. However, USB drives still need to be recognized by Windows as fixed drives, so you won't be able to use a flash drive, and some HDD or SSD enclosures may not present themselves correctly to enable this feature. Making sure it all works It took a little longer than expected For my test here, I'm using a couple of old external drives I have lying around, one being an SSD and the other being an HDD. With both drives plugged into my PC, I first had to make sure they were both empty and backed up any important data within them. Then, in theory, I should have been able to just go into the Settings app to create a storage pool using my disks, but none of them were showing up as capable of being used for Storage Spaces. Control Panel let me select them, but the process would fail saying the physical disk's sector size wasn't compatible with the storage pool, so I had to do some digging. If you run into this issue, what you need to do is reset the physical disk using PowerShell. In an elevated Terminal window, run the command Get-PhysicalDisk and check that the CanPool label for your disks is set to True. If not, you need to reset them. To do this, first run the following command: Get-PhysicalDisk | Select FriendlyName, UniqueId From the output, copy the UniqueId field for the disk(s) you need to reset. Then, run this command once for each disk: Reset-PhysicalDisk -UniqueId {UniqueId} You can then run the Get-PhysicalDisk command again to make sure the disks can now be pooled. In my case, I actually had to restart my PC because something still wasn't working right, but this shouldn't be necessary. I mention all this because it may happen to you just like it happened to me, particularly if it's an old drive you've used before. However, in an ideal scenario, you shouldn't have to go through all this hassle. Creating redundant storage It's easy once everything is ready With that part of the process out of the way, creating a storage pool and space is very easy. The drives I'm using actually have different sizes, which is obviously not an ideal setup for mirroring, since you'd never be able to use the full capacity of the larger drive while maintaining the redundancy. Still, it works for the sake of demonstration. To create a storage pool, I go into the Settings app and navigate to System > Storage > Advanced storage options > Storage Spaces. Here, I can create a new storage pool and select the two disks that will go into it. The total size displayed adds up the sizes of the two disks, but in reality, since I'm using a mirrored setup, the data I put in the drive will be duplicated, since it's stored on both drives. And once one of the drives fills up, anything that exceeds that capacity of the lower drive will not be able to be mirrored. Regardless, all it takes is clicking through the rest of the process, which ends with creating a virtual drive that represents the storage space I created. Just like formatting a real drive, you can assign a drive letter, choose the file system, and so on. Once it's created, I can see information about the storage space and its individual drives in the Settings app, but the rest of Windows will only see them as a singular drive. That's pretty much all it takes to create a RAID-like setup using Storage Spaces. It's surprisingly easy and effective. However, because this is a software-level implementation with a higher abstraction layer than a proper RAID configuration, it's worth remembering that the performance benefits may not be quite as clear as using hardware-level RAID. Storage spaces deserve more attention For all the talk you may have seen about RAID, it's completely understandable to feel like it's just not something you want to bother with, but Storage Spaces lets you get a lot of those benefits in a much more convenient way, without having to go into the BIOS, and without overly restrictive requirements. If you're just starting to look into this kind of solution, this is a great place to start before deciding whether you want to commit to a proper RAID setup at some point.
Windows has a built-in RAID tool most people never touch, and it turned two old drives into a mirrored pair
Full Article
Original Source
Read the full article at Xda-developers →KhanList aggregates and links to publicly available news content. We do not host full articles from third-party sources. Always verify important information with original sources.