
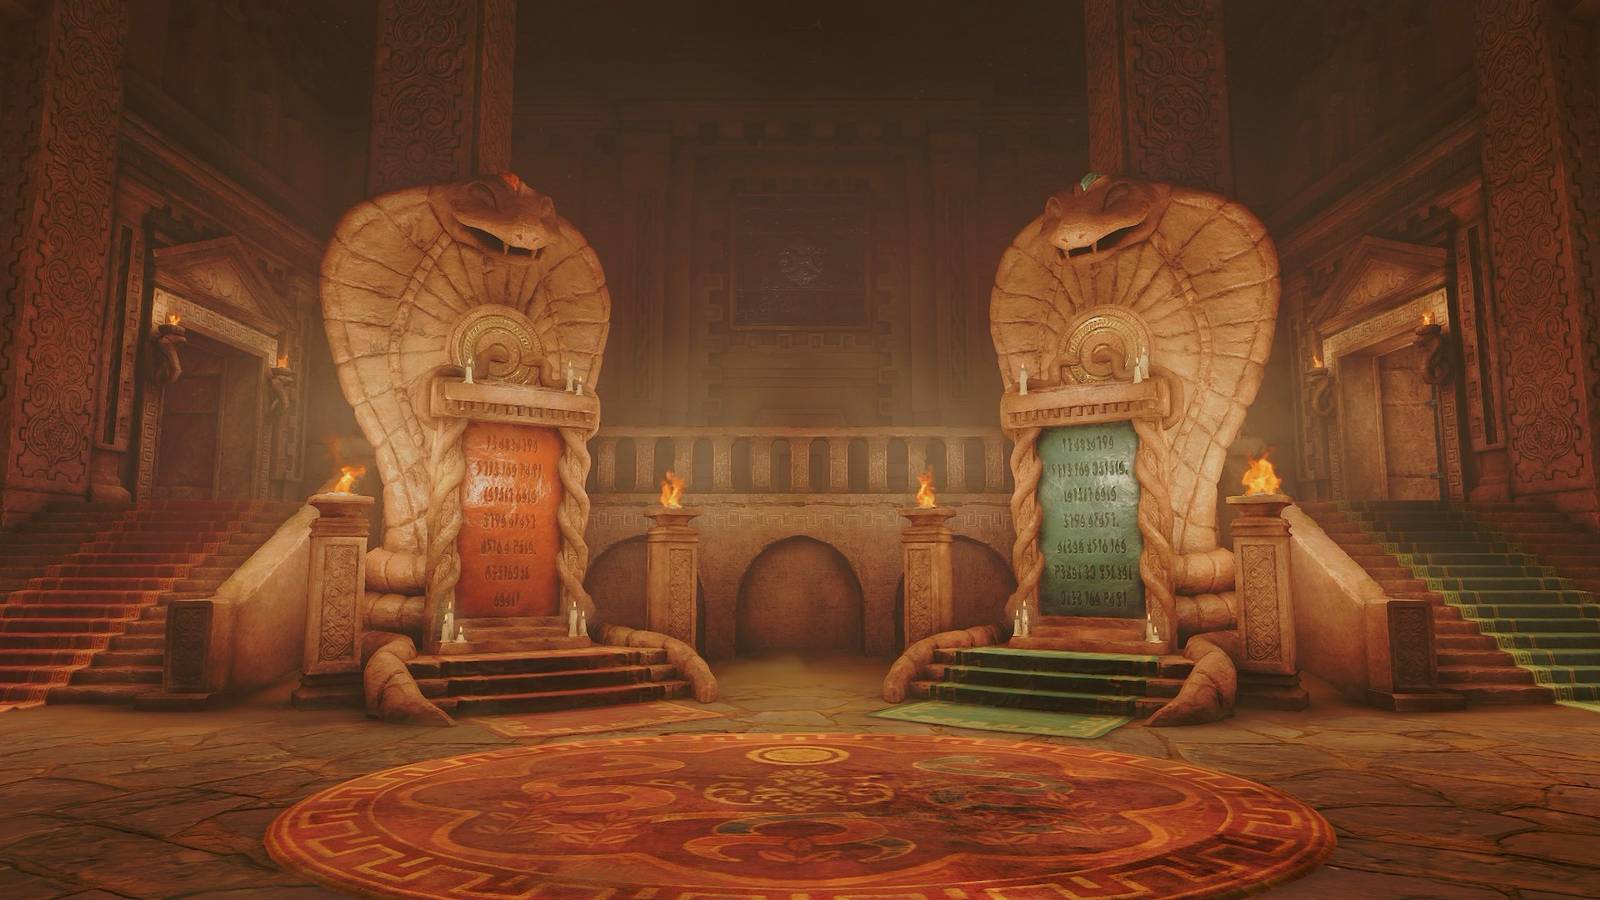
Published Nov 5, 2026, 12:01 AM EST Travel through time to get through this dungeon Image: Nintendo EPD/Nintendo via Polygon The Spirit Temple is another dungeon that you take on in the future in The Legend of Zelda: Ocarina of Time remake. You're sent to the Spirit Temple to find for Nabooru, the Gerudo's exalted leader. However, when you get to the Spirit Temple, you quickly learn that you'll have to literally manage your time properly if you want to solve its puzzles and find Nabooru. The Spirit Temple is the first dungeon that you need to go to in the past and the future to reach its end. Here's how to complete the Spirit Temple dungeon in Ocarina of Time remake. Part 1: Reaching the Spirit Temple Before you make your way to the Spirit Temple, we recommend learning the Scarecrow Song and bringing a magic bean and a bug if you want to collect every Gold Skulltula inside and in the surrounding area. Graphic: Johnny Yu/Polygon | Source images: Nintendo EPD/Nintendo via Polygon To get to the Spirit Temple, follow the flags in the Mirage Desert until you reach a building. Before you go up the stairs, go around the stairs and drop into the hole. You'll find a Gold Skulltula on the wall. Go back up to the top and read the plaque, which states, "Those with eyes of truth shall be guided to the Spirit Temple by a welcoming specter." Put on the Lenses of Truth, and you'll see the Phantom Guide. Tell them you're ready to go, and follow them closely. The Phantom Guide is a little annoying as they'll take many useless sharp turns, and they'll run through Leevers, which look like cactus monsters. You'll have to stay as close as you can to the phantom and avoid every incoming enemy until you eventually reach the entrance to the Evil Desert Colossus. Then, head straight and attempt to go into the Spirit Temple. Sheik will stop you and essentially tell you that you need to go against the flow of time to complete the dungeon. They'll also teach you the Requiem of Spirit (L - R - L - A - R - L), which allows you to warp back to the Spirit Temple. So, play the Prelude of Light (X - A - X - A - Y - X) to go back to the Temple of Time, turn back into young Link, and warp back to the Spirit Temple. Graphic: Johnny Yu/Polygon | Source images: Nintendo EPD/Nintendo via Polygon Before you head inside, make sure to place a bug on the soft soil on the left side of the Spirit Temple's entrance to get a Gold Skulltula, and then plant a magic bean into it for when you travel back into the future. Part 2: Finding the dungeon map Head up the left staircase, and you'll meet Nabooru just in front of a tunnel. She'll tell you that there's a treasure hidden behind the tunnel that can move the huge stones blocking the way on the other side of the temple. Graphic: Johnny Yu/Polygon | Source images: Nintendo EPD/Nintendo via Polygon Crawl through the tunnel, and you'll enter a room with a bunch of Keese, Blade Traps, and an Armos. Defeat all the enemies to unlock the two gates. First, follow the path to the left. In this room, you'll face off against a Stalfos, which will take a bit more to beat as your young self. After you defeat them, look to the north, and you'll see a glowing switch behind a wall. Throw your Boomerang to the left side of the wall, and then look to the right side of the wall to direct the Boomerang into the switch. When you hit it, the wall will fall and turn into a bridge. However, a couple of Green Bubbles will also spawn. After you take them out, head to the chest in the corner, but be careful as the pots are actually Flying Pots. Open the chest to get a red rupee and then crawl through the tunnel into the next room. Graphic: Johnny Yu/Polygon | Source images: Nintendo EPD/Nintendo via Polygon In this room, Anubis, a floating statue, will be on the opposite side of the room, and its movements will mirror yours as you walk around and attack. To defeat it, you need to hit the eye switch on the northwest pillar, and then jump onto it so that Anubis is in the fire on the other pillar. Make sure to jump from the center of the room though, or else you'll fall into the abyss. After you defeat Anubis, head through the unlocked door. Image: Nintendo EPD/Nintendo via Polygon For this room, you need to collect the five crystals to unlock the door. However, there will be a Wallmaster and a Fire Keese that try to attack you as soon as you walk in. Take out the Keese first, and get out of the spotlight to attack the Wallmaster. Once they've been defeated, grab the crystals on the ground. Then, climb up the walls to grab the crystals in the air. Image: Nintendo EPD/Nintendo via Polygon The wall will drop, but be careful of the Keese on the other side of the wall. Take a step onto the bridge to make the Keese get off the wall, and then take them out with your Fairy Slingshot or Boomerang. There's also a Gold Skulltula on the left wall. Walk onto the bridge and hit it with your Boomerang to collect its token. Graphic: Johnny Yu/Polygon | Source images: Nintendo EPD/Nintendo via Polygon Light a Deku Stick with one of the torches, and use it to light the unlit torches. A chest containing a small key will drop from the ceiling. Collect it and go through the door to the south to end up back in the room you started in. Crawl through the tunnel, and use the small key to unlock the door. Image: Nintendo EPD/Nintendo via Polygon Use your Boomerang to hit the Skullwalltulas and climb up the wall. A couple Lizalfos will spawn in the room at the top. Defeat them, and then look at the western wall to see a breakable rock wall. Use a Bombchu to break the wall. If you don't have any, hit the switch to the south, and a chest containing five Bombchus will drop from the ceiling. Light will beam onto the sun on the floor, and the door to the next room will unlock. Graphic: Johnny Yu/Polygon | Source images: Nintendo EPD/Nintendo via Polygon In this room, there is a giant statue of a woman with a snake on her head. You'll find a lit torch and an unlit torch in front of her, and a Gold Skulltula on her right. Light the unlit torch, and a chest containing the dungeon map will spawn. Then, collect the Gold Skulltula token. Part 3: Getting the Silver Gauntlets Graphic: Johnny Yu/Polygon | Source images: Nintendo EPD/Nintendo via Polygon Climb to the top of the stairs, where you'll find a button and a statue on the platform above it. Climb up the wall and push the statue onto the button to unlock the door. Graphic: Johnny Yu/Polygon | Source images: Nintendo EPD/Nintendo via Polygon Head inside and go up the stairs. You'll enter another room where you must collect five crystals to move on, but this time there are a few Beamos hiding about. Blow up the Beamos with your bombs, and then you'll be free to start collecting crystals. First, climb onto the walls around the room to get four crystals. For the last crystal, climb onto the wall in the center of the room, and jump into it. The door to the next room will unlock, but don't head into it just yet. Graphic: Johnny Yu/Polygon | Source images: Nintendo EPD/Nintendo via Polygon Pull the cube with the sun on it into the beam of light, and a chest will spawn in the hole in the wall. Open it to get a small key. Now you're free to go into the next room, but immediately turn around to find a Gold Skulltula above the door. Use your Boomerang to collect its token. Graphic: Johnny Yu/Polygon | Source images: Nintendo EPD/Nintendo via Polygon Unlock the next room and head inside. You'll see an Iron Knuckle, which looks like a knight with a greataxe, sitting in a chair at the other end of the room, and yes, you need to defeat them to get to the next room. Get close to them, and they'll stand up. Your shield isn't that effective at blocking their attacks, so instead, you'll need to dodge. Because their attacks are so strong, they're also slow to recover, which is a great time to attack. They'll either slam the ground in front of them or sweep their axe to both sides. Backflip away from their attack, and then do a jump attack of your own to close the distance. If you're low on health, bait their attack into the stone pillars. Three hearts will fall from each one, so you can heal enough hearts to take one of their hits. Repeat this until you defeat them. Open the door to the next room, and go down the path which will take you outside. Open the chest on your left, and you'll get the Silver Gauntlets, the treasure that Nabooru was looking for. Nabooru will greet you outside, but she'll shortly be attacked by Kotake and Koume. As the Silver Gauntlets can only be used by an adult, you'll now have to warp back to the Temple of Time, and return as an older Link seven years in the future. However, after you teleport, Kaepora Gaebora will greet you outside. They've come to say goodbye, as this is the final time you'll see them. Graphic: Johnny Yu/Polygon | Source images: Nintendo EPD/Nintendo via Polygon Travel to the future and return to the Spirit Temple by playing Requiem of Spirit (L - R - L - A - R - L). If you planted the magic bean as young Link, you can ride the plant to get a Gold Skulltula and a Piece of Heart. Part 4: Finding the compass Graphic: Johnny Yu/Polygon | Source images: Nintendo EPD/Nintendo via Polygon Go up the right staircase in the Spirit Temple and push the black stone blocking the doorway on the right. Then, hit the switch on the ceiling to unlock the doors. Image: Nintendo EPD/Nintendo via Polygon Head into the room on the left and a Wolfos will appear. Defeat them, and stand on the Triforce on the floor. Play Zelda's Lullaby (Y - X - A - Y - X - A) and a chest will spawn on the platform ahead of you. Longshot to the target below it, and open the chest to get the compass. Image: Nintendo EPD/Nintendo via Polygon Go back into the previous room, and take the path to the right. In this room, there are a bunch of rolling stones, and you need to collect five crystals to unlock the next room. You'll need to jump for the first crystal, but the other crystals can be found in the small alcoves. Before you play the Song of Time to get rid of the time cube blocking the way to one of the crystals, go into the last alcove on the left to find a Gold Skulltula. Then, play the Song of Time, which will move the time cube into the last alcove, but also reveal the final crystal. Head into the unlocked room, where you'll find a chest and a Like Like. Defeat the Like Like and open the chest to get a small key. Backtrack into the room with the switch and Blade Trap, and use the small key to unlock the door. Two Flying Pots will charge at you and another Like Like will try to eat you. Defeat them and climb up the wall. At the top, quickly put on your Lenses of Truth to spot the invisible Floormaster. Wait for them to run into your shield or the wall, and then attack them and the hands that they split into. Part 5: Getting the Mirror Shield Image: Nintendo EPD/Nintendo via Polygon Turn the light into the sun on the eastern wall, and a chest will fall from the ceiling. Then, skip the next sun, as it'll spawn a Wallmaster, and turn the light toward the sun on the southern wall to unlock the door. You can also skip the last sun, as it'll spawn a fake chest. Graphic: Johnny Yu/Polygon | Source images: Nintendo EPD/Nintendo via Polygon Head into the next room, which will be the room with the large statue of a woman who has a snake on her head. First, Longshot onto the statue's left wrist (your right). Step onto the Triforce on the hand, and play Zelda's Lullaby (Y - X - A - Y - X - A), which will spawn a chest onto the statue's right hand. Graphic: Johnny Yu/Polygon | Source images: Nintendo EPD/Nintendo via Polygon Before you head over, Longshot to the target in the northeast corner of the room, and hit the button with the Megaton Hammer to unlock the door. Then, drop back down to the floor, but don't immediately go to the door. Graphic: Johnny Yu/Polygon | Source images: Nintendo EPD/Nintendo via Polygon This time, Longshot onto the statue's right wrist (your left). Open the chest to get a small key, and then play the Scarecrow Song, which will summon Pierre onto the platform above you. Longshot over, and you'll find a Gold Skulltula on the floor. Collect it and drop back down. Go through the door in front of the statue, and push the large stone block until it falls. Follow the path and do the same with the next stone block, which will create a path back to the starting room. Graphic: Johnny Yu/Polygon | Source images: Nintendo EPD/Nintendo via Polygon Head back to the room with the statue, and Longshot to the target above the door in the southeast corner of the room. Go up the stairs and use the small key to unlock the door, but be careful as there will be a Beamos waiting for you in the next room. Throw a bomb at them and head into the next room, where you'll find three Anubis and a Beamos. Image: Nintendo EPD/Nintendo via Polygon First things first, take out the Beamos with a bomb. Then, go to the far side of the room and play the Song of Time (A - L - R - A - L - R) in front of the symbol on the wall. Next, step on the button in the northeast, which will turn on the fire pit. Direct every Anubis into the fire by jumping over to the time cube and walking to the northwest and southwest corners of the room. Graphic: Johnny Yu/Polygon | Source images: Nintendo EPD/Nintendo via Polygon Head into the unlocked room, where you'll find a button on the floor and an Armos on one side, and a beam of light on the other. You can't do anything with the sunlight for now, so stick to the side with the button. The Armos will be a monster, so instead of pulling them onto the button, you need to make them jump onto the button. This will turn them back into a statue and unlock the southern door. Open the door, and use your Lenses of Truth to open the two chests in the hallway to get some rupees. Then, head into the next room, where you'll find another Iron Knuckle, but this time, you're older and stronger. Take them out like you did before, and remember that you can bait their attacks into the pillars to spawn hearts. However, only one heart will drop from each pillar this time. After you defeat him, go into the next room and follow the path which will take you outside. Step on the button to spawn a chest, and open it to get the Mirror Shield. Part 6: Finding the boss key Image: Nintendo EPD/Nintendo via Polygon Equip the Mirror Shield and return to the room with the sunlight. Hold ZL to lift your shield and step into the sunlight. Reflect it into the sun on the wall above the door to unlock it. Head inside and open the chest to get a small key. Go back to the room where you defeated the Anubis, and use the key to unlock the door. Image: Nintendo EPD/Nintendo via Polygon Blow up the two Beamos, and head inside. You need to climb up the wall, but it'll be shifting from side to side. Use your Longshot on the highest wall and climb up the rest of the way. Two Lizalfos will appear at the top. Take care of them, and Longshot to the tap of the wall like you did the previous one. Graphic: Johnny Yu/Polygon | Source images: Nintendo EPD/Nintendo via Polygon Go into the next room, and play Zelda's Lullaby (Y - X - A - Y - X - A) on the Triforce on the floor to unlock the door. Inside, you'll find a bunch of Torch Slugs and a bunch of fake doors. Use your Megaton Hammer to flip the slugs and defeat them. Then, break the door in the northwest corner with your hammer, and you'll find an eye behind it. Hit the eye with your Longshot or bow, and a wall will fall over, creating a platform. Longshot to the target on the ceiling, and then step on the button to turn off the fire surrounding the chest. Longshot back over, and open the chest to get the boss key. Part 7: Reaching the boss room Image: Nintendo EPD/Nintendo via Polygon Return to the previous room and climb up the wall. Go through the door, but be weary of all the pots in this room as they're all Flying Pots. Drop onto the floor and hit the switch to unlock the door above. Open the door, and you'll find a beam of light and a sun on the wall. If you're low on bombs, reflect the light into the sun to spawn a chest that'll give you five. Graphic: Johnny Yu/Polygon | Source images: Nintendo EPD/Nintendo via Polygon Defeat the White Bubbles in the next room, and destroy the rock wall. There will be another reflective mirror and two Dinolfos inside. Jump to the side when the Dinolfos are attacking, and hit them until you defeat them. Rotate the light in the previous room, and aim it at the other light contraption. Then, go to the next room and aim the light at the bars. Graphic: Johnny Yu/Polygon | Source images: Nintendo EPD/Nintendo via Polygon Follow the light and drop into the hole. Stand on the platform with the sun on it, and reflect the light into the sun on the wall. The platform will drop and stop just in front of the large statue's head. Reflect the light onto the statue's head. Its face will fall off, but it'll reveal a target and the door to the boss room. Part 8: Defeating the Spirit Temple boss, Twinrova Longshot to the target and unlock the door to enter the boss room. You'll find Kotake, Koume, and another Iron Knuckle. Kotake and Koume will leave, and you'll need to fight against the Iron Knuckle. Defeat them like you did the previous two. The Iron Knuckle's armor will fall off, but this time you'll find out that it's actually Nabooru inside. Kotake and Koume will trap Nabooru again, and unlock the door to the next room. Image: Nintendo EPD/Nintendo via Polygon Go inside, but before you climb onto the platform, there are a few things you should know about the fight against the Sorcerer Sisters, Twinrova: Warm up whichever finger you use to hold down ZL as you'll be lifting the Mirror Shield for essentially the entire fight. The Mirror Shield can reflect magic, not just light. Utilize the side platforms to keep the center platform free of magic. Image: Nintendo EPD/Nintendo via Polygon For the first part of the fight, the sisters will fly around the arena, and take turns shooting a magic beam at you. Don't be afraid of their magic though, as you can reflect it with your Mirror Shield. Wait for them to use their magic, and then reflect the beam toward the other sister. If you miss the beam, there will be a patch of fire or ice (depending on which sister cast magic) on the ground. Avoid it and wait for the next magic cast. Repeat this a few times until the sisters combine into Twinrova. Graphic: Johnny Yu/Polygon | Source images: Nintendo EPD/Nintendo via Polygon For the second part of the fight, Twinrova will throw fire and ice magic at you, but you need to reflect three of the same type to counterattack. For example, if you block three ice attacks in a row, you'll reflect the attack back at Twinrova, and she'll become vulnerable. However, Twinrova is not guaranteed to cast the same type of magic three times in a row. If you've already blocked two fire attacks, but the next attack is ice, you need to dodge and wait for a fire attack. If you absorb the opposing spell, your shield will lose every charge, so make sure to dodge if the spell isn't the same type. After you reflect the magic, Twinrova will fall onto a platform. Jump over and attack her as many times as you can. Image: Nintendo EPD/Nintendo via Polygon When Twinrova is casting a different type of magic, we recommend waiting on a platform off to the side of the arena, and waiting until she is just about to cast a spell. If it's the same type, you can stay on the platform and block it. If it's not the same type, jump back to the center right after she casts her spell, and her attack will land on the platform off the side. This way, the main area will be free of any ice and fire magic, and you won't have to worry about finding a safe spot to move to. Graphic: Johnny Yu/Polygon | Source images: Nintendo EPD/Nintendo via Polygon From here on out, Twinrova will incorporate a new charge attack. For the charge attack, she'll fly to the edge of the room, and quickly charge at you. Roll to the side as fast as you can to avoid her. She will cast this in between her spells, so make sure to keep the center clean of spells to ensure that you can dodge this attack. As Twinrova is casting her spells, she'll quickly swap between her wands to trick you. She'll lift her fire wand, but then swap to her ice wand and cast ice magic instead. Sometimes, she'll swap multiple times, and other times, she'll lift the same wand multiple times in a row. It can take a while to block three of the same types of magic, so you'll need to dodge a lot. Remember to stay on a side platform to keep the center clean. The rest of the fight will just be Twinrova either charging at you or casting a magic spell. Continue to block her attacks until you have three of the same spell type, send it back to her, and then attack as many times you can until you defeat her. Collect the Heart Container and exit the dungeon via the ring of light as usual.
Spirit Temple dungeon walkthrough in Ocarina of Time
Full Article
Original Source
Read the full article at Polygon →KhanList aggregates and links to publicly available news content. We do not host full articles from third-party sources. Always verify important information with original sources.