
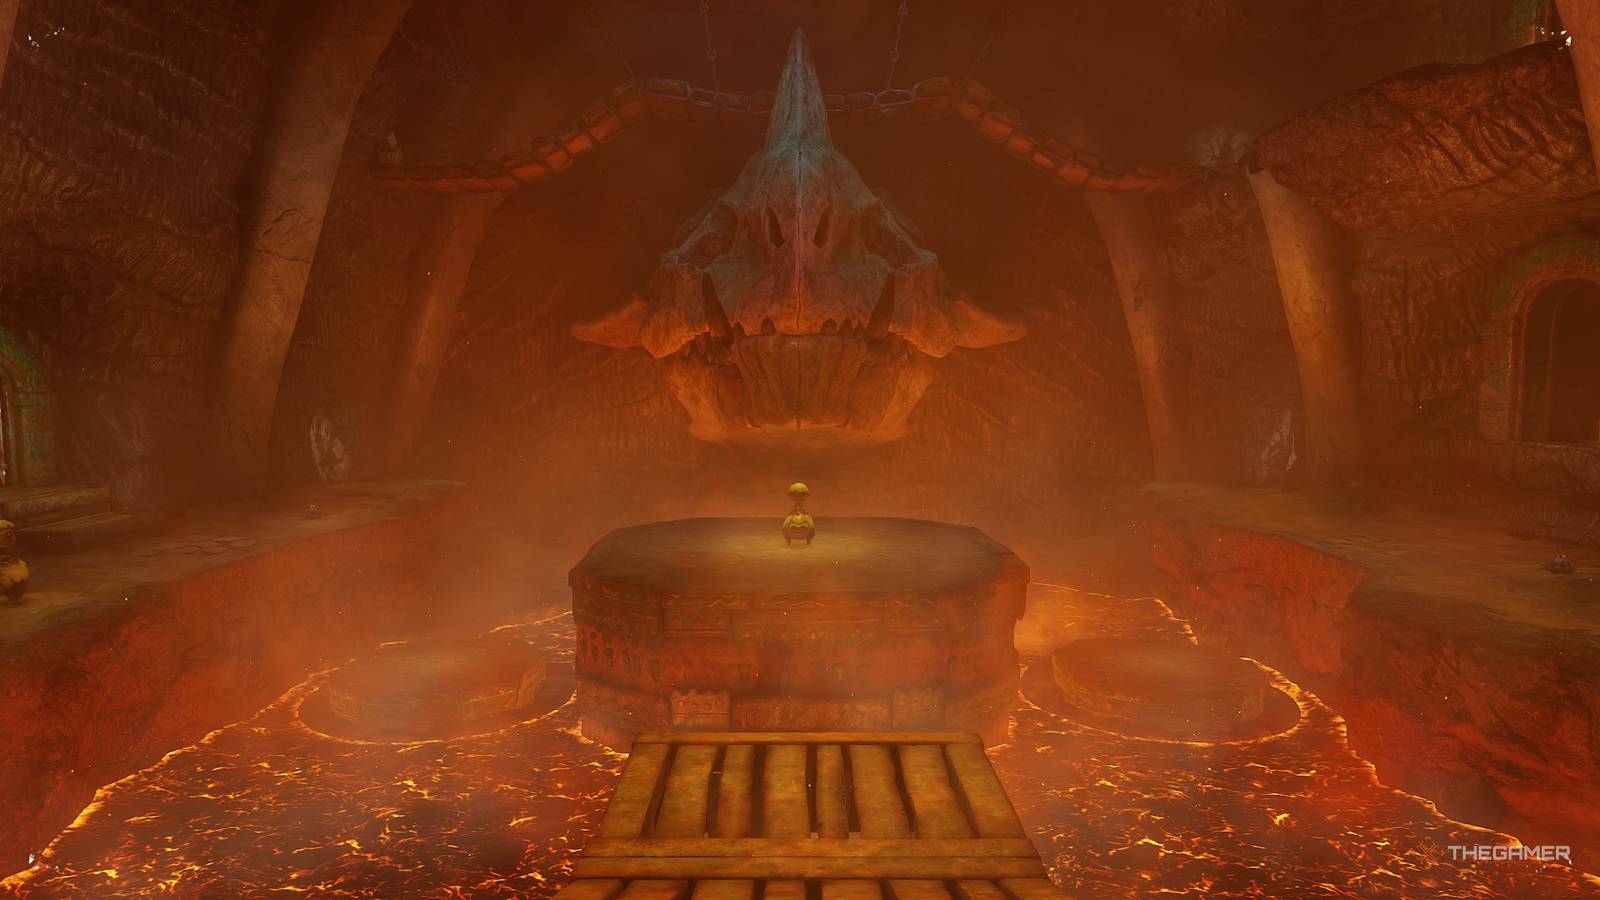
The Legend of Zelda: Ocarina of Time remake has officially launched, so grab your Hylian Shield, load up your Fairy Slingshot, and get ready to save Hyrule once again. Throughout this journey, you will need to complete several dungeons that are filled with traps, puzzles, combat encounters, and a unique boss at the end. One of the first dungeons you'll be tasked with completing is Dodongo's Cavern, which is located right outside of Goron City. This is a far more elaborate dungeon than the previous Great Deku Tree and will be your first real challenge if you're new to this title. If you're struggling at all or just want to ensure you find all the collectibles inside, here is how to find and do everything in Dodongo's Cavern. Dodongo's Cavern Walkthrough After going through the massive hole you created on Death Mountain's Trail, you will enter a smaller room with a breakable wall at the back. Since we're currently limited to Bomb Flowers, grab one of the two Bomb Flowers and throw it at the rocky entrance to blow open the door to the actual dungeon. Step inside to trigger a brief cutscene introducing Dodongo's Cavern. Get The Dungeon Map Now that we're in the dungeon, you will want to head to the left side of the Main Chamber. Be careful as you traverse across the platforms, as they not only sink into the lava below, but you'll also need to contend with the new Beamos enemies. These foes fire a laser in a straight line that chases after you. You can either outright avoid them since they cannot move or destroy them with a Bomb Flower. Make your way left and destroy the Beamos with the nearby Bomb Flower. Once it's dead, take the Bomb Flower and destroy the destructible wall near the back left corner of the room to reveal a large chest that contains the Dungeon Map inside. Additionally, you can use the Bomb Flower to destroy the other breakable wall on the left side to find a small chest that has a Blue Rupee in it. Get The Compass After getting the Dungeon Map, head to the right side of the Main Chamber, taking extra care to not get attacked by the Beamos in the center. Just like before, grab the Bomb Flower and use it to destroy the Beamos on the right, before using it to blow open both of the breakable walls on either side of the elevated section. In the back right corner will be a Gossip Stone, and the path forward will be in the bottom right corner. Progress down the tunnel and kill any of the Baby Dodongos that come scurrying out of the dirt. These explode a few seconds after taking damage, so always try to keep your distance from them after you swipe at these foes with your sword. There's a Gold Skulltula you can get once you are playing as Adult Link. Return to the hallway with all the Baby Dodongos and look along the northern wall about halfway down the tunnel. Above you will be a Scarecrow point you can reach with the Hookshot via the Scarecrow Song! We can't do anything about it now, but it's good to come back to! Once they're dead, approach the door with the stone switch in front of it. Push either of the two Armos Statues on top of the switch to permanently unlock this door. Progress through the hallway with the two Keese and go out the door on the other end. When you enter, the door will lock behind you, and you'll need to kill two Lizalfos. These enemies are quite nimble and will only attack you one at a time. Play defensively and use your shield to block their attacks before swiping at them with your sword a couple of times. After one takes a few hits, it will run away, and the other will take its place. Repeat this process of blocking their initial strike and counterattacking when they stop. There's no point in chasing after them, so just stay on the platform you entered on until both are defeated. With the Lizalfos dead, a chest will spawn with a Red Rupee inside. You can also refill your hearts by hitting the pots on either side of the arena. Go into the next hall and use the Bomb Flower to blow open the cracked wall on the right. This will reveal a Business Scrub who is selling Deku Nuts and Deku Sticks if you need them. If not, progress into the blue-colored chamber directly ahead of you. Make sure to have the Hylian Shield for this dungeon! If you have the Deku Shield equipped and take fire damage, it will burn up, and you'll need to get a new one! In this room, there will be three Dodongos, which are slow-moving but relatively dangerous enemies. Their weak points are their tails, as the rest of their bodies are heavily armored. Approach one and wait for it to breathe fire before running behind it and slashing at its backside. Hit it twice and then back away to avoid its tail swipe move. Repeat this process two more times to kill the Dodongo. Now, you do not need to actually fight these Dodongos if you want, but it does make the small puzzle in this room easier if you're not being harassed by angry lizards. Once they're dead, take out a Deku Stick and light the three unlit torches in this room. There will be one by the closest and farthest pillar, with the third being against the right wall. This will unlock the door, letting you go inside. You're now back in the main chamber, so step on the stone switch to unlock the door directly across from you. Jump back down into the main chamber, head across the moving platforms, and go into the newly unlocked door. Proceed into the next chamber and use a Bomb Flower to blow open the breakable wall directly to your left. Inside will be three Armos Statues, with one sitting directly in front of the ladder. Upon interacting with the Armos Statue by the ladder, it will come to life and attack Link. Equip your Deku Nuts and use them to stun the enemy, freezing it in place. Now quickly grab a Bomb Flower and throw it at this foe to kill it. Don't stand too close, as it will explode when it dies. Approach the ladder and climb it to reach the chest that contains the Compass. Get The Bomb Bag With the Compass and Dungeon Map acquired, the next task is to acquire the Bomb Bag so you can carry and use Bombs wherever you want. Upon leaving the room where you got the Compass, head over to the large stone pillar that is surrounded by Bomb Flowers. You'll notice a gap in the middle, so grab the lone Bomb Flower that's off to the right side and place it in this opening. When the Bomb Flower detonates, it will cause a chain reaction where all the other Bomb Flowers around the pillar will explode in sequence. If done correctly, all the Bomb Flowers should explode, causing the pillar to shift, revealing that it's actually a staircase. Climb up the stairs and continue up the dirt incline until you reach the next door. Gold Skulltula 1 — Bomb Flower Staircase Room (2F) Your first Gold Skulltula in this dungeon is located at the top of the room where you formed a staircase via detonating all the Bomb Flowers. At the door, turn around and face the large wall that has netting on it. There will be both a normal Wall Skulltula and a Gold Skulltula. Use your Fairy Slingshot to kill them both and climb up to get your token. In the next room there will be two Fire Keese and four Armos Statues surrounding a central platform. Use your Fairy Slingshot to kill the fiery bats and then approach the platform in the center. Three of the four Armos Statues around the platform are hostile, with the only inanimate one being in front of a ladder. All the hostile ones will have broken ladders behind them, so check for the one that has an intact ladder, pull the statue away, and climb up to activate the switch, opening the door. Go across the bridge above the Main Chamber and kill the Fire Keese flying around you. In the next room there will be two spike traps moving horizontally across the ground between the series of pillars. Time your movements carefully and go to the back right corner. Grab the movable block and push it towards the lower pillar near the ladder. Use the block to reach the pillar, which will let you both access a small chest that has some Deku Seeds and a Bomb Flower. Grab the Bomb Flower and toss it at the cracked wall by the ladder to clear a path. Now move the block in front of the ladder and use it to climb up to the opening you just created. Continue into the next room where there is a large flame blocking your path. Take out your Fairy Slingshot and shoot the eye above the door, behind the fire to temporarily stop the blaze. Quickly cross the platforms and go into the next room. There will be several Baby Dodongos buried in this room, so carefully deal with them as you cross the lava to the door in the back left corner. The next room will have two more Lizalfos that you'll need to deal with. Just like before, use the Hylian Shield to do your best turtle impersonation and wait for the Lizalfo to attack. Once it hits the shield, the enemy will be briefly stunned allowing you to get a couple slashes in before going back on the defensive. Use this method to defeat both Lizalfos to unlock the doors and spawn a small chest. Before proceeding, go to the far end of the room and make your way through the narrow gap in the rocks. There you will find the newly spawned chest which contains a brand-new item called a Business Scrub Seed. When used, this seed will spawn a Business Scrub anywhere in the game, allowing you to buy items you might need. When you're done, head through the unlocked door on the left side of the Lizalfo arena. In the next room, you will need to once again shoot the eye switch to make the flames on the platform cease. Hit the eye switch directly across from you first, then jump onto the platform that no longer is lit. Quickly look to your left to see a second eye switch and use your slingshot to also shoot this. Doing so will cause the second platform's fire to vanish, letting you safely cross. You will then reach a room with a large chest which finally contains the Bomb Bag. This allows you to carry up to 20 bombs and use them anywhere you want! Blow a hole in the wall behind the chest with your newly acquired explosive and continue into the Main Chamber. Open The Dodongo Skull Now that we're back in the main chamber, we need to make our way to the boss' room. Step onto the switch to activate the platform on the ground floor to turn into an elevator between the different levels. If you want another Gold Skulltula, take the platform down to ground level, otherwise, go to the suspension bridge over the Dodongo Skull. Gold Skulltula 2 — Side Room (1F) The second Gold Skulltula can be found in the side room to the southeast by where you were first introduced to the Armos Statues. In the hall that had the Baby Dodongos you will find a cracked wall that you can blow open with a Bomb. This will reveal a small chamber with a Gold Skulltula and three normal Keese. Gold Skulltula 3 — Suspension Bridge (2F) Another Gold Skulltula can be found to the right of the switch you used on the second floor to turn the platform into an elevator. Next to the suspension bridge over the Dodongo Skull, use a bomb to blast open the breakable wall and head inside. There you will find two Dodongos around a large rock. Kill the enemies and go to the back of the rock to find the next Gold Skulltula. Once you're done getting all the Gold Skulltulas, head onto the suspension bridge over the Dodongo Skull. There will be two conveniently bomb-sized holes in the bridge that are above each eye socket. Drop a bomb into both eye sockets of the skull to light up the eyes and cause the jaw to open, revealing a new door you can go through. There will also be an additional bombable wall that has a small chest behind it that contains a Blue Rupee. Make your way back down to the first floor of the Main Chamber and go through this newly opened door. Reach The Boss Room Upon entering through the door in the skull, make your way down the hill and then go up the incline on the other side. Ignore the switch on the floor for now; we will come back to it. Follow the path until you reach a room with several stone blocks. Grab the stone block directly to your left and line it up with the one on the raised section. Doing so will let you climb onto the block you moved and push the one on the raised section to the area below. Now, head down to where you pushed the block and drag it to the back left corner of this room. Move your block so it's aligned with the one in the wall. Climb onto the block you've been pushing around and shove the one in the wall forward so you can reach the next section. Gold Skulltula 4 — Block Room (1F) The final Gold Skulltula in Dodongo's Cavern can be found in the block room. Before you push the block embedded in the wall, move the block on the ground so it's in front of the cracked wall. Drop a bomb on top of the block so it blows open a hole to a side room. In this new area, you will find a hostile Armos Statue and three Baby Dodongos. Kill all of them, and you can find the Gold Skulltula along the back wall. Follow the path back down to the room with the switch and push the stone block in front of you onto the lower level. Then drag the block into the conveniently block-sized hole with the switch at the bottom. Dropping the block onto the switch will unlock the boss room door. Defeat King Dodongo The big bad of this dungeon is the massive dinosaur, King Dodongo. This hulking behemoth is far easier than he actually looks. Your main weapon during this fight will be bombs, so make sure you have a few before dropping into the hole you make in the boss's room. When you hit the ground, a brief cutscene will play that introduces the boss. Right after you regain control of Link, equip the bombs and wait for King Dodongo to begin sucking air and fire into his mouth. Throw a bomb at his mouth while the boss is sucking in air to make him eat the explosive. This will detonate inside King Dodongo, stunning him and causing him to collapse onto the ground. Quickly run over to King Dodongo and begin slashing at his tongue to damage him. Keep it up until he stands back up and closes his mouth. Now, run to any corner of the room and stand on the edge near the lava. King Dodongo is going to start rolling around the arena, but you can entirely avoid this attack by just hanging out where the lava and ground meet. Once he slams into a wall, a few Baby Dodongos will spawn and rush towards you. Deal with enemies and wait until King Dodongo begins sucking in air once again. If you're fast enough, you can throw a bomb into his mouth and kill the Baby Dodongos, but if not, you'll need to avoid the massive fireball he launches. This projectile will ricochet around each side of the room. Nothing else in this fight will change, so keep throwing bombs into his mouth, attacking his tongue while he's stunned, and using the edge of the arena to avoid his attacks. The only difference is he will summon more Baby Dodongos the second time he recovers from being attacked. Otherwise, this is an extremely straightforward fight. After killing him, he will roll into the lava and turn to stone. A Full Heart Container will spawn, so make sure to grab it before stepping into the light and teleporting outside of the dungeon's main entrance.
How To Complete Dodongo's Cavern In The Ocarina Of Time Remake
Full Article
Original Source
Read the full article at Thegamer →KhanList aggregates and links to publicly available news content. We do not host full articles from third-party sources. Always verify important information with original sources.