
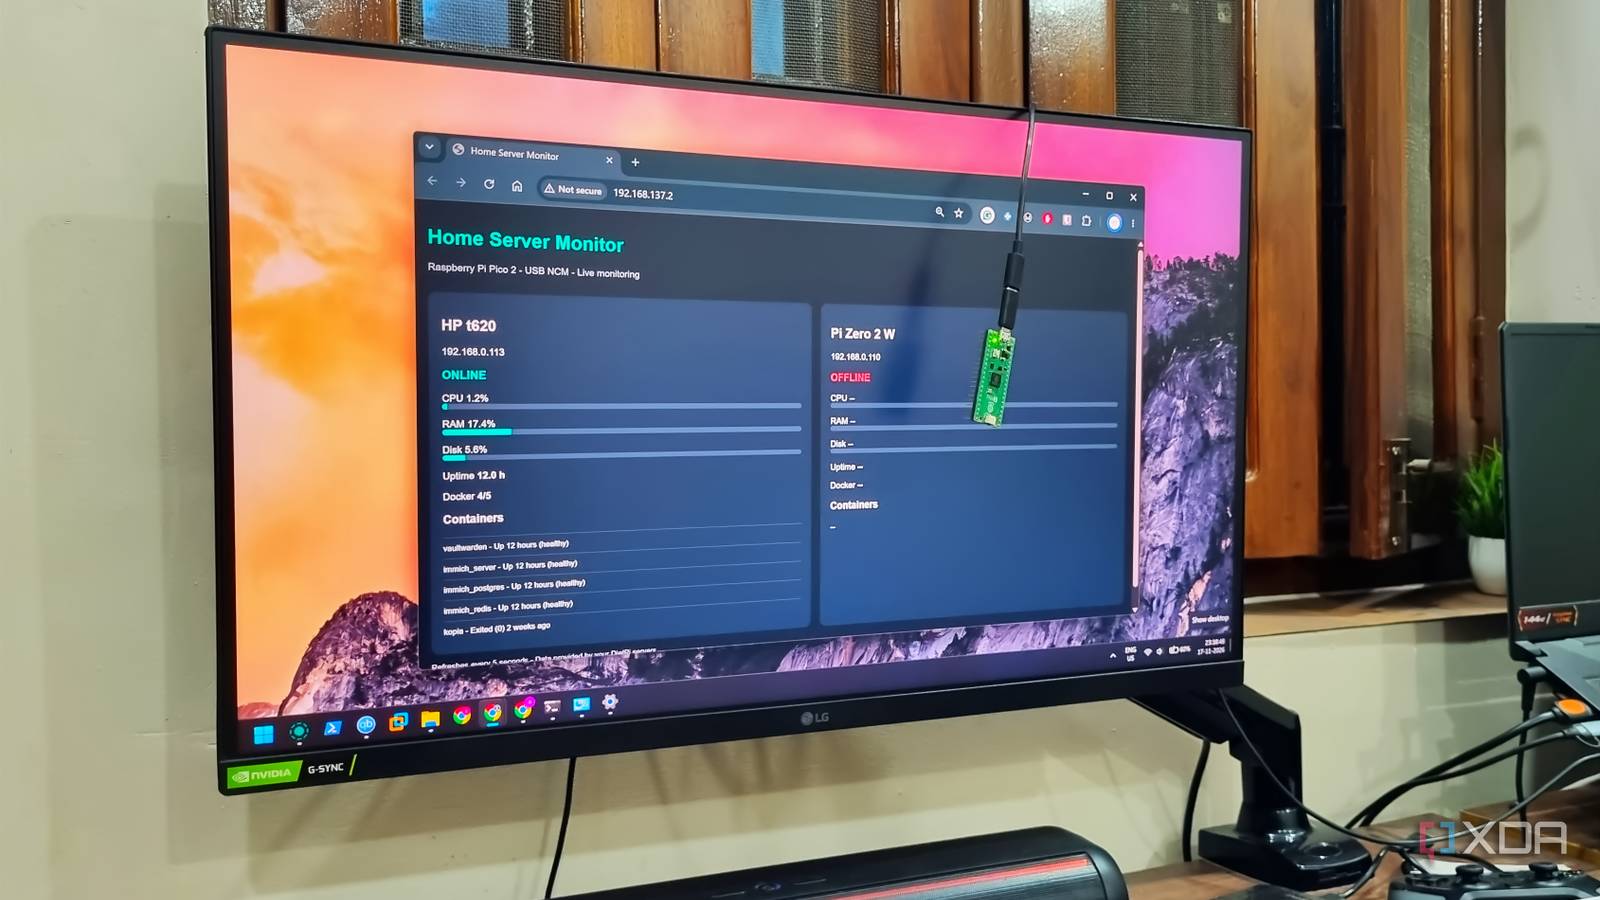
Published Nov 18, 2026, 3:31 PM EST Abhishek is an author at XDA who covers computing. He has loved computers since he got the Lenovo G570 in 2012. Abhishek holds a master's degree in computer applications and began his writing career in 2018. He loves writing how-to articles, listicles, and informational posts on popular operating systems and web services. He closely follows the Windows Insider program and tests new Insider builds to discover upcoming experimental features and upgrades. His past work includes long-term collaborations with reputed publications like Tom's Hardware, and Windows Latest. When not writing anything, he is busy watching new episodes of One Piece or searching for something binge-worthy. Raspberry Pi has launched multiple boards and even different series in the last ten years. You might be familiar with the mainstream Raspberry Pi boards like the Raspberry Pi 4 Model B or Raspberry Pi 5. In addition, you can pick the Raspberry Pi Zero series, which is best for single-purpose roles, and the Raspberry Pi Pico series, which is for embedded computing. I have a Raspberry Pi 4 Model B, Raspberry Pi Zero 2 W, and recently bought a Raspberry Pi Pico board as well. I intended to find time to learn electronics and circuitry. But I didn't find the time or purpose for it, even after a month of having it. For an average user like me who prefers software-based projects, a Raspberry Pi Pico is a challenge. There's no easy operating system to install on it because it's a microcontroller. The board is not capable of running a full-fledged CLI OS like DietPi. So, I decided to build a lightweight monitoring server on it as a challenge. Massive roadblock on the first try I got the wrong Raspberry Pi Pico Last month, I bought a Raspberry Pi 4 Model B with 1GB of memory and a Raspberry Pi Pico 2 W. I prefer buying boards with headers and wireless connectivity because they keep the door open for future electronic tinkering. They also don't need any attachments for wireless connections. But when I set out to build a watchdog dashboard independent of my servers, my first script tests in Thonny showed errors. I checked the board's labels, and it was indeed a Raspberry Pi Pico 2 (I received the wrong one) without any wireless connectivity. This mismatch in hardware brought my project to a screeching halt. I had a board that couldn't connect to the servers, so what's the point of building it? I used it for physical connection projects that rely on other components to build something. The main reason for building a monitoring server on Raspberry Pi Pico 2 was to make it independent of failures. If I host it on any of my home servers and they go down, I cannot use the dashboard anymore. I have to resort to SSH to check each one. My options were limited to either buying a Raspberry Pi Pico 2 W with wireless capabilities or integrating an external Wi-Fi module into my current board. But I found another way using USB NCM. Forcing the Raspberry Pi Pico to behave as a network device Windows PC shares its network connection If I can share my PC’s network connection with the Raspberry Pi Pico 2, it can host the dashboard and connect to other servers. The Raspberry Pi Pico 2 (and even other Pico boards) present themselves as USB storage in BOOTSEL mode. The USB Network Control Model (NCM) is a USB standard that makes the microcontroller present itself as a network device to the computer. I did a similar thing with a Raspberry Pi Zero 2W using the USB Ethernet mode and a few config file tweaks. But since the Raspberry Pi Pico 2 has no operating system, I enabled the USB Ethernet support in firmware using the Arduino-Pico core and the NCMEthernetlwIP library. The first phase was to add the Arduino-Pico board package by Earlephilhower and then install the package using the Board Manager. The next phase was to build the sketch (with generous help from AI assistants), which would utilize these libraries and host a lightweight dashboard on the microcontroller. It assigns a static IP to the dashboard, which I’ll explain a little later on. The dashboard pulls system and Docker container stats from both the home servers using Python-based monitoring agents. The agents allow access to the collected data over HTTP on port 8765, and the dashboard refreshes every five seconds. It also includes a basic LED-flashing code to indicate when a server is not responding. I uploaded the Arduino sketch to the Raspberry Pi Pico 2 and then waited for it to reboot while checking the serial monitor stats. The output showed that the Raspberry Pi Zero 2 W server was offline while the second one was available. I opened the web dashboard using the static IP address, and it loaded perfectly with accurate status and other metrics. You can access the sketch and monitoring agent file on my GitHub repository. A static IP is necessary Dashboard access becomes difficult without it I previously built the dashboard and let Windows handle most of the networking elements. This method uses Windows Internet Connection Sharing (ICS) to manage DHCP, IP assignment, and NAT automatically. I only had to enable connection sharing from my Wi-Fi adapter to the Raspberry Pi Pico’s Ethernet device. The dashboard loaded perfectly, and I also created a batch script to launch the dashboard automatically. But DHCP kept assigning a new IP address every time I disconnected the microcontroller or shut the PC down. So, I had to resort to a static IP. So, I needed to configure a static IP for the Pico network adapter and then assign one for the dashboard in the sketch. Doing so helped the dashboard URL stay unchanged and made my access a lot easier. Now, the microcontroller shares my PC's network and can access and display updated data even when the ISP is down. The monitoring agent shares the data in JSON, and the sketch uses HTML to turn it into a simple webpage. The Raspberry Pi Pico 2 has a dual-core Arm Cortex-M33 (150MHz), 520KB SRAM, and 4MB flash storage, and running a live home-server dashboard on it is wildly impressive. Further scope for improvements I want to explore the LED alert system, which will reduce the need to check the dashboard page. If I add a multicolor LED device and define color codes for each state, like RED flashes for an inactive server, and individual colors for each one, it would be a better monitor. Since it's a very new experience using a microcontroller, I have a lot to explore. Raspberry Pi Pico 2 The Raspberry Pi Pico 2 is a microcontroller featuring powerful Arm cores and optional RISC-V cores. It offers a great range of capabilities for running DIY and industrial projects.
My Raspberry Pi Pico 2 lacks an OS and onboard network features, yet it’s more reliable than every Pi in my house for one task
Full Article
Original Source
Read the full article at Xda-developers →KhanList aggregates and links to publicly available news content. We do not host full articles from third-party sources. Always verify important information with original sources.