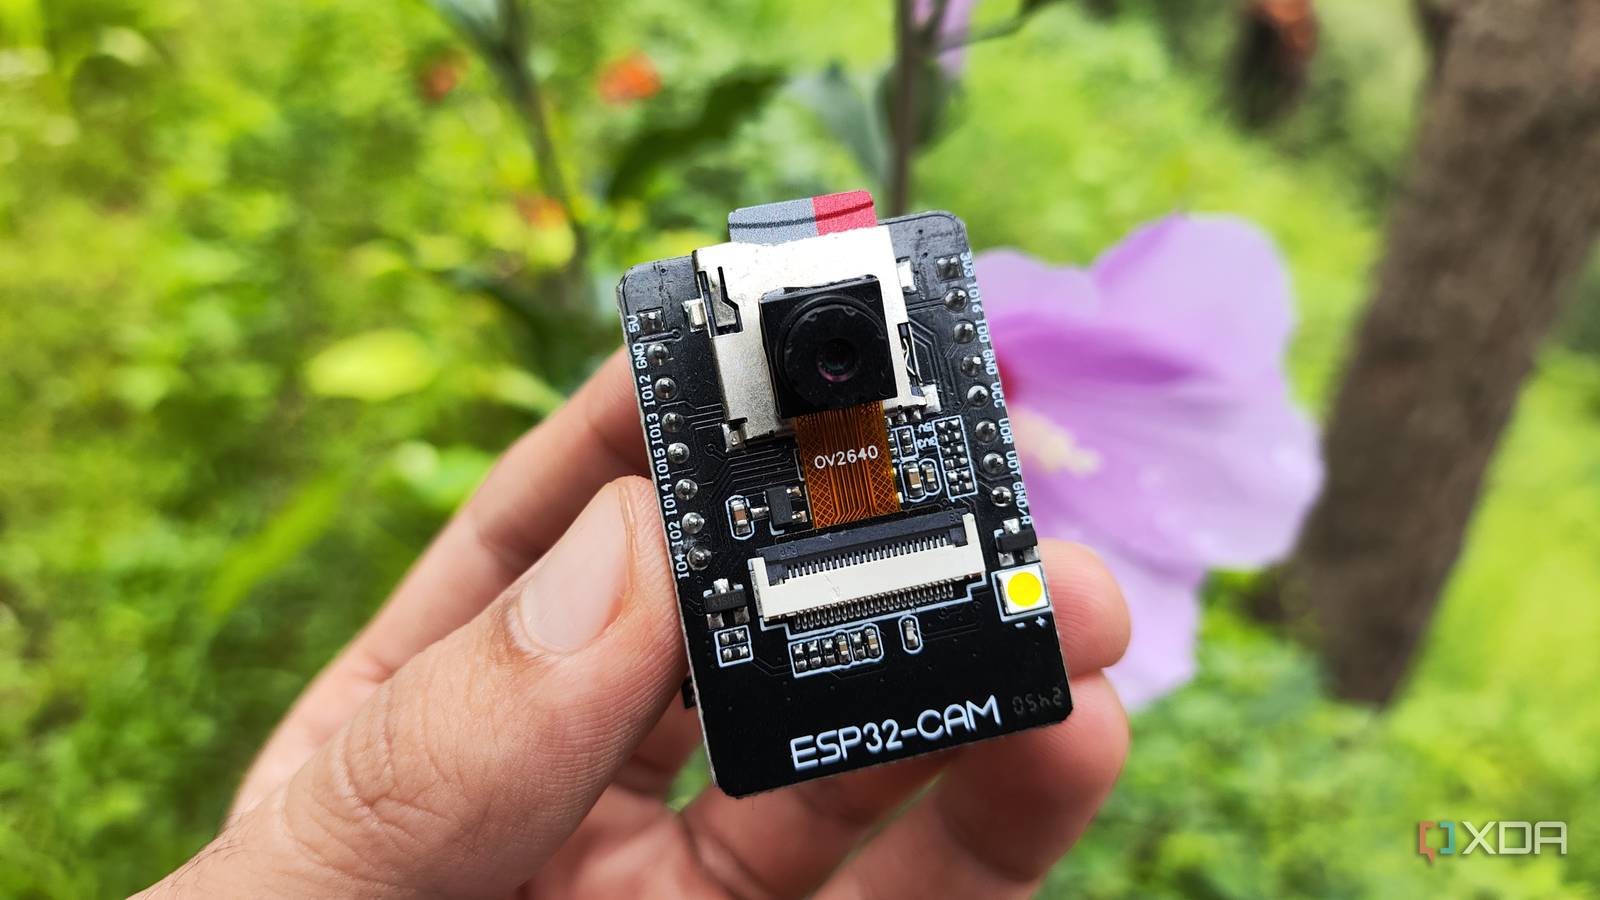
Published Jul 30, 2026, 2:00 PM EDT Ayush Pande is a PC hardware and gaming writer. When he's not working on a new article, you can find him with his head stuck inside a PC or tinkering with a server operating system. Besides computing, his interests include spending hours in long RPGs, yelling at his friends in co-op games, and practicing guitar. On paper, the AI-based surveillance features on modern security cameras may seem like a perk, especially if you’re a newcomer to the smart home ecosystem. While the convenience of such setups is undoubtedly unrivaled, you’ll have to pay a huge privacy toll when you’ve got a cloud platform constantly eying your surroundings. In fact, that’s my deal-breaking issue with cloud-based surveillance setups, and it’s why I transitioned to a fully local pipeline for my security cameras. But after realizing I needed yet another surveillance camera, I had a shower thought on repurposing a cheap ESP32-CAM module for this task. As it turns out, this tiny microcontroller can serve as a surprisingly decent option for my low-resolution streaming needs. Turns out, I needed a USB-to-UART converter for this project Otherwise, ESPHome would fail to flash custom firmware on the ESP32-CAM module Since my game plan was to create a security camera that could stream its video feed to Home Assistant, I decided to hop on the ESPHome Device Builder app to flash it with the right firmware. For reference, I wanted to use an ESP32-CAM module for this project, which needs a USB-to-UART adapter board. That’s because, unlike a regular ol’ ESP32 microcontroller, attempting to connect the CAM variant to ESPHome Builder’s flashing utility using a typical micro-USB cable would cause the app to throw errors. For my specific setup, here’s the connection diagram I used to hook my ESP32-CAM to the adapter board: ESP32 USB-to-UART adapter GND GND 5V 5V U0T TX U0R RX Since I wanted to program the microcontroller as well, I also had to put it in “flashing” mode. On the ESP32-CAM, I had to short the IO0 and GND pins, which was as simple as connecting a jumper cable between the two. The YAML code for my makeshift security camera was pretty easy to create My freshly-configured ESP32-CAM showed up on HASS automatically, too With the ESP32-CAM hooked up to the adapter board, I plugged the latter’s USB end into my PC and headed to ESPHome Device Builder’s web UI. I went with the default ESP32 profile on the app, and it was able to detect my ESP32-CAM module without any issues. Thanks to ESPHome Device Builder, copying the code from the official documentation and modifying certain variables was pretty easy, too. If you’re wondering, here’s what I used for my setup: psram: mode: quad speed: 80MHZ esp32_camera: external_clock: pin: GPIO0 frequency: 20MHz i2c_pins: sda: GPIO26 scl: GPIO27 data_pins: [GPIO5, GPIO18, GPIO19, GPIO21, GPIO36, GPIO39, GPIO34, GPIO35] vsync_pin: GPIO25 href_pin: GPIO23 pixel_clock_pin: GPIO22 power_down_pin: GPIO32 resolution: 800x600 name: esp_cam02 idle_framerate: 0.1fps output: - platform: ledc pin: GPIO4 channel: 2 id: led light: - platform: monochromatic output: led name: espcam_02 light If you’re following along, you’ll want to paste this section under the captive portal: section with the right YAML indentation rules. With that, I used the USB flash option within ESPHome to write this code to my ESP32-CAM. Once this process was complete, I detached all the cables and re-connected the CAM module to the MB board I’d unplugged earlier, with a micro-USB header connected to a power brick. Sure enough, ESPHome Device Builder immediately detected the freshly-flashed ESP32-CAM, and the same applied to the underlying Home Assistant hub. Specifically, my DIY security camera showed up within the Devices & Integrations section of the Settings tab, and I quickly added it to the attic zone. Besides sparing my wallet, the DIY ESP32 camera respects my privacy After all, everything gets saved locally with this setup With the practical section complete, it’s time to address the elephant in the room. On paper, an ESP32-CAM module isn’t powerful or detailed enough to provide top-notch video streams, even more so when you compare it to the likes of dedicated surveillance systems or even CCTV cameras. But my biggest reason for jumping into this project was that I’d miscalculated the number of cameras I needed for my household, leaving my attic completely unmonitored. Unlike my porch and backyard, where I need a camera with at least 1080p streaming capabilities, a surveillance camera that keeps an eye on my tiny attic doesn’t need fast frame rate or high resolution. From a price perspective, grabbing an ESP32-CAM module and turning it into a makeshift camera that can constantly send my attic footage to a Home Assistant server seems like a pretty decent idea, especially with typical security cameras costing around three times the amount as this tiny system. Another neat perk of my makeshift ESP32-CAM setup is its completely local nature. Unlike Ring and cloud-based cameras, I didn’t have to worry about my footage getting stored on some random company’s servers. Combine that with the low cost of an ESP32-CAM module, and you can see why I decided to opt for my DIY solution. And if I wanted better video quality, I'd go for an ONVIF camera and hook it up to my Frigate (and by extension, Home Assistant) hub instead of going down the cloud surveillance route. ESP32-CAM
My homemade ESP32 attic security camera beats Ring on price, privacy, and control
Full Article
Original Source
Read the full article at Xda-developers →KhanList aggregates and links to publicly available news content. We do not host full articles from third-party sources. Always verify important information with original sources.