
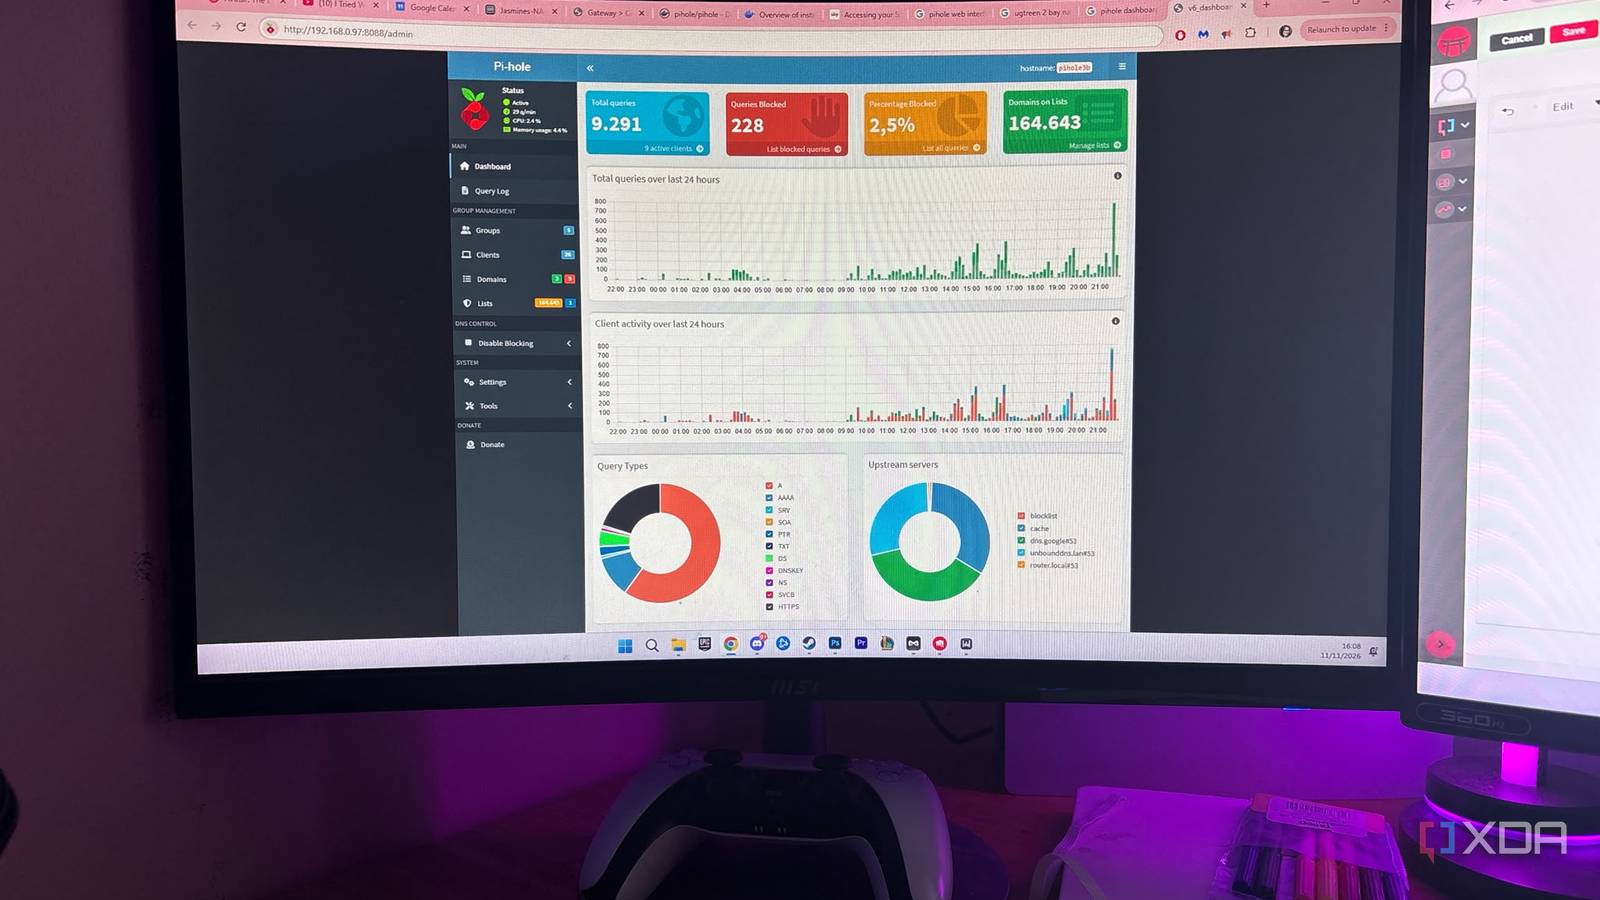
Published Nov 15, 2026, 2:30 PM EST Jasmine is Software and PC Hardware Author at XDA with years of tech reporting experience ranging from AI chatbots right down to gaming hardware, she's covered just about everything. Whether it's breaking news about the latest AMD NPUs or creating video tutorials on social media platforms, Jasmine has contributed to the world of AI and tech in a variety of ways including interviewing the CEO of Razer, AMD's Director of Product Marketing and the VP of Lenovo. Passionate about gaming and PC technology, she has built countless computers, keyboards and other peripherals - knowing them inside and out. For ad blocking, browser extensions work well on desktop, but they don't address the sprawling ecosystem in your home, leaving mobile apps, smart TVs, and IoT devices exposed to trackers and ads. Instead of managing ad blockers on a dozen individual endpoints, deploying Pi-hole via a lightweight container on a NAS device centralizes traffic control for your entire household. It operates as a network-wide DNS sinkhole. The software essentially handles domain name requests before the ad content is downloaded, silently dropping requests targeted at known advertising and tracking telemetry domains before data ever enters the local network. It stops ads at the source When you're running a traditional ad blocker, these will typically run client-side inside a browser. Traditionaly, many of them hid elements after the content has already been requested and downloaded — though this isn't usually the case for modern blockers. Pi-hole acts as a local DNS server. This means that when any device requests a web address, it queries the Pi-hole first, creating what is known as a DNS sinkhole architecture. That said, it won't do much for ads and unwanted content served by the source's domain. By utilizing the sinkhole architecture, Pi-hole is able to filter traffic at the source. If a requested domain matches entries on local block lists, such as Gravity, which contain hundreds of thousands of known ad and telemetry servers, Pi-hole immediately returns a non-routable null address, like 0.0.0.0. This effectively short-circuits the connection. If the domain is legitimate, the query will instead be cleanly forwarded to an upstream public resolver, such as Cloudflare. The great thing about Pi-hole is the fact that it can cover unreachable ecosystems too. When you're using a browser extension, it can't intercept traffic inside native mobile apps, streaming boxes, connected car telemetry systems, or your smart home appliances. When configured as the network DNS, Pi-hole can catch many telemetry and advertising calls from devices that use the network-assigned resolver, but it cannot intercept queries that the device sends via encrypted DNS (DoH/DoT) or that are hardcoded to external resolvers, so some iOS, Android, streaming boxes, or embedded devices may still bypass the sinkhole. I decided to deploy Pi-hole in a container on my NAS Be sure to adjust your router settings You can deploy Pi-hole in a number of ways. One option is purchasing a dedicated single-board computer, such as a Raspberry Pi. If you already own a NAS, you can run Pi-hole in a Docker container on your NAS (allowing you to maximize your hardware utilization without adding clutter). Deploying the official Pi-hole Docker image does require mapping container ports. Port 53 should be mapped for TCP/UDP DNS queries. Essentially, by mapping this port, you ensure your NAS is listening specifically for those DNS lookups across your network. You also want to map port 80, as this acts as the doorway to your administrative dashboard. You can also allocate a persistent local data volume to preserve query logs and block lists across container updates. By setting aside a dedicated folder for the ad blockers' memory, you can ensure that when you update the software container to a new version, your custom block lists, history logs, and allowed websites aren't wiped out in the process. To implement Pi-hole across your entire home network, you have to update the local DHCP server settings on your primary home router. You want to ensure you designate the static IP address of the NAS-hosted Pi-hole as the primary network DNS server. If this isn't an option for you, or if you don't want to change the settings on your main router right away, you can configure individual devices manually. Go into your device's Wi-Fi settings and type in the ad blocker's address. This also lets you test the system device by device before rolling it out to your entire household. There were some hurdles to tackle My streaming services started to buffer Thanks to the built-in web dashboard, you can get real-time data visualization, historical query logs, and client-specific tracking metrics so you know everything that's going on in the background. You might notice some unexpected behaviors, such as smart home devices firing countless automated check-ins and tracking requests. Even though IoT devices don't display adverts, that doesn't mean the data isn't being harvested for other forms of advertising — which is something I only noticed after implementing Pi-hole. Unfortunately, Pi-hole isn't 100% perfect. If you implement aggressive blocklists, you can occasionally break functional services. For example, I ended up with my video player on Disney Plus continuously buffering and hanging on black screens during mid-roll ad breaks because the ad delivery domain is blocked, but the primary video stream remains unblocked. I also noticed that if I did click on a paid link on Google, like the sponsored search result, it would result in a connection error page. The best way around this is to isolate the IP address and filter real-time logs. Open your web admin dashboard and navigate to your query logs. Filter the query log by your specific device's local IP address or hostname so you aren't sifting through network noise from other devices in your home. Then, reproduce the exact issue on your device while monitoring the live logger update. You can then inspect the blocked requests that occur and pay close attention to the domain naming conventions. Once you've identified the specific flagged domain, click the allow button next to it, and the update should take effect across your network instantly. I could finally block ads across all devices Including my streaming stick By centralizing ad blocking at the network layer, you're transforming your home network from a leaky data siphon into a streamlined private perimeter, and you no longer have to manage ads on each individual device. By using your NAS to run an open-source solution, you can achieve comprehensive, client-agnostic protection without paying for commercial subscription services or installing alternative software on each device in your home.
I ran one Docker container on my NAS, and it blocks ads on every device in my home
Full Article
Original Source
Read the full article at Xda-developers →KhanList aggregates and links to publicly available news content. We do not host full articles from third-party sources. Always verify important information with original sources.