
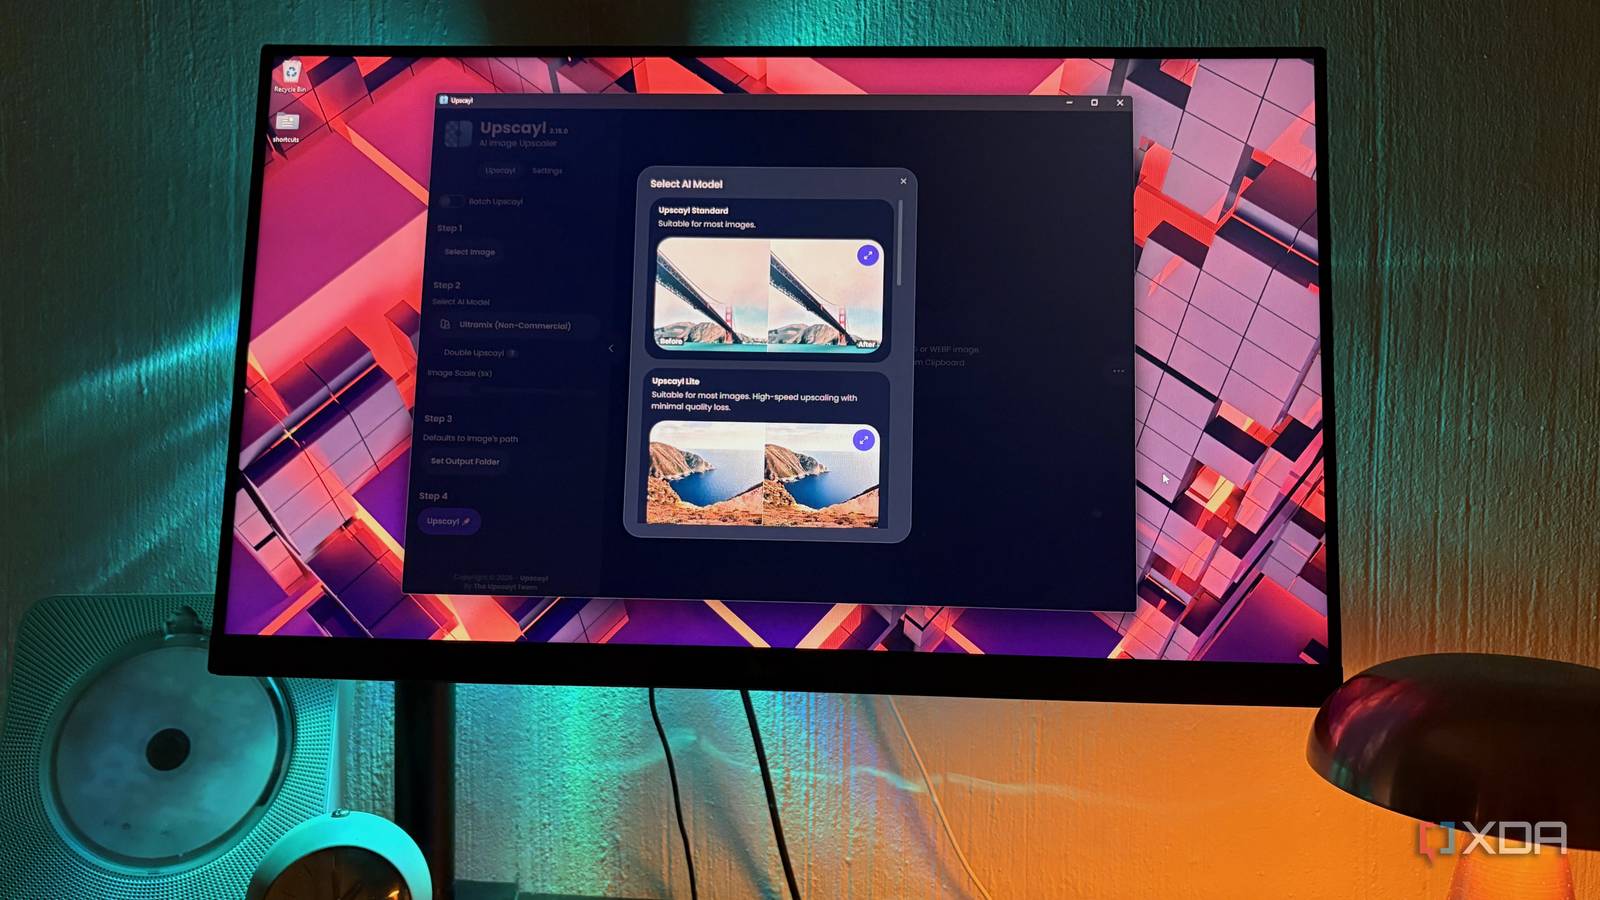
Published Nov 5, 2026, 12:30 PM EST Nolen began their writing career in 2019, with three years dedicated to editing the Creative section at MakeUseOf. Their expertise lies at the crossroads of technology and creativity, covering areas like photography, video editing, and graphic design. Outside of work, you'll often find Nolen diving into a good book, writing their own stories, or playing video games. ComfyUI is one of those tools that's genuinely fun to use…once you've managed to get it running. Every step of making an AI graphic gets its own little box, also called a node, on a large canvas, and you wire the boxes together to build your own generative pipeline. I just find the workflow really fun and it reminds me a bit of prototyping in Figma; it's as close as you will get to how image generation actually works. This is a big part of why ComfyUI has a bit of a cult following, and I totally get it. But the problems start when you try to do something useful outside of its canvas, like hooking it into another app or workflow outside of its UI. And oftentimes, even a setup that should be simple on the canvas ends up being more trouble than it's worth. Looking back at what I was opening it for, most of the time it was something pretty unglamorous like cleaning up and enlarging images I already had. So a full node graph started to feel a little overkill for these one-shot tasks, and I started looking elsewhere. The issue with ComfyUI The fun part was never the problem Dragging wires between boxes is the part of ComfyUI I'd happily keep doing. Where it keeps losing me is everything around that, from getting it to work with the other apps I use to how much setup it needs for the tiniest jobs that I don't have all the time in the world for. The Krita plugin is my best example. Krita is a free painting app, and there's a popular plugin by a developer called Acly that adds AI generation to your canvas. And it uses ComfyUI running as the engine in the background. The easiest route is letting the plugin download and set up its own copy of ComfyUI, so that's what I did. I picked a Stable Diffusion XL setup for my 8GB card and hit install, and GitHub, where the files are hosted, kept refusing the download partway through. So I never actually got to use the plugin. The funny thing is that the job I opened ComfyUI for most often didn't need it plugged into anything. Enhancing or making an existing image bigger is really a one-shot task, but because of ComfyUI's nature, it still treats it like a complex pipeline. Even its own upscaling guide has you download a model file from OpenModelDB, a community site for these models, and save it into a specific upscale_models folder yourself. Then you wire a Load Image node and a Load Upscale Model node into an Upscale Image node, with a Save Image node at the end. That's four nodes and a manual download before you even get anything done. This is just way too much for tiny jobs. Meet Upscayl A local AI image tool that requires almost no setup Upscayl is a free, open-source desktop app for making images bigger and sharper, and it can run entirely on your own computer and offline once it's installed. The AI doing the work is a model called Real-ESRGAN, which came out of Tencent's ARC Lab research team in 2021. Instead of training it on real damaged photos, the researchers took clean images and ran them through repeated rounds of artificial blur and compression to mimic how real photos end up degraded, and the model learned to work backwards from that. So basically it's reverse-engineered. Upscayl itself says it improves images by guessing what the missing details could be, so the extra sharpness you get is the model's best guess at what was probably there. The reason there's no setup comes down to the engine Upscayl runs the model on. It's called ncnn, another Tencent project, and it was built for running AI on phones. That's why it doesn't rely on any other software packages to work, and it talks to your graphics card through Vulkan, a standard most modern GPUs support. So basically, there's no Python setup underneath for add-ons or updates to clash with, which is the same problem that kept stopping my ComfyUI installs from working. The Vulkan reliance can be a bit of a catch. You need a graphics card that supports it, and the project warns that a lot of integrated graphics chips won't work. My RTX 3070 handles it fine, but if you're on something older it might not work. Getting good results from Upscayl Picking the right model does most of the work The app is laid out as numbered steps in the left panel - I don't think I've ever seen a tool do this beyond onboarding, so that's pretty unique and makes it more accessible. Step 1 is picking your image that you want to improve, step 2 is picking your model, step 3 is selecting an output folder, and 4 just says "Upscayl" which sets the process in motion. The model picker is the most important decision here. Each model gets a before-and-after preview and a one-line description, which helps since the names don't tell you much. Upscayl Standard is what I'd default to for regular photos. When I'm running a whole folder and don't need every detail, Lite trades a bit of quality for speed. High Fidelity is where I go when detail matters and it's actually a community model called HFA2k by a developer named Helaman, originally trained on frames from anime films. Digital Art is meant for illustrations and graphics, so I recommend staying away from this one for photos because it honestly looks a little ridiculous on real-life subjects - I added a photo of my face and it came out looking very AI-generated. There are a couple of models on this list that carry a "non-commercial" tag, meaning the license only allows non-commercial use, so for any paid graphics work I'd stick to the others. The scale slider has a catch as well. Upscayl's settings explain that anything above 4x only resizes the image without AI, apart from Double Upscayl, which runs the model twice for 16x. TTA mode is the more useful extra if you've got time to spare, since it runs eight variations of the image and combines them to cut down odd artifacts. Upscayl also isn't the best tool for fixing blur and focus, it specializes more in small and pixelated images rather than ones that are soft-looking; the results will just come out looking smeared rather than sharp. Not every AI image task needs a full pipeline I'll probably keep using ComfyUI from time to time because the nodes are my jam, but it's really not worth the effort for something that can be completed in seconds. And Upscayl is still a local tool either way, so it's not like I'm giving up on control or privacy. For the images I actually deal with week to week, a four-step app is just a much better fit. Upscayle
I ditched ComfyUI for a local image tool that does exactly what I need
Full Article
Original Source
Read the full article at Xda-developers →KhanList aggregates and links to publicly available news content. We do not host full articles from third-party sources. Always verify important information with original sources.