
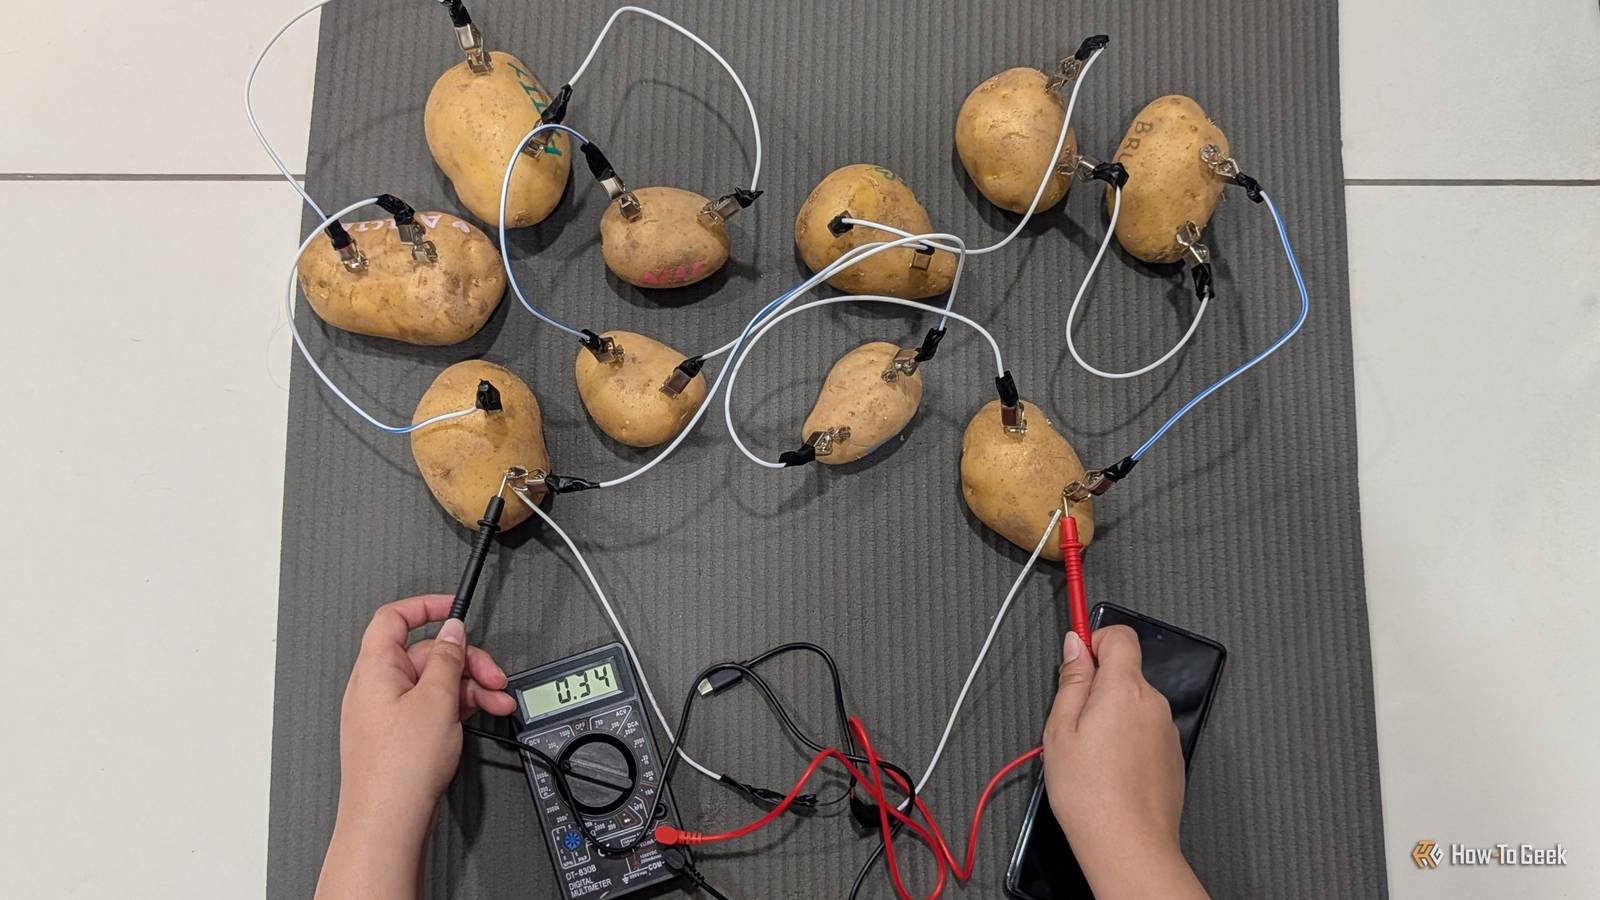
Published Nov 15, 2026, 9:00 AM EST Namerah Saud Fatmi has been writing about smartphones, accessories, e-readers, and apps for nearly a decade. She occasionally branches out into sects like gaming, software, hardware, smart home, and wearables. Before How-To Geek, she was a senior editor at Android Central, and has had bylines at other respectable publications such as Windows Central, iMore, XDA Developers, Neowin, and Good e-Reader. When she isn't writing or testing yet another weird and wonderful new gadget, she spends her free time snuggling with her grumpy feline life partner. Her hobbies include casual gaming, traveling, attempting to pet anything classified as an animal, unnecessarily complicated craft projects, and hunting for the next great bowl of noodles. If you've ever attended a middle or elementary school science fair, you must've seen the classic potato clock or potato lamp project. Inspired by this simple project, I started to wonder if I could build one myself, but with a higher ambition. Can a smartphone be charged by a modest tater battery? I put this brain worm to the test. A recipe that calls for potatoes And not much else A homemade potato battery is a very inexpensive little endeavor. Potatoes are a dollar per pound, and because they're a food staple, most folks already have them at home. I did a grocery run before setting up the experiment, so I set aside ten potatoes for the project from my pantry. My goal was simple: to try to charge a smartphone at the bare minimum charging speed. This would require a total output of at least 5V from the potatoes. That's a far cry from what they're usually used for — to light up little low-power LED bulbs or clocks. The products required to make such a battery were the same, albeit more potatoes were required. I decided to opt for 10 potatoes, thinking that if one potato could power a small bulb, ten of them could easily deliver a sliver of power to a smartphone, even for a split second. Other materials required were cheap enough and quite straightforward to attain from a hardware store. I went to my local store to grab a digital voltmeter, a few dozen galvanized zinc nails, some thick 0.8mm copper wire, 20 small alligator clips, and a reel of insulated copper cables. I also dug up an old 5V USB-C cable from my drawers. And with that, I was ready to start designing my battery layout. Hooking up the potatoes to harvest energy Designed through much trial and error The next step involved poking two holes in each potato and inserting a galvanized zinc nail on one side and a copper one on the other, both acting as electrodes. Initially, I went with a daisy chain formation for the potatoes. The alligator clips go on each end of a copper cable, connecting a positive end of one potato to the negative end of another. However, when everything was set up and I checked the digital voltmeter, there was hardly any voltage detected. This is when I realized the first trial wasn't working. I needed to optimize the connection layout of the potatoes. So, I went back to the drawing board and looked for guidance. I soon learned from The Lab-X on YouTube that the potatoes needed to be connected in a single file, with the final loop open so the USB-C cable could be connected. Based on their YouTube tutorial, I created a sketch of what my potatoes needed to look like. I also needed to thicken the copper electrodes I had cut, so I removed them and made them longer and much thicker. My initial design needed to be completely rewired too. But after the second round, the voltage still was not improving beyond 0.11V. In my attempts to try to locate the problem, I played around with several additional wires connecting to the two rows of potatoes hooked up in single file. Eventually, I decided to remove the alligator clips as the electrodes were too small for more than one clip to comfortably clip on to. Hours of failed attempts and small improvements to the design helped me achieve a max voltage of 0.68V. I tried to attach the 5V USB-C cable to it, but of course, it was not enough power to charge a phone. The experiment might have failed, but I learned that I could continue finessing the design to steadily improve the power output. If I had access to at least seven to eight times as many potatoes and the equivalent materials needed to set up an even larger battery, I am certain I would have succeeded in charging my Android phone. Sure, it would still not be enough to fully recharge a gigantic 5,000mAh lithium-ion cell, but it could definitely deliver a few milliamps of power. The science checks out, but my home isn't large enough to host a large enough potato party. A fun experiment that's worth replicating and repeating Even if the experiment was not a success, I'm really glad I gave it a go. I named all the potatoes for good measure, enlisted the help of friends too, and we felt such joy from such a simple children's project. The satisfaction of building something with your own hands, understanding battery technology, and learning part of the science behind what keeps our phones powered every day is wonderful. It helps you appreciate the tech that we take for granted every day in our lives. This doesn't mean I have given up, though. I would love to repeat the experiment and try to get it right the next time, learning from the mistakes I made this time. Perhaps I'll give lemons a go, and maybe you should too. Give in to your curiosity; you might learn something new!
I built a potato battery to charge my phone
Full Article
Original Source
Read the full article at Howtogeek →KhanList aggregates and links to publicly available news content. We do not host full articles from third-party sources. Always verify important information with original sources.