
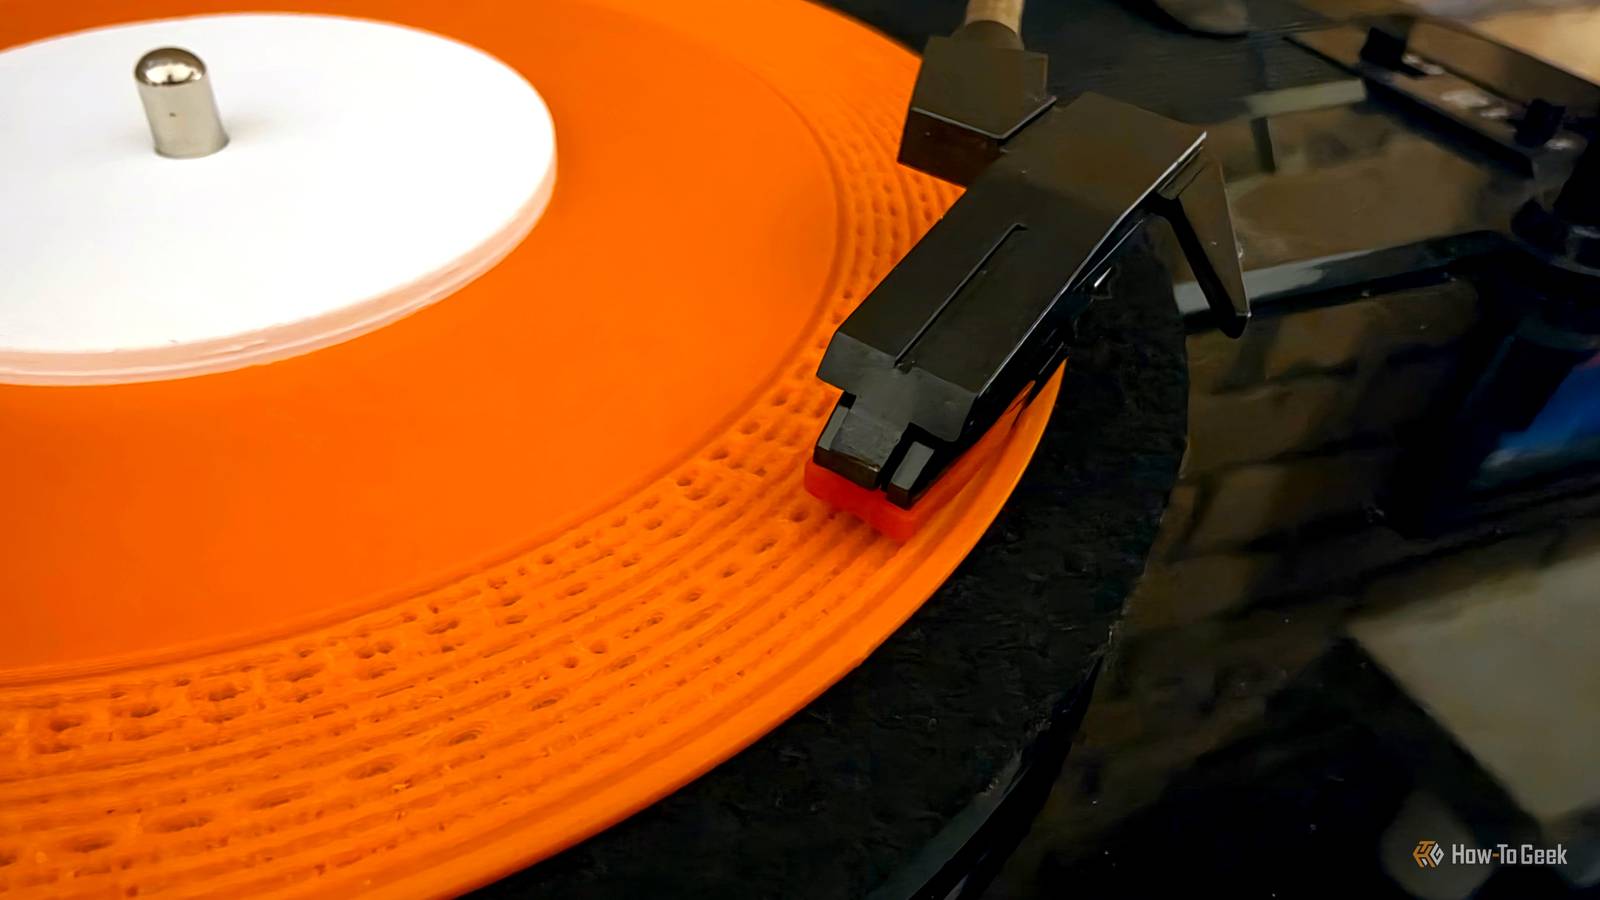
Published Sep 16, 2026, 11:00 AM EDT Joe Fedewa has been writing about technology for over a decade. Android and the rest of the Google ecosystem have been a focus for years, as well as reviewing devices, hosting podcasts, filming videos, and writing tutorials. Joe loves all things technology and is also an avid DIYer and food blogger. He has written thousands of articles, hundreds of tutorials, and dozens of reviews. Before joining How-To Geek, Joe worked at XDA-Developers as Managing Editor and covered news from the Google ecosystem. He got his start in the industry covering Windows Phone on a small blog, and later moved to Phandroid where he covered Android news, reviewed devices, wrote tutorials, created YouTube videos, and hosted a podcast. From smartphones to Bluetooth earbuds to Z-Wave switches, Joe is interested in all kinds of technology. After several years of jailbreaking and heavily modifying an iPod Touch, he moved on to his first smartphone, the HTC DROID Eris. He's been hooked ever since. “Could I 3D print that?” It’s a question we’ve all asked. I had the thought while listening to an LP vinyl record one night. Nearly two years later, I finally found a way to make it happen. Get your headphones ready. Now, I want to make it very clear right away that I never had any illusions about a 3D printed record sounding good. I also never thought of it as some sort of way to “pirate” physical media. This project was purely about answering the simple question, “can it be done?” How are vinyl records made? A brief explainer Before I take you down the rabbit hole, I want to talk about how real vinyl records — also known as “LPs” — are made. First, the audio is piped through a specialized lathe that subtly moves with the sound and cuts grooves into an aluminum plate covered in lacquer. This is called the “master disc.” After the cutting process, the disc is carefully washed, then submerged in a nickel bath and electroplated. The nickel fills in the grooves, creating a stamp when pulled from the master disc. Stamps are created for both sides of the disc. These stamps — one above, and one below — are pressed into melted blobs of polyvinyl chloride. The labels are also applied during this process. The blob of vinyl is flattened with around 100 tons of pressure, and the machine trims the excess that squeezes out. It only takes about 30 seconds to press one record. A project lost to the internet Trying to follow the bread crumbs Alright, let’s get to it. I originally pitched the idea of 3D printing a “vinyl” record back in late 2024. With blind optimism, I assumed someone had figured out how to do it, and I would be able to simply download an STL, print it, and share how it sounded. I was partly correct. Indeed, someone had figured it out — back in 2012. Amanda Ghassaei posted an in-depth tutorial on Instructables about their process of creating a record with a UV-cured resin printer. The results were impressive, and it got covered by Wired, Vice, The Smithsonian, and several other publications. Credit: Joe Fedewa / How-To Geek Unfortunately, when I found it, the links to the STL model files of the records were no longer functional. If I were going to do this, I would have to do it from scratch, with decade-old software. The process looked daunting, to say the least. So, I gave up. Then, fast forward to a couple of weeks ago, a colleague shared a Reddit post from someone who had 3D printed a “vinyl” record with an FDM printer. They had followed instructions from MakerWorld user GoChee, who had resurrected Amanda’s old project. We are so back. Converting audio into a physical record Not a fun process Just like the real thing, this project starts with the audio. Technically, it’s possible to print a full-size record with multiple songs, but that would require lengthy slicing and printing time. GoChee recommended opting for a 7-inch record with an audio track less than 18 seconds, so that’s what I did. Next, the audio files need to be prepared for the medium. GoChee used Gemini to calculate the min/max sampling rate and low-pass filter limit for various nozzle sizes and turntable RPMs. I used this information to apply a low-pass filter to my audio file in Audacity. The second step was to adjust for the speed of the turntable. This part had me a bit confused. Audacity has changed since the tutorial was written last year, and stretching the time with the provided values sped up the audio instead of slowing it down. I ended up skipping this step and just adjusting the speed of my turntable instead. In the end, it didn’t cause any issues. The next steps involved running a Python module and using an app called Processing to generate the STL file. This project requires very specific old versions of these apps, including some extras. It’s all provided by GoChee on the instructions page. My one tip is to make sure the Modelbuilder files are extracted to Processing’s “Sketchbook” folder. I didn’t, and it tripped me up for a while. With the STL file in hand, it was time for slicing. Nozzle size is more important than layer height in this case. Sadly, I’m working with a 0.4mm nozzle, which is definitely too thick. Still, I did the best I could. Mainly, adjusting the settings in Bambu Studio to slow down while printing the intricate details. After it finished printing, I printed GoChee’s “adapter” for the center of the record. How does it sound?! Uhhhh If you clicked the Reddit link earlier, you already know my record isn’t going to sound good. You are correct. However, I must warn you, mine sounds much worse. The audio I selected was the Home Depot theme song — listen first to see if you can hear it in my video and audio recording below. Yeah, not great. The playback speed seems fine, but the grooves in my record are considerably more exaggerated than the ones I see online. That’s most likely why there’s so much noise. The needle stays on track for a couple of seconds, then skips over the rest. I had to physically move the needle in order to get the full recording that you hear. With further tweaking, I’m sure I could get a better result. The record you see in this article was my second attempt, and, as hard as it may be to believe, it sounds drastically better than my first. However, it’s not a quick process. That 18-second track took three hours to print. Regardless, the entire point of this project was to simply see if it could be done, and I’ve done enough to satisfy my curiosity. Sometimes, you just need to do something for fun.
I 3D printed a vinyl record and it actually played music (barely)
Full Article
Original Source
Read the full article at Howtogeek →KhanList aggregates and links to publicly available news content. We do not host full articles from third-party sources. Always verify important information with original sources.