
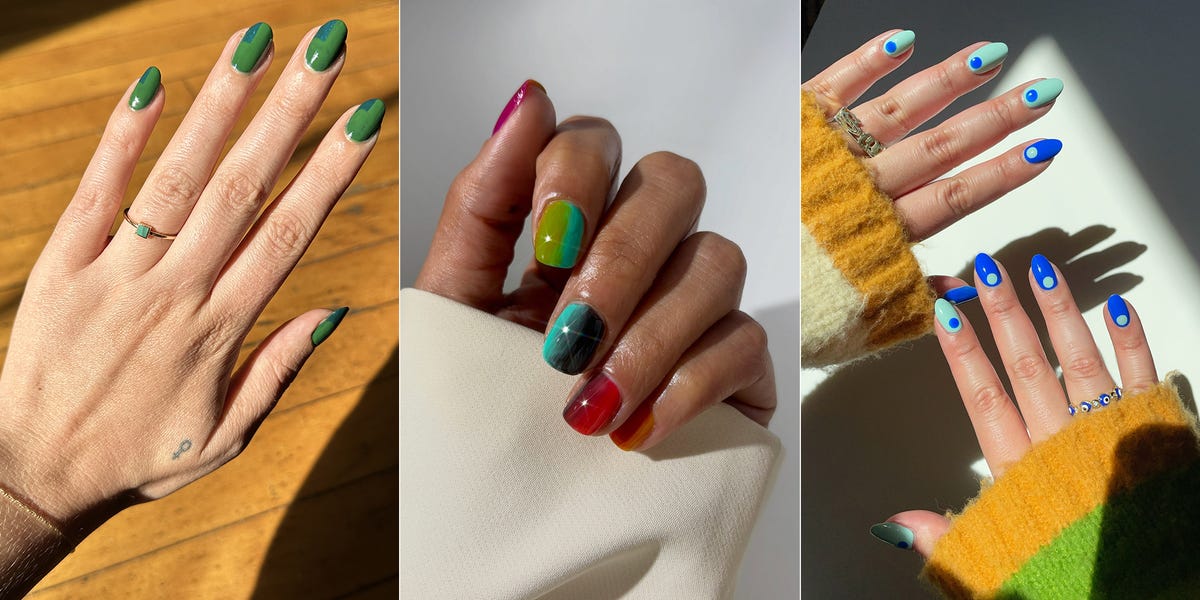
Ah, the at-home manicure. Nail artists make it look so easy when you’re in the salon, but get in front of a file and dotting tool at home? Suddenly, things can get a little shaky. I’ve technically been doing my own nails since I was about six, but really started leaning into trying to get better at painting on little designs over the past few years. I can say from experience: There is a lot of so-called easy nail art out there that, in reality, is very difficult to do yourself. But there are also plenty of designs you can totally pull off as a beginner. That, my friends, is what we’re here for today.Unfortunately, the old “practice makes perfect” thing does actually apply to any type of creative endeavor, manicures included. I’m not saying you’re going to be able to perfectly recreate any of these looks the first time you try (though, if you can, maybe quit your day job). There’s a reason I still pay a professional to do my nails if I want them to look extra super good for a special occasion; those people have years of training I’ll never be able to catch up to. Instead, these are designs with elements I know a beginner can do well enough that you won’t get so frustrated with the results that you give up on your new hobby for good.“It can be super intimidating to start painting your nails while you're looking at an inspo pic or video from IG or Pinterest, but remember that the reason you probably started painting your nails was to have a creative outlet and a moment of self expression,” nail artist and wise person Sigourney Nuñez says. “Try to not let perfectionism get in the way of something that is meant to be a self care moment where you get to show up for yourself in this fun, creative and colorful way.”Hear, hear! If you’re ready to get started on your artistic ungual journey, keep scrolling for expert-recommended tips, tools, and plenty of design inspiration.The best tools for DIY nail artWhile your toolkit can grow exponentially the further you get into your nail art journey, Nuñez says the “perfect DIY tool trifecta” is a clean up brush, dotting tool, and liner brush.Clean Up BrushI can confirm the clean up brush will be your most-used tool when you’re learning to do your own nails. Even if you don’t make a massive, colored-outside-the-lines mess, going around your nail with a clean up brush dipped in nail polish remover “can really give you that crispy salon finish at home,” Nuñez says. She uses a Simply Simmons #4 painter’s brush you can buy at Michael’s, but says you could also sacrifice an old angled eyeliner brush if you aren’t looking to spend money on tools yet. “Just be sure you don’t use it on your eyes again after you’ve dunked it in nail polish remover,” she warns.Dotting ToolNuñez calls dotting tools “the gateway to the nail art universe.” You could use bobby pins, a flat eraser on the end of a pencil, or the end of a brush, but there are plenty of affordable dotting tool options too. Olive & June makes a nice double-sided one that would be a great first dotting tool, while Halo Taco has a fun, holographic set that comes with a total of eight different sized tips.Thin Liner BrushOnce you’re really ready to level up, get yourself a nail brush. There are sets with multiple brush sizes out there, but Nuñez doesn’t think you need them. “I literally only use one type of liner brush, [the] Liner 3 from Bio Seaweed Gel,” she says. “It’s been my go-to brush for years.” Instead of dealing with a bunch of different size brushes, you can make different size lines by varying the amount of pressure you use.How to prep your nails at home I cannot emphasize this enough: If you’re serious about wanting your manicure to look as close to professionally done as possible, you absolutely must prep your nails before you even think about picking up your base coat. This means completely removing all your polish, cutting and/or shaping your nails with a file, and cleaning up your cuticle area... but not too much on that last part.“When it comes to DIY prep, less is more,” Nuñez says. “There is no need to over trim any surrounding skin unless there's a hangnail that's waving hi at you.” Instead, she recommends using a cuticle buffer stick like the Sally Hansen Push & Buff 2-in-1 Cuticle Pen. “It helps exfoliate the cuticle area and side walls, plus helps buff out the waxy layer that can accumulate [on your nails],” Nuñez says. “That waxy layer is totally normal but it gets in the way of adhesion.” I like to wash my hands after I’ve done all that trimming, filing, and buffing, to make sure there’s no leftover nail dust that could ruin my hard work.Keeping your cuticles healthy between manis will make this prep step easier. “I’m actually so passionate about cuticle care,” Brooklyn-based nail artist Anna Miles says. “A little attention every day will do wonders—more than any nail tech could accomplish in our monthly sessions.” She recommends using a towel to gentle scrub your cuticle area after a shower (”to encourage the cuticle skin to roll back”) and be diligent about using hand cream and cuticle oil after you wash your hands.“If you’re like me and out of sight equals out of mind, buy travel sizes in multiples and keep one everywhere—bag, coffee table, bathroom, bedside,” Miles says. She loves the CND Rescue Rxx Daily Keratin Treatment and Zoya Healing Dry Skin Hand & Body Cream, both of which come in smaller sizes.Other tips for nail art beginnersThe number one thing that will make your nail art look better is to learn to leverage your fulcrum finger (aka the digit that’s holding your hand steady while you work; Nuñez says this is usually the pinky) and elbows. Do not try to do your nails while sitting on a couch; you need a table with enough space to create those stabilizing points.Whether you’re going to use a dotting tool, liner brush, sponge, or other nail art tool, it can take some practice to figure out how much polish to put on it before you start designing. I always do a test run on a piece of paper; it’s not a perfect substitution for painting on your curved nail, but I think it gives you a pretty good idea of how much polish to use. Nuñez also has a handy video on how to load your liner brush properly.And, again, you just need to practice. When I’m in the habit of doing my nails every week, I’m shocked at how much better I get over the course of a month. Ready to dive in? Here’s some inspo to get you started.Easy Nail Art IdeasSkittles Nails@thatglosssauceLet’s start with the easiest nail art of them all, a skittles manicure. This is simply painting each nail with a different shade of polish, which is a fun way to start playing around with color theory—a key skill for professional-looking DIY manis. “Every great manicure starts with a beautiful color story,” Nuñez says. “When the colors can do most of the talking, you don't have to try as hard with your DIY design.”Glitter and Cream Polish@kara.mcgrathGlitter polish is kind of a nail art hack in its own right, because the texture makes any mistakes kinda blend in. For this look, I swiped some random splotches of purple cream over a glitter from Mooncat (a brand that makes some of the best sparkles, IMO).Half and Half Nails@cassmariebeautyThe half and half manicure is a great way to practice creating straight lines: Since you fill in the space on one side of the line, it’s less obvious if things are little crooked.“When painting lines, instead of moving the brush, you can try rotating your hand/nail while keeping the brush anchored,” Nuñez advises. “This can help with a more precise application.”Geometric Accents@lolo.naileditI know, I know, all these straight lines look intimidating, but, similar to the half and half, I promise that the fact that you fill in the triangles after you paint on the lines makes it far easier to get a crisp look. And if you have the patience, you could always wait for the base color to try, then use Scotch tape to stencil out the details.Marble Nails@primping_aint_easyMarble looks complicated, but Miles swears it’s not so difficult. “Marble is good for beginners because the success of this design is in the imperfection,” she is. “Uneven, shaky lines and blurry, smeared areas... sounds like the makings of a gorgeous marble!” Pick two colors of polish with high contrast to make the marble design stand out.Miles says there are many ways to do marble, but one of the first methods she fell in love with is using an unused kitchen sponge that’s been cut into thin slices. Start by applying one of your polishes as a base coat, then paint the other color onto a nail-sized section of your sponge slice. “You can see the marble ‘veins’ on the sponge as you paint it,” Miles says. Stamp the wet paint onto your nail, using a rocking motion so it covers the whole nail. You can add metallic accents or a shimmery top coat to really make it special.Peek-a-boo Color@lightslacquer / @elizabethmThis is one of my go-to designs. You paint on two coats on your base color, then go in with a second color but stop before you get too close to your cuticle. It’s extremely simple, but gets loads of compliments.Nail Stickers@primping_aint_easyIf you crave more intricate designs but don’t have the brush skillset just yet, stickers are a great option. “I love using nail art stickers,” Miles says, noting that her favorites come from Deco Beauty. “For best results, make sure to apply them to a long-dried base color and paint two thin top coats instead of one thick one if you’re using traditional polish.”Polka Dots@samrosenailsPolka dot nails stay trendy, so that dotting tool is definitely worth the investment. There are many different ways to do dots—a bunch of super tiny dots, big circles, a mix and match of multiple size. I’d recommend practicing on a piece of paper first so you can get the pressure just right for the size you’re looking for. A light touch is key once you’re actually on the nail. “If your base color is not fully dry and you put too much force on the dotting tool that can create a dent and hole in your hard work,” Nuñez says.This is a design that definitely requires Nuñez’s recommended stabilization techniques, but if things get a little shaky, you can just say you were going for a Bambi effect. Larger dots can also be a bit more forgiving.@nailartbysigTiny Rectangles@kara.mcgrathAnother trick for adding details when you don’t have a super steady hand is to apply the color you want for the detail as the base coat and then layer thick strokes of another color on top. That’s what I did for this look: The blue polish went down first, then I just painted one strip of green vertically and one strip horizontally to create the rectangle accent effect.Ombre Half Moons@nailartbysigAs everything gets digitized, I fear we’ll lose important ancient techniques, like using paper hole protectors as a stencil for a negative space half moon effect. At least, that’s how I’d pull off this look.Confetti Polish@overglowededitIn the vein of nail stickers, confetti polish is a great way to create nail art without even looking at an extra tool. (KB Shimmer makes really fun ones that come in a bunch of shapes and colors.) Just make sure to apply two thin coats of top coat so the sparkles stay put.Micro French@nailcharkI would never in a million years suggest that a French manicure is easy. But I will tell you that those rounded silicone stamper tools absolutely work to create a micro French, especially on shorter nails.Rhinestone Accents@nickyynailssUsing a rhinestone application tool can be a bit tricky to master, but I do find it a relatively easy way to add just a touch of detail to your nails. These won’t stick with just some good top coat; you’ll need to use nail glue too.Polka Dot Flowers@chezpaintsnailsGreat news: Once you’ve gotten good at polka dots, you can totally do flowers too. These are made up of just five black dots and one white one, but the final look seems much more complicated.Meet the expertsSigourney Nuñez is a Los Angeles-based nail artistAnna Miles is a Brooklyn-based nail artistWhy trust Cosmopolitan?Kara McGrath is a contributing beauty editor at Cosmo with over 15 years of experience writing professionally about nails. She’s been an amateur nail artist for over 30.Kara McGrath is a writer and editor with over 17 years of experience covering the beauty industry, women’s health, and a wide range of other lifestyle and wellness topics. After most recently serving as content director at Allure (2019-2025) and executive editor at Bustle (2014-2019), she is now fully freelance. In addition to Cosmo, her writing has appeared in Allure, The New York Times, Marie Claire, Business of Fashion, Playboy, NH Magazine, and more. Kara lives in New Hampshire with her dog, four cats, and a rotating cast of foster animals. You can find more of her work at karamcgrath.com.
You Can Definitely Do These Easy Nail Art Designs at Home
Full Article
Original Source
Read the full article at Cosmopolitan →KhanList aggregates and links to publicly available news content. We do not host full articles from third-party sources. Always verify important information with original sources.