
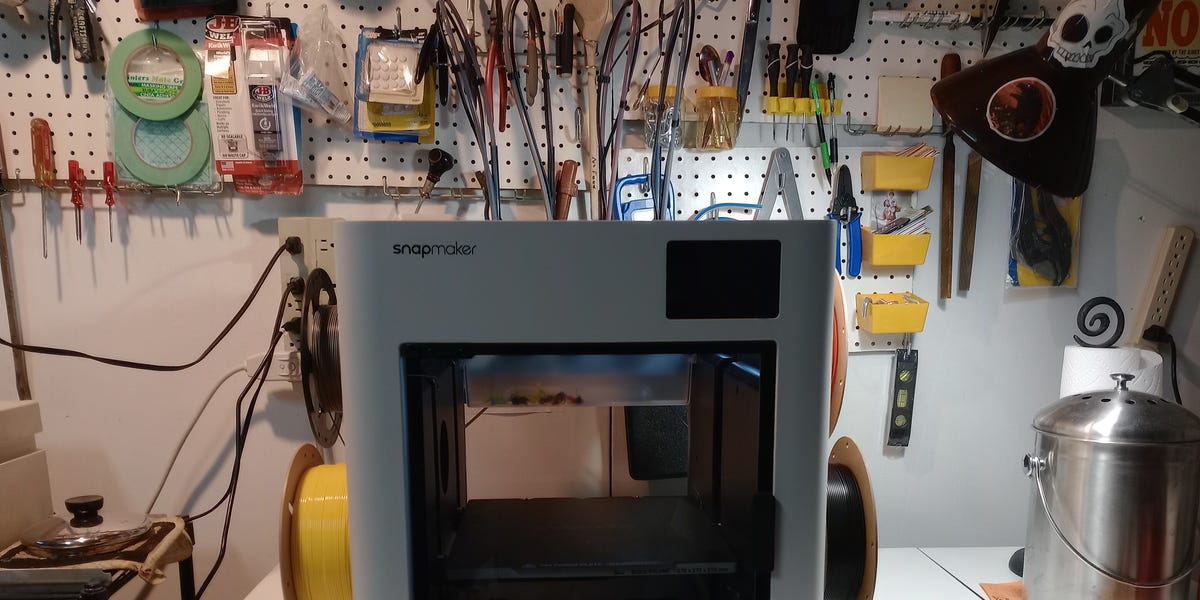
7 min readThe Snapmaker U1 revolutionized multi-material 3D printing when it launched in late 2025, introducing a clever toolhead swapping system that speeds up the process of switching between colors or materials, while minimizing the waste it normally generates.Most 3D printers use a single nozzle to lay down layers of plastic, but the U1 features a set of four nozzles, each of which pulls from its own filament feed. When it’s time to change color or material, the printer swaps the entire toolhead automatically, which takes about five seconds—up to four times faster than most single-head printers can change colors. The mere concept garnered record-setting support in the U1’s pre-release Kickstarter campaign. It helped that, at $750, it was far more affordable than any other multihead printer.ProsFast multicolor prints with very little wasted filamentIntegrated Full Spectrum printing makes it easy to use a wide range of colorsIntuitive user interfaceImpeccable documentation, and robust tech supportConsNo active chamber heatingKey SpecsPrinter TypeFDMMax Print Size10.5 x 10.5 x 10.5 in.Multicolor 4-colorAnd, upon testing, it turns out that the printer is everything Snapmaker’s supporters hoped it would be. I added the U1 to our guide to 3D printers earlier this year based on some initial testing, but have now had it in my lab for about a year.The multihead system is indeed faster and more efficient, and U1’s user interface makes it a genuine pleasure to use. Since my initial testing, a new technology called “full spectrum printing” has come out that greatly expands the options for multicolor printing, especially for multi-toolhead printers like the U1.All of that only reaffirms the U1’s place among my favorite printers right now: It’s an easy recommendation for anyone looking to upgrade or even get their start with 3D printing, especially if you plan on making multicolor or mixed-media prints.The Snapmaker in a NutshellThe Snapmaker U1 is a CoreXY printer, which means that the print heads move left and right and forward and back, while the bed moves up and down. (As opposed to a “bed-slinger” that moves the print bed forward and back, while the print head moves up and down.) The toolheads are held on a rack at the back of the print chamber, and all four sides have windows, which makes it easy to visually monitor your prints.It produces crisp, detailed prints with minimal fuss. Between my initial testing and recent revisit, I logged over 165 hours of print time, creating models of all shapes and sizes, from small, intricately detailed miniatures to large vases and accessories for my table saw and shop vacuum.Snapmaker provides a free, reskinned version of Orca—a popular “slicer” program that breaks down 3D models into layer-based blueprints for printing. It’s also compatible with any slicer software you prefer. I had issues with the speed of Snapmaker’s slicer when I first tested the U1 last year, but I’m happy to report that the latest versions of the software run more smoothly.The model I tested did not have a top lid. This is fine for filaments with lower print temperatures, such as PLA (polylactide), but can be an issue if you want the more durable prints that require higher temperature or foul-smelling filaments. Snapmaker currently offers an add-on lid and HEPA/activated carbon air filter for $150, allowing you to have more control over the internal temperature of the chamber, and to control fumes from printing. But even with the lid, the Snapmaker U1 has no active chamber heater—it relies on the heat from the nozzle and bed to maintain the chamber temperature. This means printing high-temperature filaments like ASA (acrylonitrile styrene acrylate) or ABS (acrylonitrile butadiene styrene) can be difficult. (If this is an issue for you, consider our Best for Durable Prints pick, the Bambu X2D.)Many Heads Mean Massive EfficiencyThe defining characteristic of the U1 is its four separate toolheads, and its efficiency during multicolor or multimaterial prints. A 3D printer with a single toolhead can create multicolor prints, but it’s a laborious process. To switch colors, the printer needs to clip the current filament, purge any excess material from the nozzle, then feed in the next filament. And it will go through that full process on every single color switch. A complex print may have several hundred filament changes, which will add long stretches of inactivity, as well as mounds and mounds of waste. That’s why it pays to spring for a multi-toolhead printer. They can swap among a limited number of colors without changing filaments, minimizing time and material losses.Dan StoutLook at the difference between the waste generated by Bambu P2S (left) versus Snapmaker U1 (right).To demonstrate the difference, I printed the left and right cheeks of a mask on the Snapmaker U1 and the Bambu P2S, our current Best Overall printer. (The models were identical, only mirrored to more easily tell one from the other.) While the P2S excels at standalone printing, the difference in print material and time is staggering.PrinterPrint TimeMaterials UsedSnapmaker U15 hours, 45 minutes98 gramsBambu P2S19 hours, 30 minutes347 gramsEven in a small, hand-sized print, it makes a huge difference. On a larger or more complex job, you could save a meaningful amount of money (by keeping your filament on the spool).‘Full Spectrum’ Printing Brings Out the U1’s Full PotentialThat efficiency when swapping colors makes the Snapmaker U1 particularly well-suited for one of the newest developments in multicolor printing: Full spectrum printing, which allows the printer to blend filament colors by laying down thin, semi-translucent layers of filament on top of each other to create a wider array of colors, much like an ink-jet printer.Traditionally, 3D printers cannot create or control color: The color (or colors) of your materials are your only options, and you need to have spools of filament for every color you want to use. Even with four printer heads, that can be fairly limiting. After years of using 3D printers and dealing with all the labor and waste around switching colors, the ability to blend colors feels shocking in the best way possible. It’s absolutely liberating.Since full spectrum printing was developed as an open-source technique, it isn’t exclusive to the U1; but it was developed with this printer in mind. And the full spectrum technique of applying many thin layers of filament means that it’s ideal for use with a multi-toolhead printer like the U1. Snapmaker’s slicer fully integrates full spectrum printing, meaning that you can begin using it at no cost.Dan StoutFull-spectrum printing allows the U1 to combine filaments to create more colors without switching filaments. These small print samples were made by combining yellow and blue filament. I didn’t use any green.It’s worth noting, though, that other manufacturers are hot on Snapmaker’s tail, releasing their own tool-changing printers and embracing full spectrum technology. But, for now at least, full spectrum printing makes the U1 a wonderfully distinctive choice, capable of doing a lot of things that most other 3D printers can’t. (At least not without wasting a metric ton of filament).User-Friendly Design Makes Everyday Operation a PleasureOf course, all the technical bells and whistles don’t mean a thing if the printer itself is so difficult to use that it sits idle. Luckily, the U1 has a user-friendly design that frees you up to focus on making things, rather than endlessly tweaking poorly labeled settings, or scouring the internet for solutions to what should be a simple issue.The U1 is more intuitive than most printers, and that’s clear right from the moment you unpack the machine. The U1 comes with an extensive, step-by-step assembly document, with full-color images of each step and a QR code that links to a video walkthrough. I loved that it shipped with extra parts, so a broken part doesn’t bring you to a complete standstill until you order a replacement. And the U1 comes with a generous amount of starter filament, with 500 grams of four colors, compared to most printers that ship with only a few grams, enough for no more than a single test print.I rarely ran into print issues, but when I did, the AI detection worked well, pausing prints and allowing me to clear debris or cancel the job without wasting more filament.‘Snapmaker Space’ Has the Potential to Become a Great Community HubOne of the previous drawbacks of the Snapmaker U1 ecosystem at launch was that it lacked an online model repository. There are plenty of online communities that have grown up around the U1, such as on Facebook and Reddit, but model-sharing spaces serve as both a repository of knowledge and a way to find 3D designs built specifically for your machine, keeping tinkering to a minimum.Happily, the brand has finally addressed this, launching Snapmaker Space, which is currently in open beta. If you buy this printer, it’s definitely worth checking out. It doesn’t have a community section yet, and I’m hopeful it will be added soon. After all, areas where makers can share ideas and test designs are exactly what creates innovation.Who Should Buy the Snapmaker U1?Given its four-headed design and some innovative software, the Snapmaker U1 is my go-to recommendation for anyone who wants a user-friendly option to regularly print multiple colors or materials. The U1 is beautifully designed and the user interface is a genuine pleasure to use, and its combination of performance and quality design makes it a great choice for a majority of users. Its competitors are more expensive or more difficult to use, making the U1 the natural choice for makers who want a balance of price and multicolor performance.There are exceptions, of course. For example, a printer like the Creality K2 Pro Combo makes more sense if you’re planning to work with engineering-grade filaments like PC (polycarbonate) or ASA (acrylonitrile styrene acrylate), since you’ll need a filtered ventilation system and the higher temperatures that come with active chamber heating. (Though that will also push the retail price up more than $1,000.) On the other hand, at $750, the Snapmaker U1 may be a bit pricey for new makers: If you’re on a tighter budget, I’d recommend looking at options like the Elegoo Centauri Carbon, a single-head printer that starts at less than $300, and features a multicolor add-on.Still, the U1 is a stellar all-around pick that delivers great performance, especially if you’re working with multiple colors. After a year, it has become one of my go-to printers across the board. Whether you’re printing a cute multicolor fidget spinner for your kids or assembling prototypes to impress investors, this is a printer capable of turning your vision into reality.More 3D Printers We RecommendBest for Fine Details and MiniaturesA former residential remodeler and maintenance manager, Dan Stout has worked in nearly every part of the construction and DIY industry, from project planning and permitting to plumbing, drywall, carpentry, and more. He loves to write about the weird history of everyday objects, and to help readers make informed decisions about their homes.
This Snapmaker 3D Printer Makes Multicolor Prints Faster—and Wastes Less Filament
Full Article
Original Source
Read the full article at Popularmechanics →KhanList aggregates and links to publicly available news content. We do not host full articles from third-party sources. Always verify important information with original sources.