
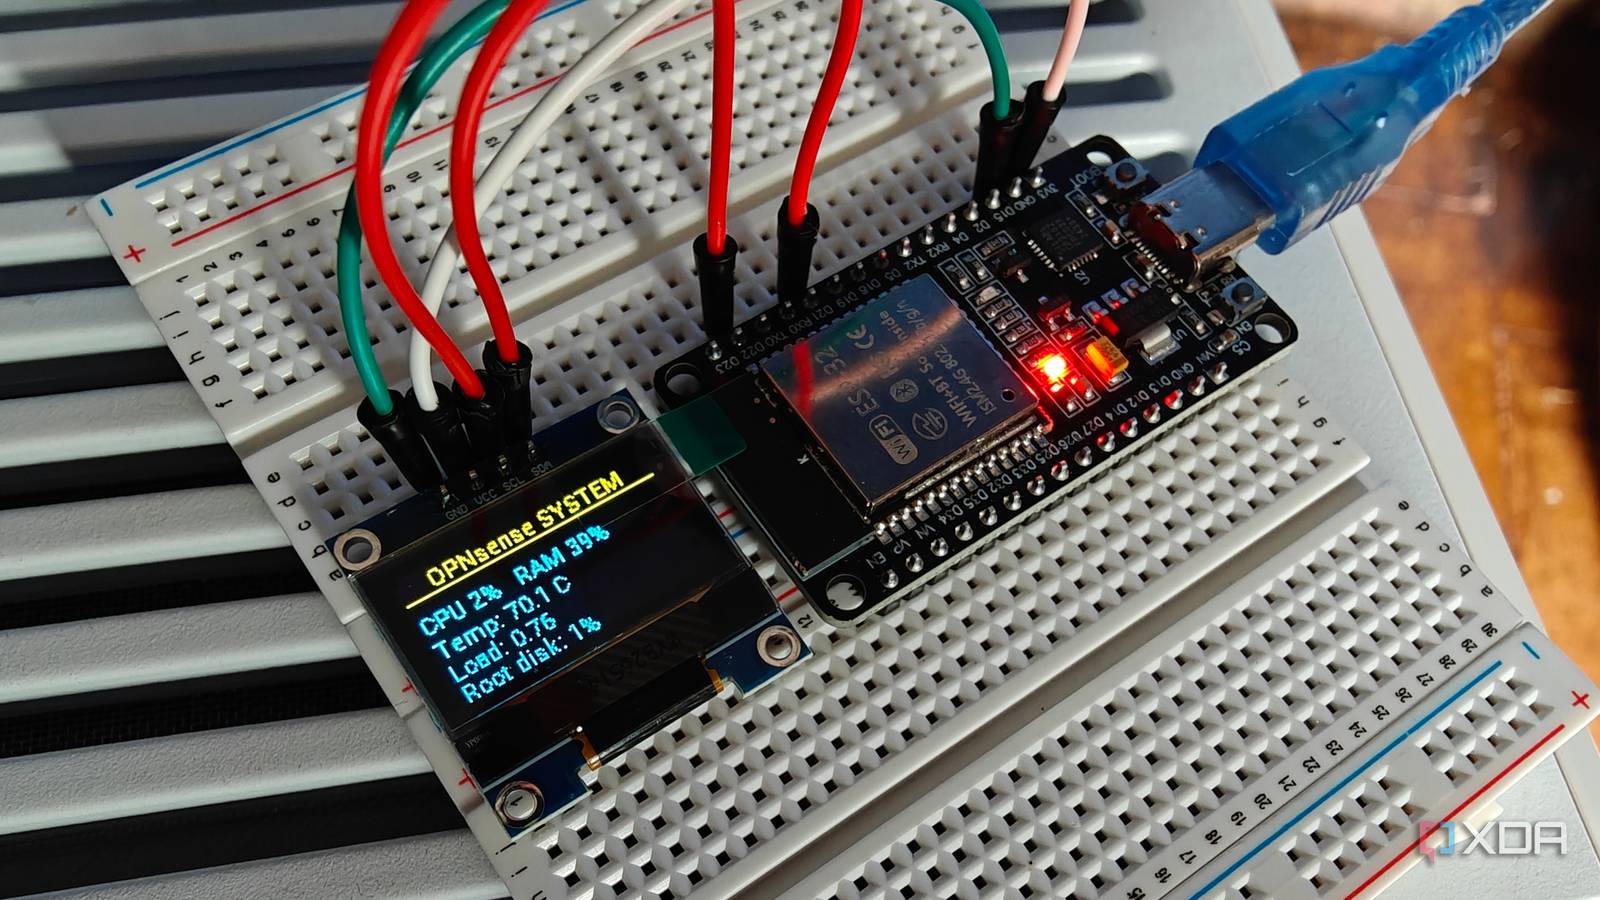
Published Aug 26, 2026, 5:00 PM EDT Richard is the PC Hardware Lead at XDA and has been covering the technology industry for almost two decades. He's been building PCs since young, and when not creating content, you can often find him inside a chassis somewhere. OPNSense is a fantastic platform for running a secure home network. It's feature-packed, easy to use, and is powerful enough to keep all your connected clients safe from harm. That said, if there's one thing that isn't great about using OPNsense on a custom mini PC that's passively cooled and humming away in the garage, it's the lack of any glanceable information. No LEDs, no screen, nothing. That all changed when I finally started getting into ESP32 and creating my own smart home hardware. I decided to build my own, and it was cheap and easy enough. Why bother creating a display for your router? Good question! It's all about the stats... The router doesn't seem to be the first port of call people would make when creating ESP32-powered screens, but it's actually brilliant. After setting up an ESP32 display, it's possible to connect to OPNSense's API and pull data on current internet speeds, CPU usage, and temperatures. Couple this with a rechargable battery source and you now have a portable wireless display that can be placed just about anywhere. This alone would provide the means to spot network drops immediately or periods of high latency, should issues show up on another device. There's not much to it either. OPNsense is fairly open (hence the name), and it's possible to poll specific stats via Home Assistant thanks to the OPNsense integration. The integration is actually worth having even if you don't have an available ESP32 display to play with. It can allow Home Assistant to use presence statuses via the OPNsense client list, which can prove useful for automations that require the presence of a mobile device. If the network goes down, smart bulbs could turn red or notifications could be sent out to connected devices. Though if OPNsense itself goes down, there's not a lot Home Assistant can do. Depending on what you wish to have displayed on the monitor, it's possible to show bandwidth, traffic counters, connection status, gateway health, resource loads, active connections, device tracking, intrusion alerts, VPN tunnels, and more. A timer can be used to pass through alternating views; each can show different information. For instance, one page could show system status, a second could move to network speeds, and the third could be for client and traffic counters. We've covered using ESPhome with ESP32 devices right here on XDA before, and it's as simple as it seems. Getting the display up and running From zero to network hero It was my first project using an ESP32, so I decided to go all-in. First, I downloaded and installed the OPNsense Home Assistant integration from the official store. All I needed to do to set up the ESP32 SBC for the first time was to connect it to the Proxmox server, load up ESPHome in Home Assistant, give it a name, and configure Wi-Fi. That's about it. The firmware was installed, and Home Assistant automatically detected the newly connected ESP32 on the home Wi-Fi network. Once you're at this stage, the ESP32 never needs to be connected to a PC again, unless for troubleshooting and charging. Via ESPHome, I could edit the ESP32 device, write up some YAML code that cycles through the views, and install the changes. To begin with, I started with something simple, a static display showing some network data from OPNsense. This was to ensure the connection worked and OPNsense would provide the data as requested. Once everything looked fine, I then reconfigured that screen view and added a second with some other sensors. To my surprise, the timer worked perfectly, and now the display rotates between views without human input. Adding a third view was just as simple as the second. I now had a fully configured ESP32-powered display that could show me various data points from my OPNsense firewall without needing to log into the web admin UI. Sure, it's just as easy to create a simple web page that runs in a basic Debian LXC that can print out API data from OPNsense that could be accessed on every device, but this was something that had a purpose without requiring another client on the network to do any heavy lifting. I love consolidating functionality as much as the next person, but there's something about having a compact dedicated screen for checking network info. It's much more useful than initially thought Ultimately, building a dedicated OPNsense display is one of those smart home projects that sounds like a gimmick until you actually have it sitting on your desk. It already breathes life into my router that would otherwise spend its days silently managing the household's digital life from a dark corner of the garage. It's cheap, entirely local, and incredibly satisfying to build. I'm now going to spend the next couple of hours seeing what else I can use the display for. A few more ESP32 devices are on the way, so I doubt this will be the end of my adventure with the compact controllers.
This $10 ESP32 screen replaced my OPNsense web UI and sits on my desk instead of in the garage
Full Article
Original Source
Read the full article at Xda-developers →KhanList aggregates and links to publicly available news content. We do not host full articles from third-party sources. Always verify important information with original sources.