
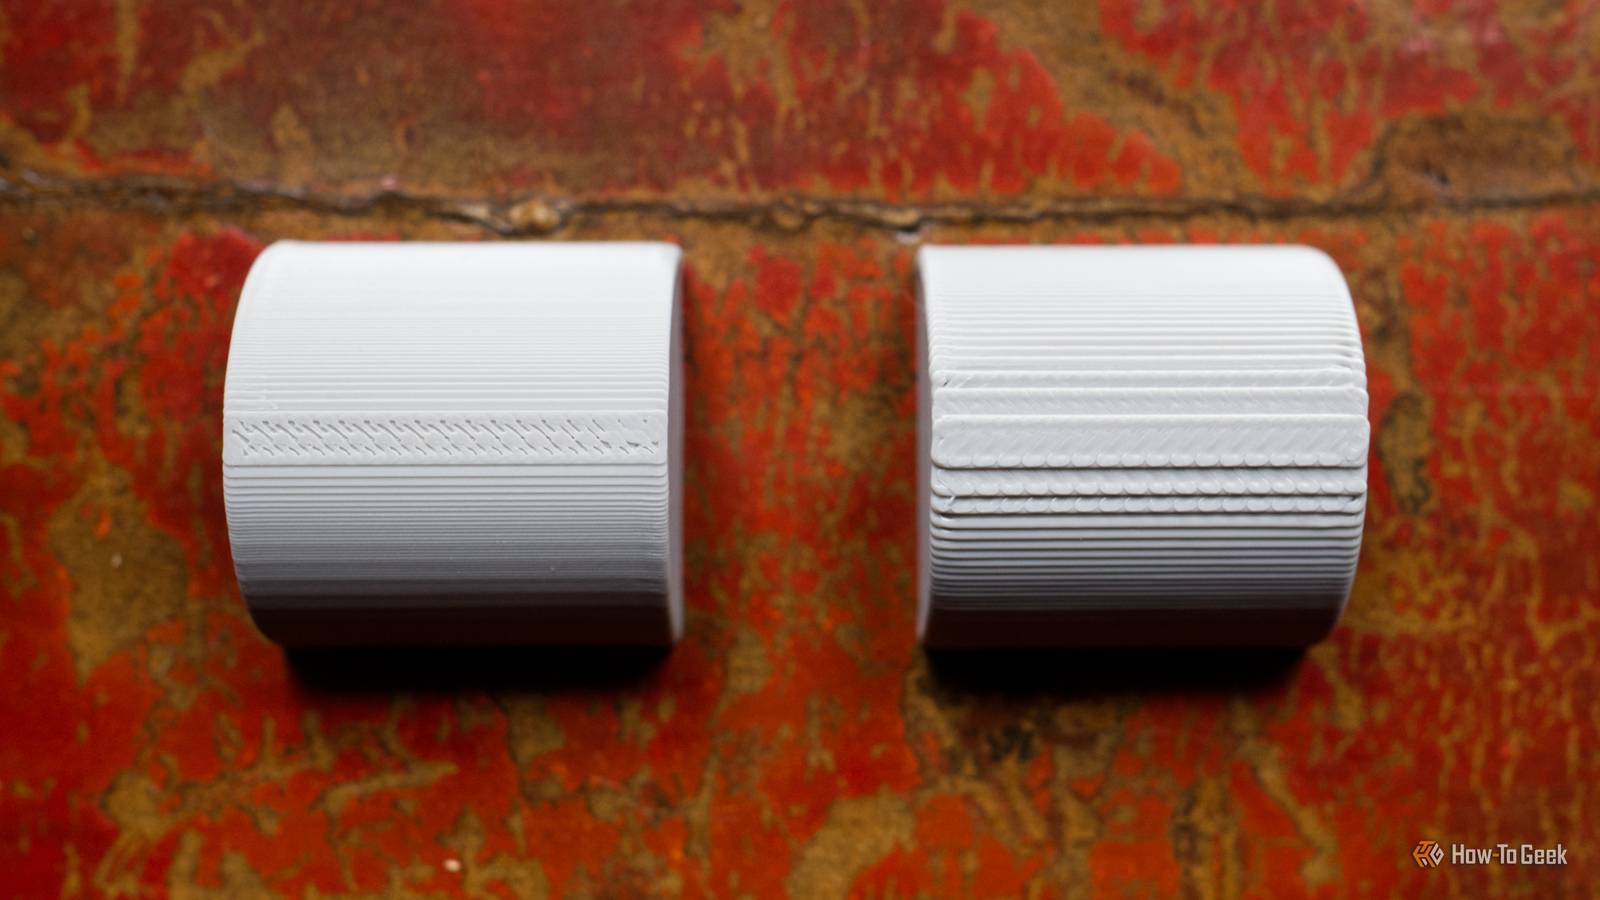
Published Oct 13, 2026, 6:00 AM EDT Tim has been covering technology for almost 20 years, in that time spanning a broad range of topics from security to product reviews. He is especially focused on the Apple ecosystem, productivity, and consumer advice. Over the years Tim has written thousands of articles, reviews, and round-ups in addition to producing video content and original photography. A graduate of journalism, he found his footing as a freelancer with a laptop and loves how he is able to work from practically anywhere. Now a Senior Editor for iPhone, Mac, and Smart Home at How-To Geek, Tim still loves to write. He can also be found crafting round-ups and productivity posts for the Zapier blog. Earlier in his career Tim spent nearly a decade as a writer and eventually Apple section editor for MakeUseOf. Tim currently lives in Brisbane, Australia. Outside of work he loves to hike and work out, play video games, and spend quality time with his wonderful partner and two cats Inka and Roger. Changing layer height is the easiest way to balance print quality and print time. It’s a simple, one-size-fits-all approach you can make with a few clicks in your slicer before you send a job to the printer. For a smarter approach, try varying the layer heights throughout the print so that you get the best of both worlds: detail where you need it, raw speed where you don’t. Here’s how it works. The problem with uniform layer heights One size fits all has its drawbacks Credit: Tim Brookes / How-To Geek Larger layer lines mean more filament is deposited at once. This results in speed and improved durability, but the big drawback comes in terms of quality. Layer lines are more visible, making an item look 3D printed. This is especially true in tapered areas, where larger layer lines result in more visible “stepping.” So why not just use smaller layer lines all of the time, then? Smaller layers are less visible, which means that you can achieve a higher level of detail in your print and help disguise its 3D-printed nature. Unfortunately, this means that prints take longer because the print head needs to make more passes. More layers mean more points of failure, which can harm print durability. A compromise between the two might seem like the best idea, but it often results in the worst outcome of all. Rather than the crisp level of detail one might expect at 0.08mm or a much speedier print at 0.24mm, a layer height of 0.16mm sits right in the middle: lacking in detail and slower than you’d probably like. In the past, I’ve always preferred to pick just one and deal with the cons. Much of the time, this means sucking up the time penalty and printing with the smallest layer lines possible. But it turns out that varying the layer height throughout the print was the right call all along. Variable layer height to the rescue Different quality settings for different parts of the print By limiting smaller layer lines to areas of the print that require higher levels of detail, variable layer height (VLH) gives you the best of both worlds. I’ve tested this in both Bambu Studio and OrcaSlicer, but other slicers like PrusaSlicer can also do it. Some models that you can download from repositories like MakerWorld and Printables will already have variable layer height enabled. I added VLH to a simple half cylinder shape I made for the purpose of this test. To do this, I selected the object on the build plate and then clicked the Variable Layer Height tool in the toolbar at the top of the screen. Two things will appear: a box with some numbers and buttons, and a scale on the right of the object preview area. You can use the overlay that appears beneath the toolbar to apply quick VLH settings. Use the slider to determine whether speed or quality should be prioritized, then click Adaptive, and the slicer will decide where smaller and larger layers should go. You will see this represented in the scale that appears in the object preview area. You can click Smooth to make the transitions between these variable heights more organic, though be aware this will slow down print times somewhat by extending the smaller print layer areas. Alternatively, you can use the scale that appears in the object preview area to make changes manually. As you run your mouse pointer down the scale, you’ll see different parts of your model highlighted. You can left-click to make layers smaller, right-click to make layers larger, and use the Shift key with the left mouse button (reset) or the right mouse button (control smoothing). You can also use the mouse wheel to increase or decrease the area you are editing. The results speak for themselves Faster prints and detail where it matters You can see the results for yourself in both real-world prints (above) and the slicer itself. First, let’s take a look at my half cylinder when printed at the fastest possible settings with a layer height of 0.24mm: This print takes 4 minutes to complete and results in increasingly unpleasant stepping at the top of the model. Now let’s apply a minimum layer height of 0.08, then use the Adaptive button in the VLH tool to add dynamic layers (with some smoothing): This pushes the print time up to 7 minutes and 38 seconds, but results in a more gradual transition between the larger layers at the bottom and the smaller ones at the top. By comparison, printing the whole thing at 0.08 would have meant a longer print time of 11 minutes and 50 seconds: Not all prints stand to gain massively from this technique, but many do. One might argue that my half cylinder is a bad example since much of it is rounded, essentially making the technique less useful. A print that has only rounded edges at certain points (like a chimney with an ornate design at the top) would yield even better results, since less detailed geometry stands to gain the most from big layer lines. There are other limitations, like the fact that this is limited to a layer range across the entire print. For example, if you have a lot of objects on the build plate and you want smaller layer lines for one part of a single object, then all layers in your other objects at the same point will also be affected (and vice versa). This isn’t the only way to make your prints look better, but it is a useful technique to keep in mind. I’d recommend combining it with fuzzy skin to help hide layer lines.
Stop choosing 3D print quality or speed, you can have both with variable layer height
Full Article
Original Source
Read the full article at Howtogeek →KhanList aggregates and links to publicly available news content. We do not host full articles from third-party sources. Always verify important information with original sources.