
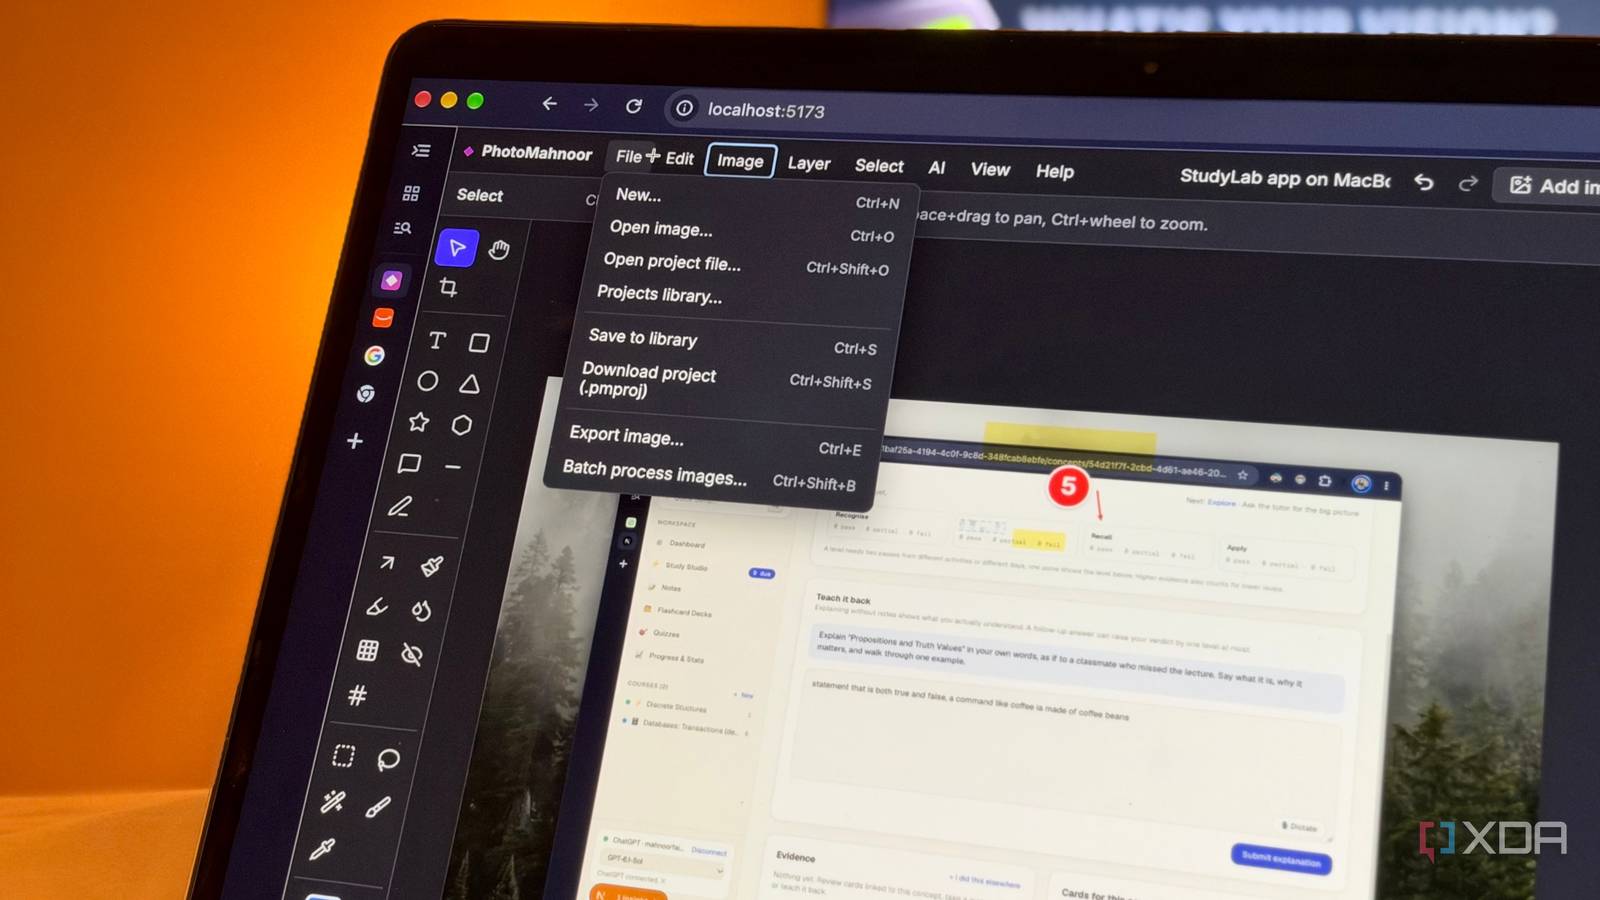
Just a few weeks ago, a developer decided he'd had enough of Adobe's subscription practices and took matters into his own hands. He used his 15 years of software engineering experience and a Claude Code subscription to recreate seven of Adobe's most popular Creative Cloud applications, including Photoshop, Premiere Pro, and Lightroom. He made all of these apps completely free and open-source. After testing the apps out, I had two thoughts. The first was, "Wow, these are impressive." The second? "Hey, if he can recreate seven Adobe apps, surely I can build an editing app of my own?" Naturally, that's exactly what I set out to do. I wanted an editor with only the features I actually use Why recreate Photoshop when I only need a fraction of it? Unlike Brandon, my goal here wasn't to create a full-fledged Photoshop alternative that aimed to do everything the original app can. PhotoCraft's UI and functionality massively resemble Photoshop's, and while that's certainly impressive, I wanted to take a slightly different approach. See, I'm not a professional photo editor or graphic designer by any means. I do use Photoshop and Express fairly often for work, but my needs are frankly pretty basic compared to what the software is capable of. Most of the time, I'm cropping or resizing images, making minor adjustments, adding annotations to screenshots, or occasionally removing backgrounds. In other words, I barely scratch the surface of what Photoshop has to offer. So, rather than asking Claude Code to recreate Photoshop feature for feature, I figured I'd have it build an editor tailored specifically to my workflow. I wanted this tool, which I called PhotoMahnoor (because why not), to have all the tools I regularly reach for, without overwhelming me with dozens of features I'd probably never touch. My custom editor is becoming my go-to for everyday edits Turns out, I knew exactly what I needed Once Claude Code was done building the custom editing tool, I was genuinely surprised by just how much it had managed to pack into the editor. For reference, I used a mix of Fable 5.1 and Opus 5.5 for the building process. To begin with, the tool has all the basics I asked for. This includes cropping, resizing, rotating, and flipping images, along with adjustments for brightness, contrast, saturation, sharpness, and more. It also supports layers, so I could add text, shapes, and images independently, rearrange them, adjust the opacity, and even group them together. Some features I made sure to add to this tool were screenshot-editing tools. A lot of my workflow involves taking screenshots, editing them, and adding annotations to highlight specific features or settings. So, I wanted to make sure PhotoMahnoor could handle all of that without having to switch between multiple apps. Thankfully, it has pretty much everything I need for that, including arrows, highlights, numbered callouts, and tools to blur, pixelate, or redact sensitive information. There's even an option to add rounded corners, padding, and a background to screenshots! You can also convert between file formats within the tool, and you can even resize, compress, or convert multiple images at once using its batch-processing feature. This is particularly handy when I'm preparing images for an article and need them all to meet specific dimensions or file-size requirements. So, for all the basic edits I once used to open separate apps for, I now have a single place to get everything done. The editor has a few features I didn't see coming My custom editor does more than I expected Beyond the basic editing tools, PhotoMahnoor also has a few more advanced features up its sleeve. For instance, it supports different blending modes, filters, and non-destructive editing, meaning I can experiment with adjustments without permanently modifying the original image. It also has a surprisingly extensive collection of selection tools, including a magic wand, lasso, and brush selection tool. I can select specific portions of an image, extract them into separate layers, or make adjustments without affecting everything else. The design tools are pretty extensive, too. Beyond adding basic text and shapes, I can play around with gradients, shadows, outlines, and different fonts. There are even presets for different canvas sizes and editing styles, along with the ability to save my own. Of course, there are some AI-powered editing features here too. One thing I found particularly interesting, though, was how Claude Code approached the AI-powered features. In my original prompt, I'd asked it to connect my existing ChatGPT subscription to power features like background removal, object removal, and smart subject selection. However, Claude Code determined that connecting my ChatGPT subscription wasn't a viable option for these features. Instead of getting stuck on that requirement or asking me to set up a separate paid API, it decided to take a different approach entirely. For background removal, it integrated an open-source AI model that runs directly in the browser, so my images don't need to be uploaded to a remote server for processing. It also added a smart subject selection tool, along with options to replace backgrounds with solid colors, gradients, or other images. Object removal works a little differently. Rather than using a generative AI model like Photoshop's Generative Fill, PhotoMahnoor uses a traditional content-aware filling technique to reconstruct the area behind whatever I'm trying to remove. The advanced features are where things get tricky It's no match for Adobe's AI tools, but it doesn't need to be Now, admittedly, most of these AI features don't work all that well. However, for basic edits, I've found them fairly decent. For instance, my MacBook has a weird insect stuck inside the screen (I know, I know, that's weird), and I use the Remove Object tool on Adobe Express fairly often to remove it from screenshots before using them in articles. The tool I built handles this particular task very well. Since the insect is tiny and the surrounding area is usually fairly simple, the tool manages to remove it without leaving behind any particularly noticeable traces. So, for something as specific as this, I no longer have to open another tool. That said, the difference becomes pretty obvious when I try removing larger objects or anything against a more complicated background. While Adobe Express can use generative AI to reconstruct what's behind an object, my tool relies on traditional content-aware filling that leaves behind blurry patches or smudges when there's too much detail to work with. I'm not ditching my other editing apps anytime soon Like I mentioned in the beginning, the goal here wasn't to build an app that'd make me cancel my existing Adobe subscriptions. It was simply to see if I could build something tailored to my own workflow, with all the features I regularly use and none of the ones I don't. For the most part, I think I managed to do just that!
Someone recreated Photoshop with Claude, so I built a version that only does what I need
Full Article
Original Source
Read the full article at Xda-developers →KhanList aggregates and links to publicly available news content. We do not host full articles from third-party sources. Always verify important information with original sources.