
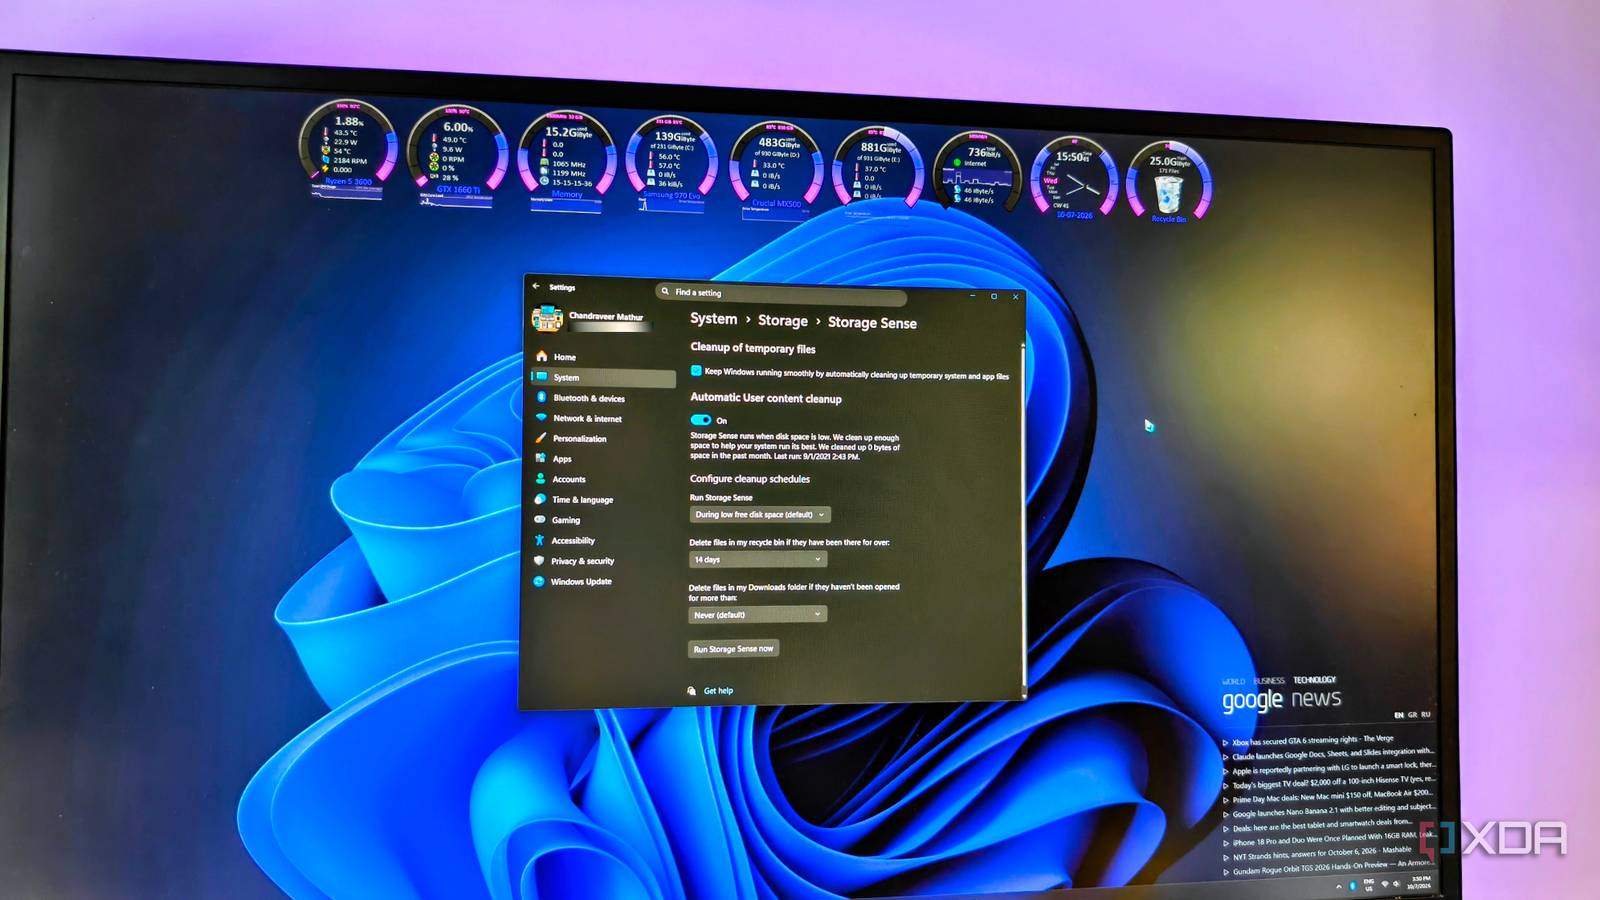
Published Oct 7, 2026, 4:00 PM EDT A seasoned mechanical design engineer turned tech reporter and reviewer, Chandraveer brings more than four years of consumer tech journalism experience to the table, with bylines at Android Police and iPhoneHacks. He's written about everything from UI and UX changes across various apps to emerging software and AI trends. At XDA, he showcases his versatility in the tech reporting space with articles rooted in personal experiences and frustrations. Chandraveer's passion for consumer tech spills over into hobbies such as mechanical keyboards, photography, and 3D printing. With an academic background in design and manufacturing, his insatiable curiosity spans beyond the digital domain. Chandraveer's downtime is an eclectic mix of reading fiction, practicing calligraphy, conceptualizing new products, and enjoying an expansive FLAC audio library. We routinely blame sluggish Windows machine performance on suboptimal boot drive configuration, and despite my technical inclination, I'm guilty of it too. Late last month, I noticed my boot time matched that of a resume from a hibernated state. I sidestepped the perils of downloading third-party optimization software that's mostly snake oil, and trusted Microsoft's integrated Storage Sense utility instead. However, I soon realized the company had misconfigured its own operating system defaults as a last-ditch troubleshooting tool rather than a routine cleanup utility. The prevailing narrative suggests Windows 11 manages its footprint intelligently, but on my 256GB Samsung 970 Evo NVMe boot drive, Storage Sense manages only one bloat layer — user-generated files. This includes temporary app data, local cloud hydration, and discarded recycle bin items. However, the core OS bloat, comprising installer cache, hidden hibernation files, etc., remains untouched by automated maintenance. Storage Sense is also passive by default, letting the drive choke to the brink of capacity before taking action. However, adjusting the defaults mostly fixes this. Identifying the problem with Storage Sense Off by default, and misconfigured when switched on I'll admit my PC upkeep was lacking, so the degradation crept up on me, masked by a general sense of hardware aging. Over the years, my boot times stretched out, and the OS dropped frames when multitasking between heavy programs. I checked my storage metrics and realized my 256GB boot drive sat permanently pinned above the 90% capacity mark. This hurt performance because the SLC cache shrank and the drive controller ran too close to the over-provisioned space reserved for wear leveling and block management. The drive firmware allocates a portion of available empty capacity as a high-speed buffer for incoming data. When Windows allowed my drive to fill past the critical threshold, it starved the SSD controller of the empty blocks it needed to maintain this high-speed cache. Furthermore, operating near maximum capacity crippled the drive’s ability to execute routine TRIM commands and perform garbage collection on stale NAND blocks. To compound the problem, write amplification dented my sustained write speeds, and if it continues for long, it can wear out the NAND flash faster than usual. I needed to understand exactly what was taking up this space before I could intelligently clear it. Opening the legacy disk management tools and modern storage breakdown menus revealed Windows accumulated gigabytes of telemetry data, temporary setup files from ancient cumulative updates, and deep caches from browser sessions I'd abandoned months ago. Even the Recycle Bin didn't clear out automatically until Storage Sense kicked in. The volume of neglected user-space data proved that relying on the OS to trim the fluff on its own was futile. By default, Windows 11 runs Storage Sense only when the system detects low free disk space. For a modern power user operating on a tightly constrained 256GB SSD, a reactive approach doesn't help because the utility sits dormant while the user experience degrades. The solution is to bind Storage Sense to a proactive, chronological schedule that runs weekly or monthly, regardless of free space on the drive. Fixing Storage Sense takes just a dozen clicks Knocking some sense into the tool so it lives up to its name When you head into Settings -> System -> Storage -> Storage Sense, first enable the checkbox under Cleanup of temporary files, and then switch on the toggle for Automatic User content cleanup. This ensures every automation Storage Sense offers is active. Fixing the default low disk space trigger that fires up Storage Sense is also fairly straightforward. On the tool's menu page, select a frequency that best suits your usage from the following options — Every day, Every week, and Every month. This switches from a reactive trigger to a proactive chronological schedule, irrespective of the remaining free disk space. Similarly, I adjusted the baseline maintenance routines for auto-clearing the Recycle bin and Downloads folder using their drop-down menus on the Storage Sense configuration page. Storage Sense also works with cloud storage services, integrating directly into its settings page, with OneDrive immediately available, and support for self-hosted Nextcloud instances as well. Microsoft embeds OneDrive deeply into the Windows shell, heavily pushing the files-on-demand feature that supposedly saves local disk space by keeping data in the cloud. However, opening a cloud-stored file entails downloading a full local copy onto my SSD. The fatal flaw in the default configuration is that Windows never proactively deletes these files from local storage after I close them. Storage Sense can clear this bloat periodically too, separate from the Delete option that nukes the cloud copy as well. To keep these files and prevent repeated downloads, select Always keep on this device in the File Explorer context menu. Fixing the baseline automated maintenance schedule stopped the immediate issues, but you'll still need to address the aggressive bloat generated by temporary system files and Windows updates. Windows natively prefers to hold onto application temp files indefinitely just in case a program crashes and requires session recovery. I rejected this safety net and found the settings page to delete all temp files without manually rummaging through System32 and accidentally crippling the OS. They're located under Settings -> System -> Storage by default, and your boot drive's usage should populate the page in descending order. If temporary files aren't already among the worst offenders, click Show more categories -> Temporary files to open a detailed breakdown. Here, you can check off everything you want to delete, including Delivery Optimization files, the DirectX shader cache, Windows error and diagnostics, and accumulated thumbnails and Recycle Bin content. If doing this manually seems like a chore, you can automate it using Task Scheduler. On this page, you'll see a shortcut to the Windows Update settings page along with how much space the update files are holding at ransom. You can use the Disk Cleanup utility from Start, selecting the boot drive, and then clicking Clean up system files. This lets you select several update-related cleaning tools, including Windows Update Cleanup, Windows upgrade log files, and System recovery log files. In Storage Sense, they show up when you click Cleanup System Files. Whenever Windows installs a cumulative update, it rarely deletes the older, superseded system files; instead, it dumps them into a directory so you can easily roll back the system if a patch causes instability. On a stable build, creating a restore point and deleting these files is a viable solution to free up drive space. Simple fixes free up plenty of space without risking OS stability This comprehensive user-space overhaul kept my SSD hovering around a healthy sixty percent capacity, fully restoring the drive's snappy pseudo-SLC caching performance. App compilation times dropped back to baseline, and the OS felt frictionless. Yet, my deep dive into Windows storage of temp files and updates revealed bloat that even Storage Sense refuses to acknowledge and clear routinely. Ultimately, achieving true storage hygiene required accepting that Windows automation is a half-measure, and even Storage Sense is configured incorrectly from the get-go. Fixing its settings is a good start to keeping bloat to a minimum on your boot drive. Most importantly, it won't break your OS.
My Windows install stopped bloating once I actually configured Storage Sense properly
Full Article
Original Source
Read the full article at Xda-developers →KhanList aggregates and links to publicly available news content. We do not host full articles from third-party sources. Always verify important information with original sources.