
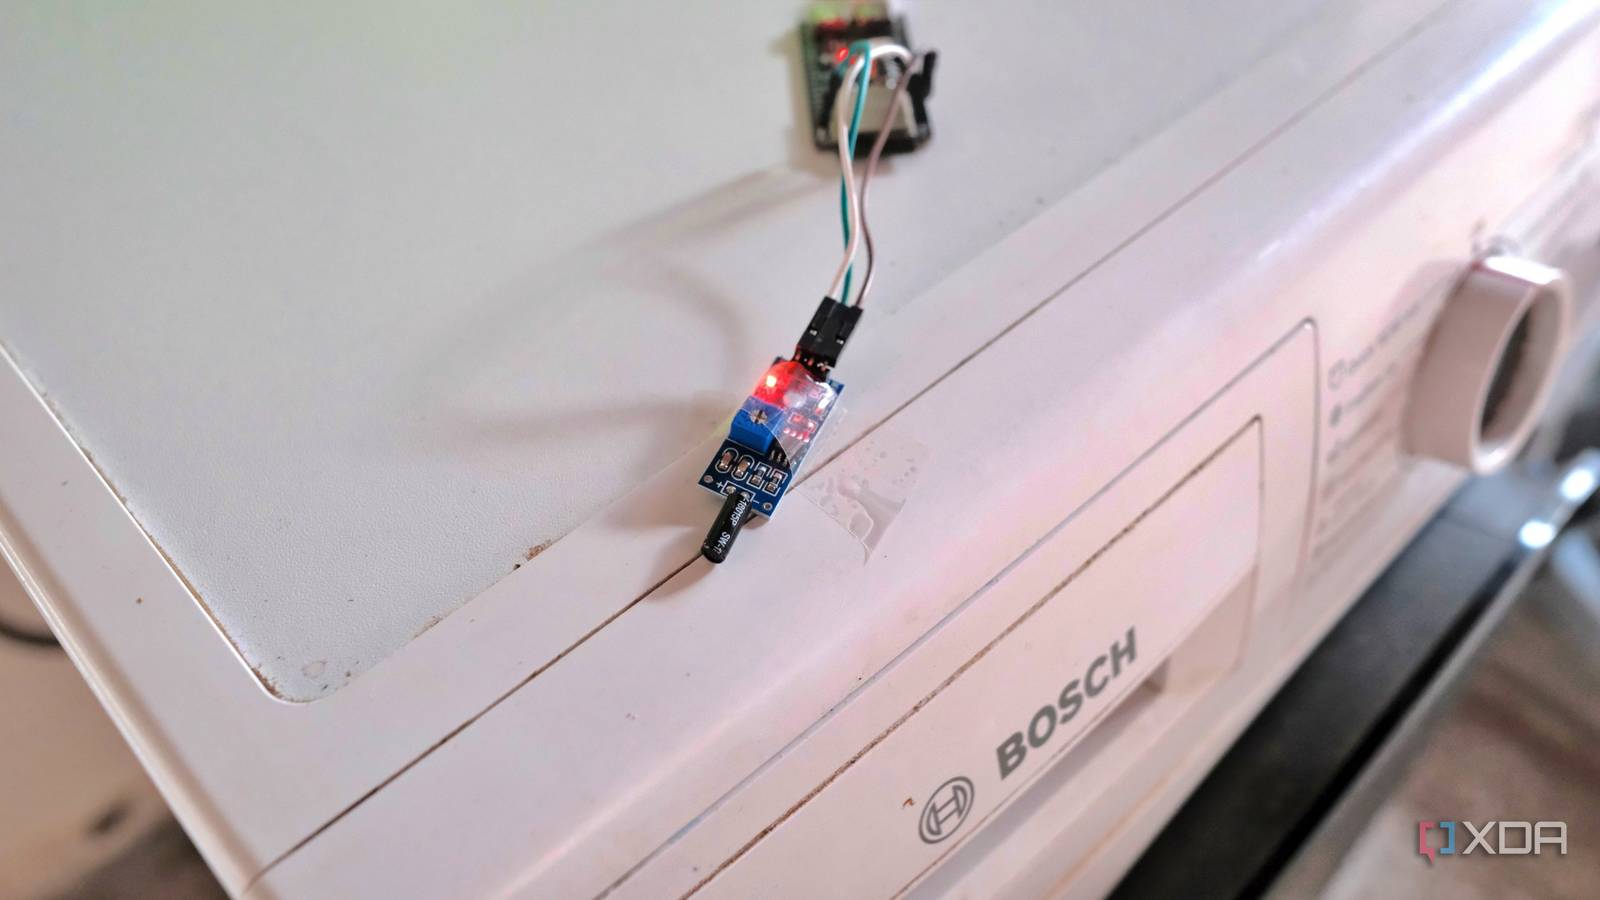
Published Nov 10, 2026, 8:00 AM EST Samir Makwana is a technology journalist and editor from India since past 18 years and his work appears on MakeUseOf, HowToGeek, GSMArena, BGR, GuidingTech, The Inquisitr, TechInAsia, TechWiser, and others. He has written news, features, and gadget reviews for national technology media publications. His passion is to help people with their technology problems and gadget purchases. For that, he has worked for some of the biggest international technology publications, covering news, explainers, how-to guides, listicles, and product-buying guides. He has worked as an editor and managed teams since 2015. His expertise broadly covers computers, smartphones, game consoles, headphones, smart home products, browsers, and apps. When I bought my washing machine, I focused on the essentials and overlooked the smart features. It has no Wi-Fi, no companion app, and not even a helpful beep. Quite often, the wet laundry just sits in the machine until I remember it exists. Every smart laundry fix I found wanted a new machine or an energy-monitoring smart plug. Neither works for me, since the outlet is stuck behind the washing machine. So I went simpler: an ESP32-S3 that was lying unused in my drawer, a cheap vibration sensor, and ESPHome. The washer shakes while it runs, and stops when it’s done. That’s all the information I need on my phone to know the laundry is ready. A vibration sensor is all the build needs Shaking or not shaking is enough I expected the vibration sensor to be the fiddly part, but it wasn’t. I used a normally open vibration sensor with an SW-18015P spring switch and an LM393 comparator. It’s the only thing I had to buy for about $0.40, since I already had an ESP32-S3 and DuPont jumper wires in the drawer. By default, the module’s switch is open, and the output sits high. When the module detects a shake, the switch closes briefly, the output drops low, and a small LED lights up. Wiring involves three connections: VCC to 3.3V, GND to GND, and DO to GPIO5. I paired it with an ESP32-S3, which costs about $10 depending on the seller. I know the S3 is overkill, and a plain ESP32 board works too, but it was readily available. I chose a normally open type vibration sensor because its switch only closes when the washer is shaking, so a quiet washer simply reads as ideal. An MPU6050 accelerometer could give richer data, but it requires I2C setup and a state machine to read it. That’s a lot of work just to know whether a machine is running or done. ESP32-S3 ESP32-S3 comes with a dual-core Xtensa LX7 microcontroller. It has 16MB of flash memory and 8MB of PSRAM with years of maturity to be ready for a variety of projects. ESPHome keeps the logic on the device A few quiet minutes means done The tricky part is knowing when the laundry is actually done. The module’s trigger time is very short, so the raw data is a stream of tiny blips instead of a proper clean on state. I fixed that with a delayed_off filter, which keeps the sensor on until it detects no vibration for a set time. In practice, the sensor stays on through the whole wash cycle, and flips to off only after the quiet period ends. Compiling the firmware and flashing the board over USB took only a few minutes. Here’s my final config: Because the output idles high and drops low on vibration, inverted: true makes the ESPHome report on while the washer shakes. I initially set the delayed_off to two minutes, which seemed generous. But the washer went quiet, and my phone told me the laundry was done. When I checked, the clothes were still soaking in water. Washers pause during soaks and between fills, so a short quiet keeps triggering false alerts. After some tries, I settled for five minutes. Adjust that value if your washer gives you false alerts too. Placement decides whether this works Tape it near the motor The code was the easy part since I’ve built quite a few ESP32-based devices. Placement was harder than I expected. I first stuck the module at the top for testing, and I kept getting inconsistent results. At the top, it picked up slightly more rattle than the drum vibration. The spring switch needs real shaking to close, so your washer may need a different spot. The trade-off is that gentle wash phases can produce sparse pulses, which is why keeping a longer delay helps. While a wash cycle runs, open the ESPHome logs to watch the pin state flicker in real time. It tells you more than a typical history graph does. I kept trying spots until the module stayed off at idle and on from fill to spin. It ended up on the side panel close to the motor. I also wrapped it in plastic to keep splashes and dirt off the board. Home Assistant turns the cycle signal into a notification Your phone does the rest Once the board is on the home network, Home Assistant discovers it through the ESPHome integration. Before writing the automation, shake the module by hand and watch the entity flip to on. The automation itself is short: when a sensor goes from on to off, it sends a push notification to my phone through the Home Assistant Companion app. Your entity ID and notify service will differ, so check the Developer Tools in Home Assistant to confirm the push works. The delay lives in the module's firmware, while the automation stays at one trigger and one action. The only side effect is that the alert arrives about five minutes after the drum actually stops. If you’d rather hear that alert than see the notification, have a smart speaker announce it instead. Making a dumb washer talk While my washer remains the same, I am building a proper case for the module. I would also like to try running it on a battery, since the washer only runs a couple of times a week. I haven’t tested that, and the module’s comparator and LED likely draw current even at idle. The shorter cycles and soak times vary by program, so getting the delay right takes some tuning. Some Home Assistant users moved to CT clamps that measure power draw. That can be more precise if you’re comfortable working in an electrical panel. Since I wasn’t, I chose a sensor that never touches the mains wiring. ESPHome Turn your ESP32, ESP8266, or RP2040 boards into powerful smart home devices with simple YAML configuration.
My old washing machine tells my phone when it's done, thanks to an ESP32 and a vibration sensor
Full Article
Original Source
Read the full article at Xda-developers →KhanList aggregates and links to publicly available news content. We do not host full articles from third-party sources. Always verify important information with original sources.