
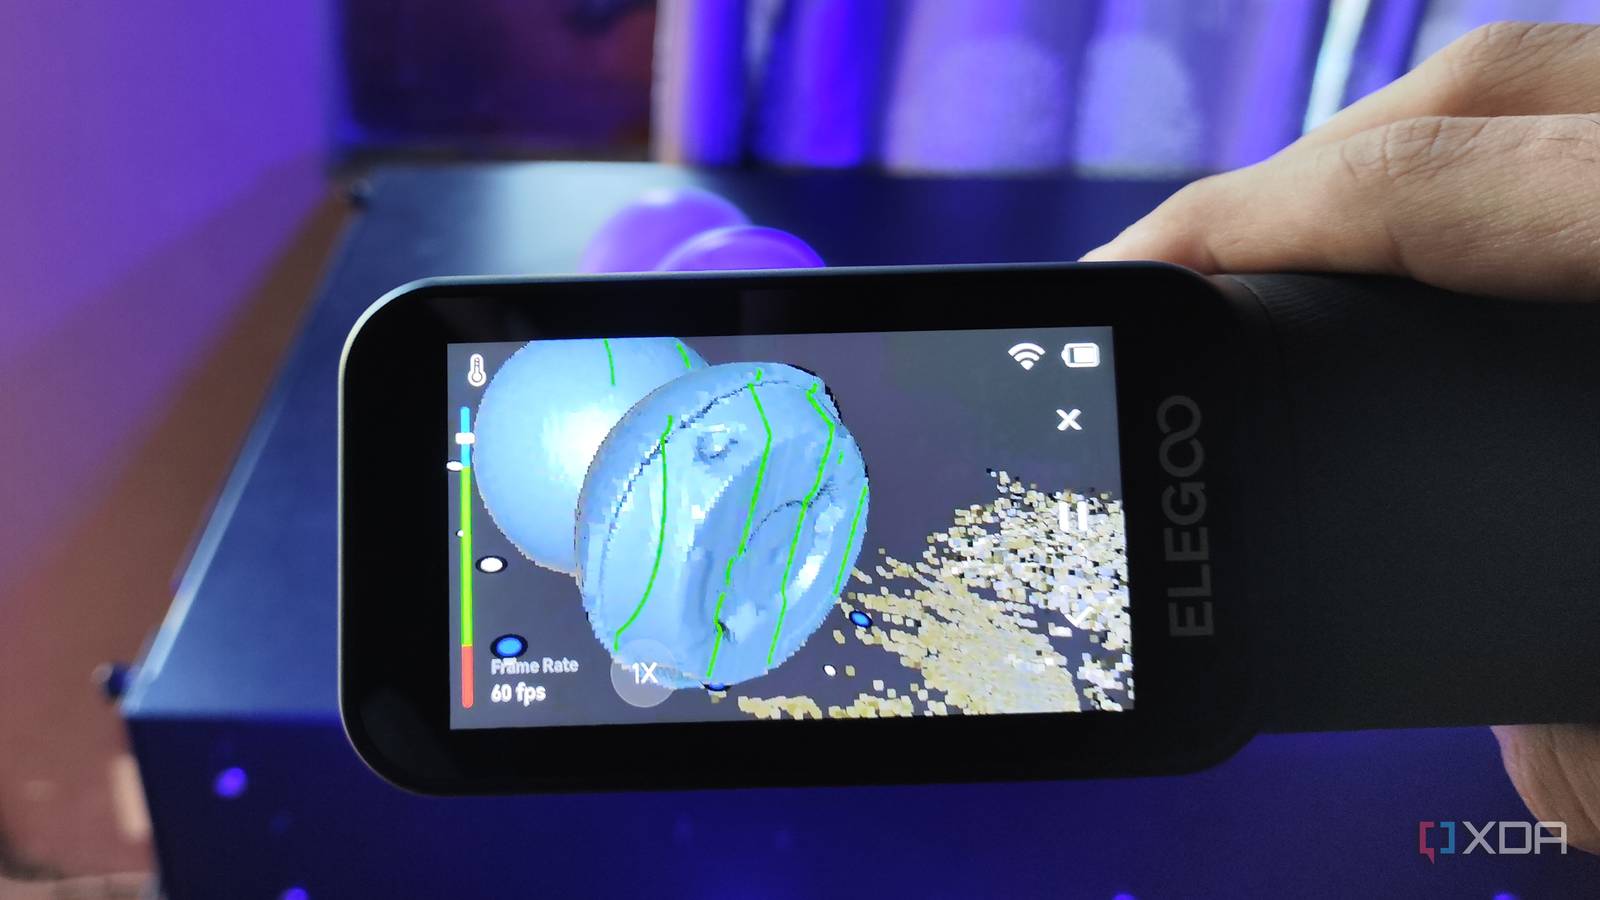
Published Nov 14, 2026, 11:00 AM EST Ayush Pande is a PC hardware and gaming writer. When he's not working on a new article, you can find him with his head stuck inside a PC or tinkering with a server operating system. Besides computing, his interests include spending hours in long RPGs, yelling at his friends in co-op games, and practicing guitar. Between aesthetically-pleasing models, functional prints, and whatever cool STL files I could lay my hands on, I’ve been using my 3D printers extensively to convert virtual CAD models into tangible products. As for the models, I’d typically find most of them on free 3D printing websites and tweak their parameters to suit my DIY needs. I’ve also started creating my own set of models as of late, and although I’m satisfied with my custom replacement models, I must admit that manually putting together functional prints is pretty complex, especially when I need to model objects that fit into other components. So, I turned my attention to 3D scanning, and when Elegoo reached out to me with their M1 Ultra, I was excited to give it a shot. I’ve been using it for my home improvement projects extensively over the last few weeks, and although it's a pricey tool with a handful of quirks, it’s a fine addition to my DIY toolkit. About this article: Elegoo sent me an M1 Ultra unit to tinker with, but the company has no input into the contents of this post. Nor did it review this article before it went live. The Elegoo M1 Ultra can handle most models thanks to a plethora of scanning modes The 34-line crossed and 7 parallel-line blue laser modes are a godsend for capturing functional designs Although the M1 Ultra is a fairly lightweight gizmo that I can hold for a few minutes without getting muscle fatigue, it’s versatile enough to support different scanning modes. And as long as I use the right mode with the right model dimensions, the scanner is pretty good at creating virtual copies of real-life objects. Since I’d rather not spin around the room during the scanning process, I’ve created a 3D printed turntable that bears enough markers for the M1 Ultra to work its magic, and it's what I used for most tests. For medium- and large-sized objects, the 34-line crossed blue laser can scan surfaces fairly quickly. So far, I've used it with camera mounts, controllers, utensils, and microphones, and the scans turned out fairly well. Then there's the 7 parallel-line laser mode, which works wonders when it comes to capturing intricate details. In fact, I recently wanted to capture the bottom half of my surveillance camera, so I could design some mounts for it in a CAD tool. Well, I didn’t even bother switching to the 34-line crossed laser mode and used its 7 parallel-line laser counterpart alone to get an accurate virtual model of my security camera. Swapping between them is as simple as double tapping the Capture button, and for complex models that need extra alignment, I’d sometimes use both modes to ensure none of the details get lost when using the scanned file to generate a mesh. Sadly, I haven't had much luck with the single-line blue laser mode The M1 Ultra failing to capture the GPIO pins properly There’s also a single-line blue laser mode, which Elegoo claims works well for scanning holes, cavities, and tight spots on models. But even after tweaking all settings on this mode, it never managed to do its job in my scanning experiments. Take my microcontroller and SBC scans, for example. As long as the tiny boards in question didn’t have GPIO pins, quick scans via the 7 parallel-line and single-line modes worked pretty darn well. That said, the M1 Ultra would fail to detect the GPIO pins on boards that possess them, and I’d get a lot of noise in the mesh even after scanning the SBCs carefully with single-line blue laser mode. The same also applies to PC cases and models with a lot of cavities in their designs, as the M1 Ultra would inevitably end up filling the tiny fan vents on my mini-PCs and SBCs. But to its credit, these errors are fairly easy to fix in CAD tools, and I can still use these models to gain a rough estimation of the board dimensions, case deformities, and other tech parts when designing accessories for them. The markerless modes are pretty handy for outdoor scans, though Technically, it’s also possible to use the blue laser scanner without sticking markers along the surface of an object, and I've found outdoor scans to be the best use case for this mode. While I wouldn’t say it’s as clean as a marker-based scan, it’s surprisingly good enough for covering larger objects where I can't just slap random marker stickers. So far, I've used it to create digital copies of my gardening, automotive, and garage accessories, and barring some slight inconsistencies in a plumbing pipe, I don't have any complaints with this mode. There’s also an infrared scanner mode, which works with color textures and body surfaces, and it’s good enough for creating reference models of body parts for cosplay props. It works well enough with my gaming PC and MacBook That said, it does need a somewhat bulky system for the post-processing tasks Just so we’re clear, the M1 Ultra isn’t a standalone scanner, and needs a PC to handle the mesh processing tasks. I’ve used it with my MacBook Air M4 and an RTX 3080 Ti-powered 32GB desktop, so my scans were fairly quick. I typically use the latter for stationary, marker-based scans, and the performance ranges between 60–85 FPS over a wireless connection. Switching to the infrared scanner does tank the performance to about 19–26 frames per second, but it’s smooth enough for the most part. On my MacBook Air M4, using my marker-equipped turntable results in an even 50+ FPS during blue laser scans. However, the number drops to 17–21 FPS when I use it in the markerless mode – and that’s with the M1 Ultra hooked up to my laptop. Infrared drops this number down to 9 frames per second. As such, I stick to my PC for typical functional parts and use the MacBook exclusively for markerless scans of outdoor objects. I always conduct the post-processing tasks on my PC, and the mesh wrapping tasks can take anywhere between a few seconds to an entire minute or two, depending on the complexity of the model. The Elegoo Scan app is a pretty handy companion for the M1 Ultra It also has a bunch of post-processing options for my scans Switching gears to the software side of things, the Elegoo Scan app for the M1 Ultra is what surprised me the most. I’ve seen my fair share of “cheaper” scanners that, despite packing solid specs, end up with unintuitive (and downright messy) software. Fortunately, the Elegoo Scan app doesn’t fit this stereotype, and it’s so useful that I don’t even need to refine half my models in a separate CAD utility. On marker-based scans, the Clipping Plane option lets me get rid of the unneeded turntable portions in a matter of seconds. Likewise, removing the excess noise and floating objects is as simple as choosing the main model, inverting the selection, and hitting the delete key. I tend to use the extensive options in the Mesh Wrapping and Mesh Optimization tabs to experiment with raw scans, but the One-Click Process isn’t half bad for simple models. Leaving aside simple desk accessories and D&D models that work well with a single scan, most of my mechanical components require more than one raw file to cover every inch of their surface, and the Alignment tab comes in a clutch. Honestly, the automatic alignment never really worked for my scans, but the manual option works pretty well once I add a bunch of labels on each scan and ensure they correspond to the same location. I also use the Simplify tool within the Mesh Optimization tab for larger scans that consume way too many polygons, while the Hole Filing feature is useful for the times when the M1 Ultra mistakenly adds cavities around the corners of hollow objects. Plus, the touchscreen display and Capture button let me control all the essential options when I’m in the middle of scanning surfaces wirelessly, so I don’t need to run back to my PC every time I need to tweak the scan mode or capture a new model. If there’s one complaint I’ve got with the Elegoo Scan tool, it’s that it forces certain firmware updates on the M1 Ultra. And as someone who has dealt with a buggy firmware update in a previous Elegoo product, I’m not very fond of being forced to upgrade my 3D scanning companion. The M1 Ultra is great for hardcore hobbyists and 3D printing lovers So far, I’ve tossed all sorts of mechanical components, tech devices, and broken appliances at the M1 Ultra, and minor issues aside, I haven’t had any deal-breaking problems with the raw scanned models or their post-processing workflows. While its one-line blue line scan mode isn’t very reliable, everything else works without a hitch. Price-wise, I’d say that the $1,699 MSRP is a tad high for beginners looking to experiment with 3D scanning tech. But for hardcore tinkerers looking for a neat companion that can aid their CAD modelling sessions, the M1 Ultra is definitely worth checking out. Elegoo M1 Ultra
I used this 3D scanner on my household items, and it turned out to be a killer addition to my 3D printing suite
Full Article
Original Source
Read the full article at Xda-developers →KhanList aggregates and links to publicly available news content. We do not host full articles from third-party sources. Always verify important information with original sources.