
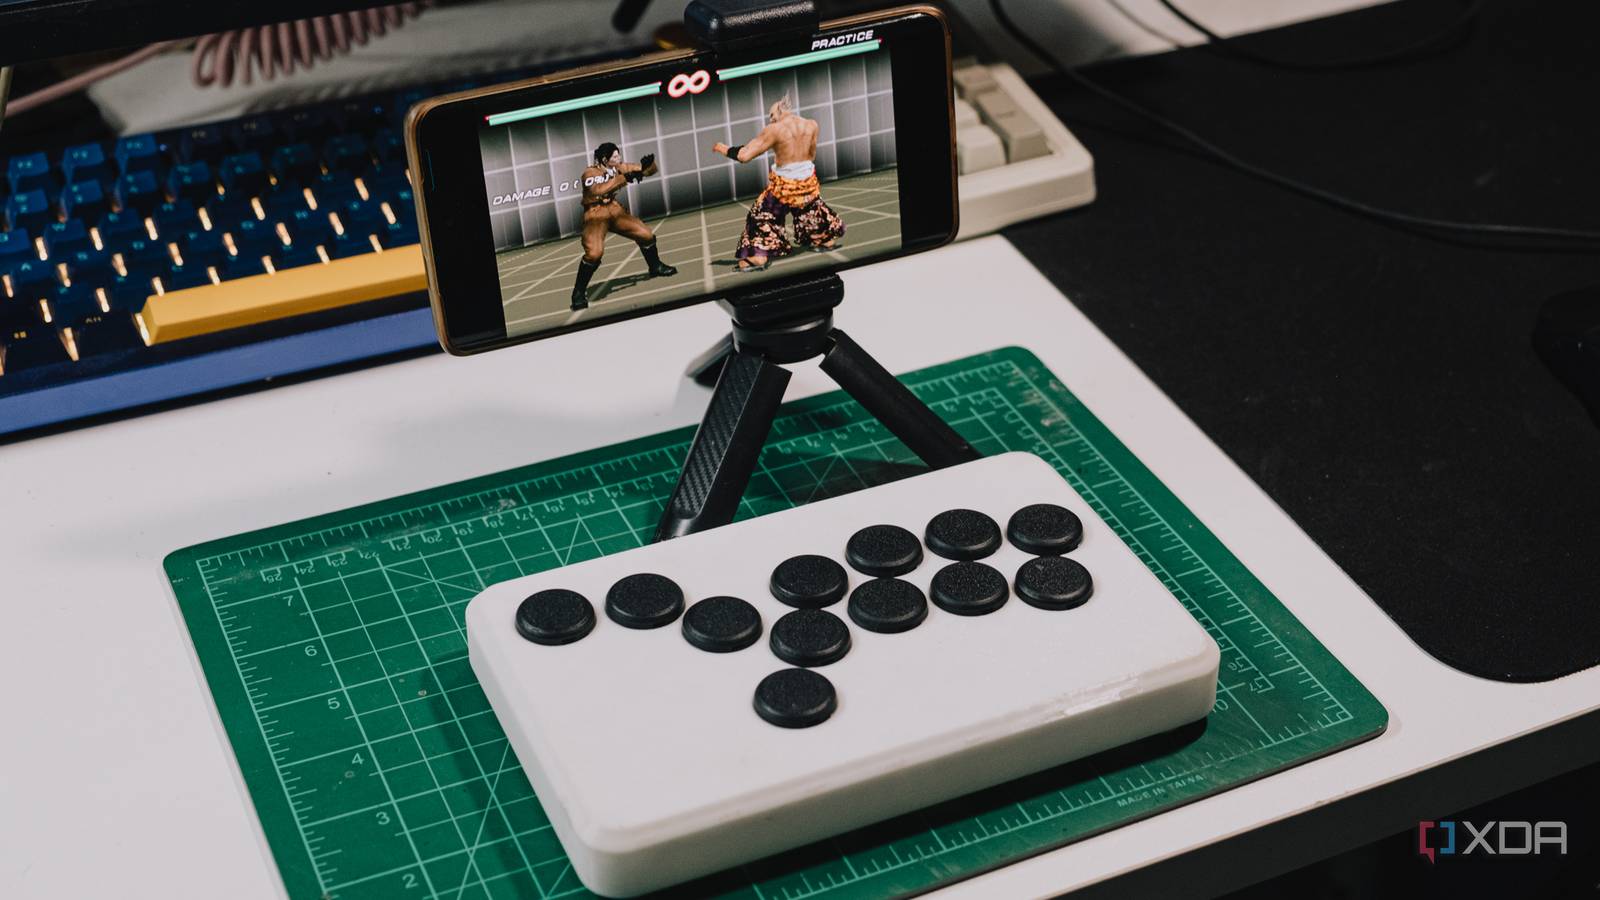
Published Aug 24, 2026, 3:30 PM EDT Jhet has gamified his life as a skill collector. He has skills ranging from woodworking and leatherwork all the way to CAD and electronics. He loves optimizing and customizing his experience with his stuff; fixing, modifying, and optimizing them to fit his needs. He has previously written for MakeUseOf.com and showcases his projects on his TikTok and YouTube channels. He is also an avid PC gamer with over 4000 hours in various FPS games and aim trainers. Leverless fightsticks have been the craze of the fighting game community for the past few years, with many variations being released. Many of them could get quite expensive, but after learning a bunch about electronics, I realized they’re actually quite simple. I’m not serious enough about fighting games to buy an expensive leverless fightstick. Thankfully, I made a legitimately competitive one for cheap — and customized to my hands! Gathering the materials and electronics You only need a few things I made my leverless fightstick similar to how you’d make a keyboard. These are what I used: Raspberry Pi Pico (I used a clone that has USB-C) Keyboard switches (I used low-profile Kailh Silent) Screw-in buttons (for start, select, etc.) Wires Solder and soldering iron M3 bolts and M3 heat-set inserts 3D printed shell and buttons Automatic wire stripper (optional, but you’ll definitely want one) If you don’t have a 3D printer, you might know someone who does. Your local library may also have one you can send print jobs to. Designing the fightstick Overthinking the design to avoid multiple iterations and wasted filament One challenge I had for myself was to come up with a design with these criteria: Small, should fit in one print, and should be no bigger than a book Comfortable Doesn’t take too much material Easy to troubleshoot Fits my relaxed hand position perfectly Completely designed by me I designed my controller with the buttons to match 24mm Sanwa buttons. Since I had Cherry MX-style cross stems on my switches, I had to design the button stem from scratch, which I wanted to do anyway. I used a schematic as my reference image and just matched the dimensions since I’m printing with PETG for strength and dimensional accuracy. To make the buttons easy to remove, I added two small notches opposite each other for a switch puller to grab. For the bespoke fit, I scaled the 3D model to real-world dimensions and laid my hands on my monitor in their relaxed position. I then positioned the switches to be in those locations so my hands would naturally land on the right buttons without thinking about it. To mock up the final product more easily, I found CAD models of low-profile switches and the Raspberry Pi Pico clone (I’ll call it the RP2040 from here on out) on GrabCAD. I didn’t bother changing the Micro-USB on the 3D model to USB-C; I just sketched a pill-shaped profile around the center of the Micro-USB and cut a hole matching the size of the real-world USB-C port. I hate wasting filament, even on successful prints. To save on filament without sacrificing strength, I used this honeycomb pattern on the inside of the shell, giving it a bit more personality on top of its function. On the bottom plate, I used a matching honeycomb pattern that goes all the way through. This means you can see the electronics inside, which I think is pretty cool (unless your wires look a mess, like mine). In the end, I only used 122.68g of filament including the unavoidable supports. Assembling the leverless fighstick And trying not to melt anything with the soldering iron Two satisfying things follow before the most daunting part: peeling off a print from a build plate after leaving it to cool down, and the crunch of support removal. And then comes the process of soldering everything together. After popping the switches and screwing in the buttons, I started soldering all the black ground wires; it took forever because I spent most of that time stripping the wires with a box cutter. I only got myself an automatic wire stripper on the last few wires because my hands had had enough; I suggest you spare yourself the torture and get an automatic wire stripper as well. In my design, the RP2040 sits above the LB and RB, so I had to solder the signal wires for those first before I could fasten the RP2040 down. I then soldered each signal wire from each button to the appropriate pins, following the GP-2040-CE wiring diagram. Once the soldering was done, I installed the M3 inserts into their respective holes. Since the backplate has holes, I sandwiched a sheet of laminate without anything inside; basically just a clear sheet of plastic. I cut it to size and poked holes for the screws to go through. Now that it’s all assembled, we can finally install the firmware and test the buttons. Installing the GP-2040 CE firmware onto my fightstick A few hours of headaches turned out to be my fault Installing the firmware for the fightstick is quite easy; download the GP-2040 CE .uf2 firmware file for the RP2040 dev board you have (I’m choosing the Pico since the pins match on the clone) > hold down the BOOTSEL button as you plug it into your PC > drag and drop the .uf2 file into the RP2040 storage that pops up; it says RPI-RP2 for me. Those steps went really smoothly for me, with no bugs or glitches during installation. Until I tried it on Tekken 7, and it only partially worked. I couldn’t push start to pause or bring up the menu. After going into the configurator, which can be accessed by holding the S2 button while plugging it in and going to http://192.168.7.1/, I could press the buttons, but with varying levels of success. GPIOs 20, 21, and 17 worked every time I reinstalled GP-2040 CE, but after a while, it stopped detecting them. I thought it was a firmware issue; I tried turning a few settings off and on, switching input modes, and checking the buttons and the wires with a multimeter; no problems. Until I swallowed my pride and checked my solder. The terminals were sufficiently wet with solder, no shorts, no cracks, good coverage. I resoldered them anyway, and it fixed it. Even if it looked like a good soldering job, the connection was loose enough to malfunction. So if you ever find yourself in a similar situation, don't rule out the solder job just because it looks perfect. Playing on a 3D-printed leverless fightstick designed from scratch It’s not just great for fighting games I’m honestly surprised by how well I was able to play on this thing. Of course, I started by playing fighting games against my friend who put this whole fighstick idea into my head: Tekken, Smash, Brawlhalla, all good fun. We’re both not very good at fighting games, but I never felt like I had any reason to blame the controller. Using the thumb button as “up” was quite a change; even though I’m very used to using the space bar as jump in many FPS games, I had a hard time adjusting to it in fighting games. It makes me think I should’ve gone with a WASD layout instead of this Hit Box style one that’s used competitively. I could easily change the design in a few minutes in CAD if I really wanted to. There were a myriad of keyboard switches to choose from, but I settled on the Kailh Silent Purple. These switches have a rubber-dampened button-out, but don't feel mushy like rubber dome switches, making them really silent without compromising tactility. Besides fighting games, I decided to try some platformers. I played Dead Cells, The Expendabros, and even some Metal Slug. It made me want to add a way to hook up a phone for a portable arcade machine experience. Maybe printing out another one for some multiplayer action on the fly. After all, it’s smaller than a sheet of A5 and has the potential to be smaller still. Making a leverless fightstick from scratch was worth it For only about $20, this is an awesome controller I honestly got more than I asked for after this build. It's a lot of fun and makes me want to play older games again. If you want to build this yourself, you don’t necessarily have to make your own from scratch. There are plenty of cases, buttons, and layouts on Makerlab and Printables for you to choose from. For me, it was a great learning experience, and I ended up with a fun new toy.
I turned my Raspberry Pi Pico into a leverless fightstick, and it was surprisingly easy
Full Article
Original Source
Read the full article at Xda-developers →KhanList aggregates and links to publicly available news content. We do not host full articles from third-party sources. Always verify important information with original sources.