
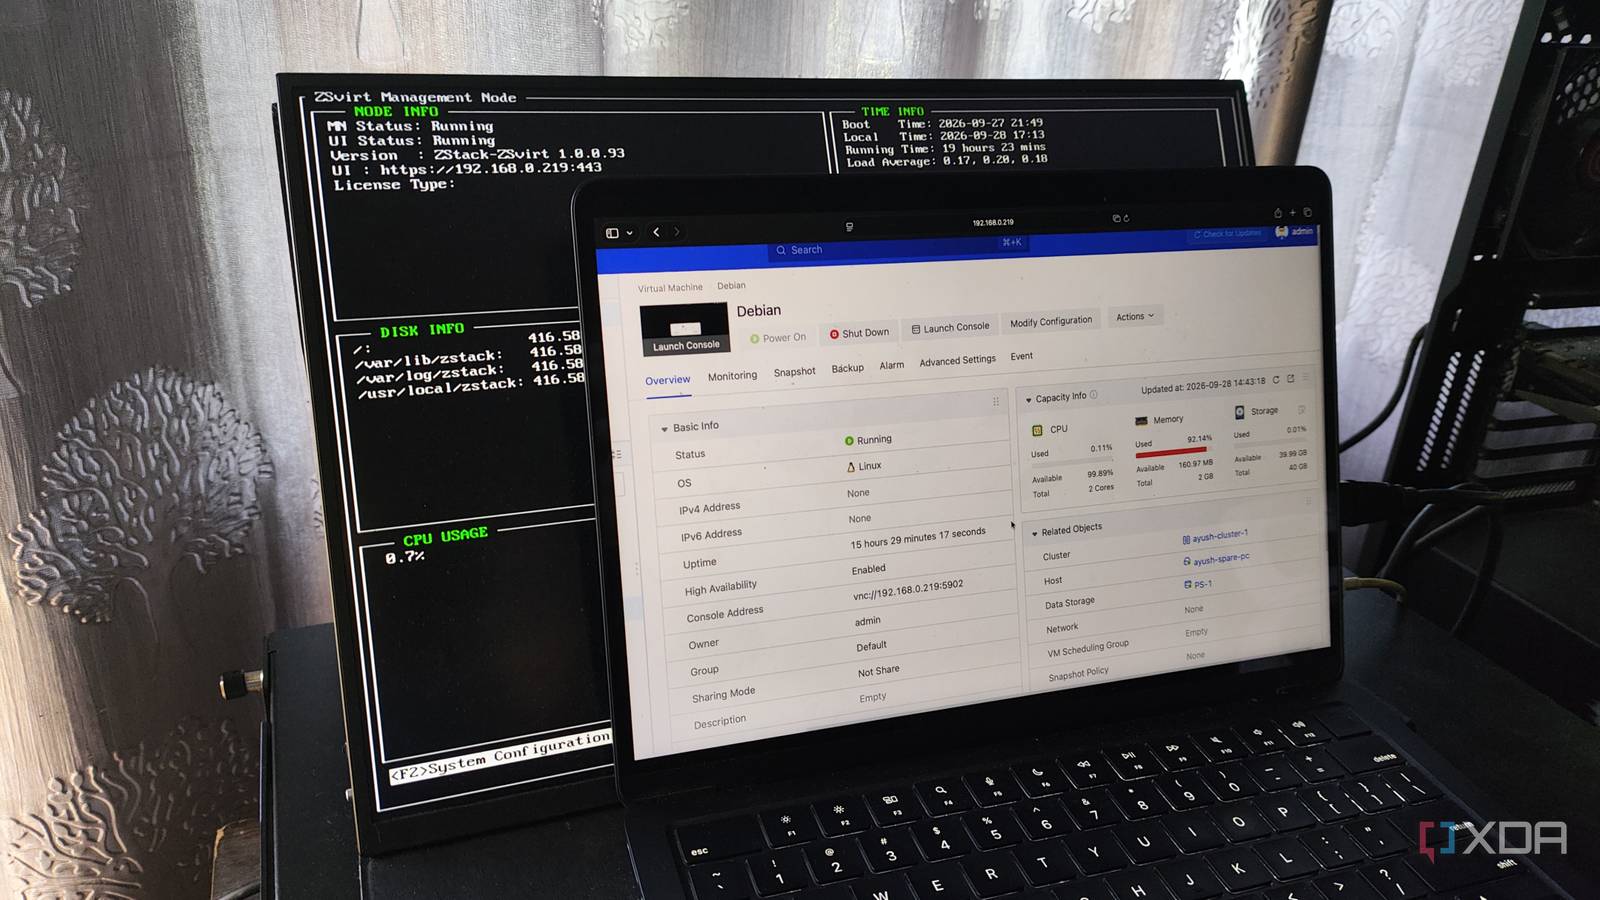
Published Sep 28, 2026, 8:00 PM EDT Ayush Pande is a PC hardware and gaming writer. When he's not working on a new article, you can find him with his head stuck inside a PC or tinkering with a server operating system. Besides computing, his interests include spending hours in long RPGs, yelling at his friends in co-op games, and practicing guitar. I’ve been a fan of Proxmox ever since I first used it with my first ever home server, and my admiration for this virtualization platform has only grown with each passing update. That said, I’m always looking for cool alternatives to try out, and I’ve already gone through everything from popular platforms like ESXi, XCP-ng, Unraid, and Windows Server 2019 to Harvester, ZimaOS, and other obscure PVE rivals. So, you can imagine my enthusiasm when I heard ZStack released their virtualization platform, ZSVirt, under the GNU GPL 3.0 license last month. Since I’m already a fan of open-source utilities, I figured I could use it to replace an existing Proxmox node in my arsenal. And despite my initial hesitation, I had to admit that ZSVirt is an incredible option for a home lab, especially if you’re planning to configure full-fledged high-availability clusters. Note: While I have some clusters in my arsenal, this article is written strictly from the POV of an average enthusiast, not someone who manages entire VM stacks for a living. As such, I’ll only cover ZSVirt’s perks and quirks from the lens of home labbers and average users instead of going over its utility in production-tier setups. It took me half an evening to get ZSVirt up and running Even though the actual installation part didn’t take too long Before I go over my experience with managing VMs via ZSVirt, let me go over the installation process. For the test rig, I decided to go with my Ryzen 5 1600 system, as it sets a decent baseline for the types of outdated machines I often convert into functioning home lab nodes. Besides the first-gen Ryzen processor, the PC has 16GB of DDR4 memory and a GTX 1080, which I often use for Proxmox experiments. Anyway, the installation process went fairly smoothly. Once my PC booted into the installation wizard, I tweaked the user account, password, and storage settings before giving it the A-OK to overwrite my SSD with ZSVirt files. Just like Proxmox, the installation process took about 15 minutes, but little did I know, this was only the first part of the configuration sequence. Once the PC restarted into the ZSVirt boot drive, it took well over thirty minutes to get the sanity checks and package updates out of the way, and only then was I cleared to access the web UI. However, once I’d logged into the online interface, I realized I’d have to go through yet another configuration process for my ZSVirt server. I’d set my PC as the management node earlier, so I had to choose the cluster, host, storage, and network settings. Credit where it’s due, ZSVirt has extensive documentation on the official website, including recommended settings for non-HA cluster setups such as mine. But if we were to compare it with the straightforward setup sequence on Proxmox, ZSVirt’s configuration process is quite the hassle. But when I started creating VMs with ZSVirt, I quickly realized it was worth the extra effort… ZSVirt is laden with all sorts of home lab features Its management UI is extremely detailed I often praise Proxmox for its detailed virtual machine management features, and ZSVirt is no slouch on this front, either. Personally, I think its UI is a tad more difficult to navigate for the average user, as some of the advanced options remain hidden inside a maze of menus. But once I went through the official docs, controlling my VMs became a lot smoother. On the virtual machine front, I can change the resource allocation, console, authentication, and boot settings as I please, and it even includes VMTools to enhance the performance of my virtual guests and enable file-sharing between them and the host hardware. Plus, ZSVirt ships with enough PCI passthrough, resource monitoring, and event logging provisions to satisfy hardcore home labbers. Unlike XCP-ng, which restricts backups on the free, pre-compiled version of its XOA management UI, ZSVirt lets me create backups and snapshots of my virtual machines directly from its web interface. The host settings are just as extensive, and I really appreciate that ZSVirt has an entire tab dedicated to logging and monitoring my systems. I’ll admit that the data and image storage pools were a bit difficult to configure, especially since I’m accustomed to Proxmox handling everything after the initial installation sequence. ZSVirt also has terrific cluster provisions Since we’re on the subject of multiple servers, ZSVirt has a plethora of cluster management tools. The main dashboard is a lot akin to Proxmox Datacenter Manager, as it displays the overarching VM metrics, resource utilization stats, and alerts from my clusters. On the network front alone, I can tinker with distributed port groups, topology charts, uplink configurations, and cluster settings. Similarly, ZSVirt supports NFS and distributed storage pools as well as iSCSI, FC, and other LUN solutions for the data pools, which are handy for HA clusters. The DRS, VM scheduling, and high-availability policies are just as easy to tweak on ZSVirt, and I love that it tracks the actual and overcommitted resource statistics for all cluster nodes. Heck, ZSVirt natively supports Terraform automation pipelines, something that requires additional plugins on Proxmox. Combine that with its straightforward VM migration tools, and it’s an incredible option for cluster-heavy home labs. That said, ZSVirt can’t replace good ol’ Proxmox for my projects PVE is just that good for ordinary home labs such as mine Despite all its perks, I have to admit that ZSVirt can’t replace Proxmox for my home lab. Sure, its cluster management and virtualization provisions are top-notch, but if I wanted to deploy containers, I’d have to rely on nested setups involving resource-hogging VMs. In contrast, Proxmox lets me spin up FOSS services as LXCs, with the PVE Community Scripts repo making this process as simple as running a single command. ZSVirt also needs at least 8GB of RAM on the host system, while Proxmox just needs 1GB for the virtualization platform. In a time when RAM prices have hit unhinged levels, I’d have an easier time repurposing old machines as container-hosting platforms with Proxmox than ZSVirt. Not to mention, ZSVirt has a steeper learning curve than Proxmox, and even with the stellar official documentation, it can’t compete with the massive community support you’ll find in the PVE ecosystem. ZSVirt
I tried replacing Proxmox with an open-source OS you’ve never heard of
Full Article
Original Source
Read the full article at Xda-developers →KhanList aggregates and links to publicly available news content. We do not host full articles from third-party sources. Always verify important information with original sources.