
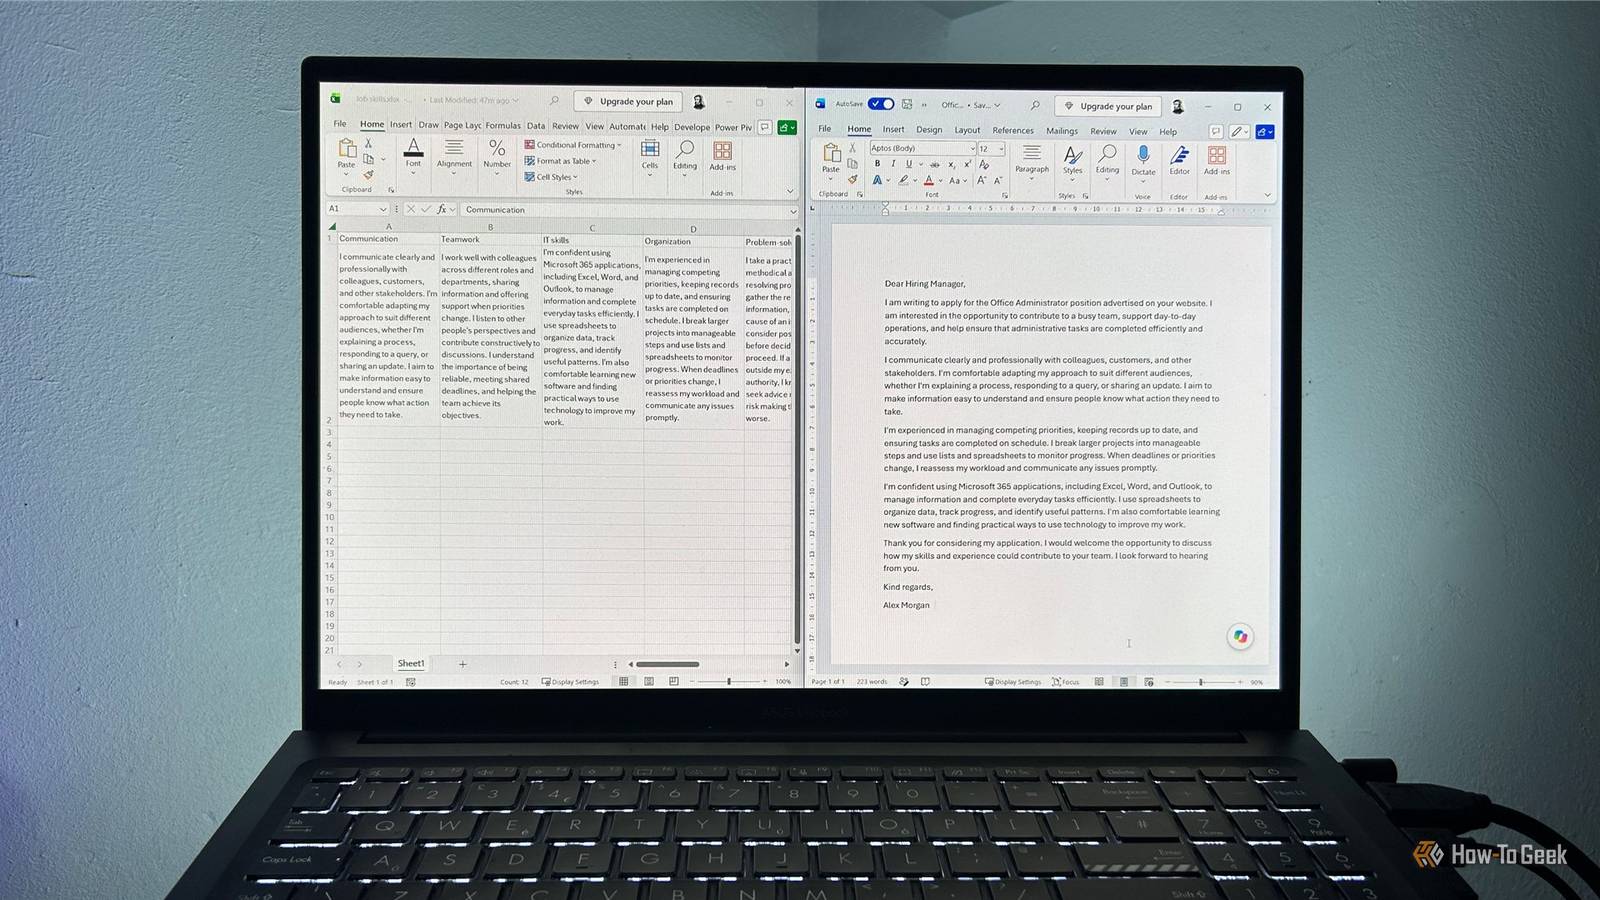
Published Oct 15, 2026, 7:00 AM EDT Tony Phillips is an experienced Microsoft Office user with a dual-honors degree in Linguistics and Hispanic Studies. Prior to starting with How-to Geek in January 2024, he worked as a document producer, data manager, and content creator for over ten years, and loves making spreadsheets and documents in his spare time. Tony is also an academic proofreader, experienced in reading, editing, and formatting over 3 million words of personal statements, resumes, reference letters, research proposals, and dissertations. Before joining How-To Geek, Tony formatted and wrote documents for legal firms, including contracts, Wills, and Powers of Attorney. Tony is obsessed with Microsoft Office! He will find any reason to create a spreadsheet, exploring ways to add complex formulas and discover new ways to make data tick. He also takes pride in producing Word documents that look the part. He has worked as a data manager in a secondary school in the UK and has years of experience in the classroom with Microsoft PowerPoint. He loves to encounter problems in Microsoft Office and use his expertise and legal-level training to find solutions. Outside of the Microsoft world, Tony is a keen dog owner and lover, football fan, astrophotographer, gardener, and golfer. Writing a new cover letter for every job application gets tedious, especially when you're repeating the same points about your skills and experience. AI tools may seem like an easy way out, but you can end up with a letter that doesn't sound like you. Instead, I turn to an underappreciated old-school tool: mail merge. You probably associate mail merge with churning out letters in bulk, but I use it with Excel to store reusable paragraphs about my skills and pull the ones I need into Word for each application. Writing those paragraphs takes a little time, but after that, putting together a new draft takes minutes. Step 1: Build a library of reusable paragraphs in Excel Write about your skills once First, create an Excel spreadsheet containing paragraphs about your skills and experience. Each column should contain a heading describing a skill, with the corresponding paragraph in the cell beneath it. For example, you might have columns for communication, teamwork, IT, and so on. Keep your paragraphs on a single data row—Word treats each row as a separate "recipient," so extra rows will produce extra letters. Write each paragraph as you want it to appear in the finished cover letter. Use complete sentences, keep the tone consistent, and avoid wording that only makes sense in a particular application. The idea is to create polished passages you can reuse and adapt without having to rewrite them every time. Aim for about three to five sentences per paragraph. To keep your spreadsheet readable, select your paragraph cells and click Wrap Text on Excel's Home tab. This keeps long passages within their columns instead of stretching the spreadsheet across your screen. Save the workbook somewhere you can find it easily. Once your library is ready, you can reuse it for future applications and add new paragraphs as your skills and experience grow. Step 2: Connect your Excel spreadsheet to Word Set up your cover letter Close your Excel workbook, then open Word and start a new document. Write the opening of your cover letter, leave a blank line for the merge fields, then write your closing. I prefer to write these parts manually so I can address the specific job and explain why I'm interested in it. You should still tailor your application—the point is to avoid rewriting material that already says what you need it to say. Next, go to the Mailings tab on the ribbon, click Select Recipients > Use an Existing List, then find and select the Excel workbook containing your paragraphs. When Word asks which sheet to use, select the one containing your paragraphs and make sure First row of data contains column headers is checked. Word uses your spreadsheet's column headings as the names of the fields you can insert into the letter. In this example, those fields are communication, teamwork, IT skills, organization, problem-solving, and attention to detail. Step 3: Insert the paragraphs you need for each application Choose the skills that match the job Read the job description and decide which paragraphs best demonstrate that you're a good fit. You don't need to include every paragraph in your spreadsheet—choose the ones that are relevant to the role. Place your cursor in the line you left blank. Then, on the Mailings tab, click Insert Merge Field, then select the relevant skill. Word inserts a field with that name in chevrons (« ») into your document. Repeat this for each paragraph you want to include, pressing Enter between each entry and placing the fields in the order that makes the most sense for your letter. You can mix and match these paragraphs for different applications. One job might call for more emphasis on communication, while another might put your technical skills front and center. Step 4: Preview and polish your cover letter Make sure the finished letter reads naturally Once you've inserted the fields you need, click Preview Results on the Mailings tab. Word replaces the fields with the actual paragraphs from your Excel spreadsheet, so you can see how the assembled letter reads. If a paragraph looks cut off, split it across two columns in Excel (see the note below on updating your library), then insert both fields, either one after the other with a space between them or on separate lines. Don't edit the letter while Preview Results is enabled. Any changes you make there will disappear when you switch preview off, so you'll lose your work. Instead, create a separate, editable copy. To do this, go to Finish & Merge > Edit Individual Documents, select All (the default option), then save the resulting letter under a new filename. The new document contains the merged text as plain content, so it's no longer linked to Excel and you can edit it freely. Keep your original template so you can reuse it for your next application. Read the new document from beginning to end. Check that the paragraphs flow naturally, that you haven't repeated yourself, and that each one is relevant to the job. Treat the merged letter as a first draft, not a finished application: adjust transitions, add specific examples, and tailor the wording to the role and employer. For your next application, the process is much simpler: reopen your original template, update the introduction and closing, and adjust the merge fields to suit the job. Then repeat the preview and editing process. If you need to edit existing paragraphs in Excel or add new skills to your library, first save and close your Word template. Otherwise, Excel might open the connected workbook in read-only mode. Then, make your changes, save and close the workbook, reopen the template and, when prompted, confirm that you want to retrieve the workbook data. If you don't see the prompt, or your changes don't appear, go to Mailings > Select Recipients > Use an Existing List and select the workbook again. Let Excel handle the repetition In a world where new technology seems to arrive every week, there's something refreshing about finding a new use for an old tool. Mail merge might have been designed for bulk correspondence, but pairing it with Excel gives you a practical way to reuse your writing while keeping everything in your own voice. And if you're also using Excel to manage your job search, my job tracker helps you keep tabs on where you've applied, upcoming follow-ups, and how each application is progressing.
I stopped writing cover letters from scratch by pairing Excel with Word
Full Article
Original Source
Read the full article at Howtogeek →KhanList aggregates and links to publicly available news content. We do not host full articles from third-party sources. Always verify important information with original sources.