
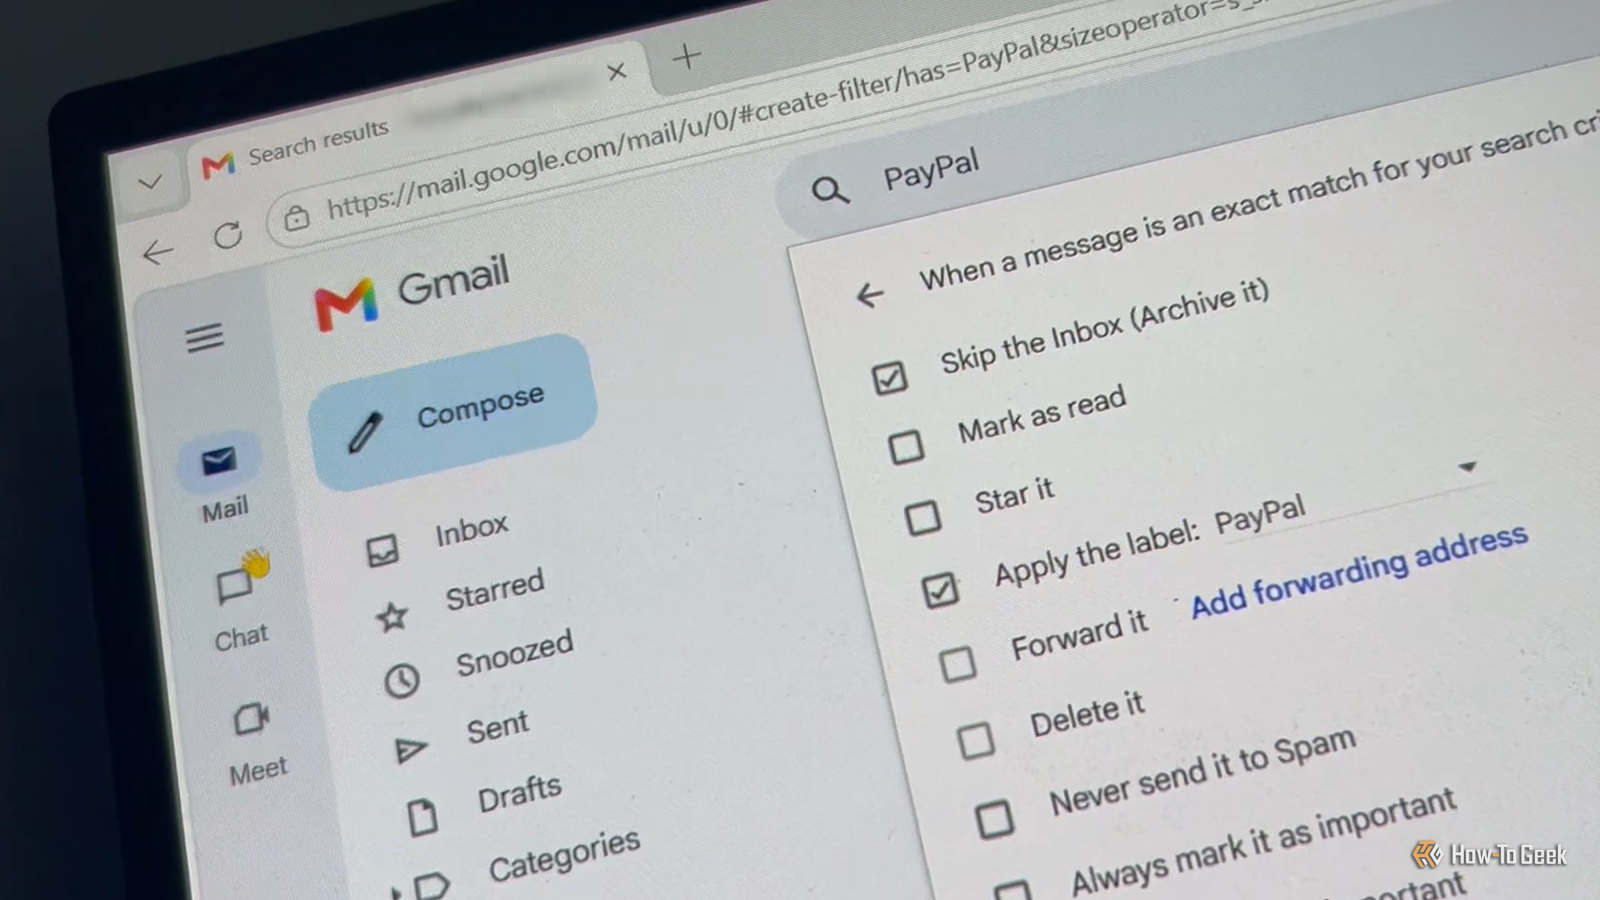
Published Aug 11, 2026, 8:30 AM EDT Tony Phillips is an experienced Microsoft Office user with a dual-honors degree in Linguistics and Hispanic Studies. Prior to starting with How-to Geek in January 2024, he worked as a document producer, data manager, and content creator for over ten years, and loves making spreadsheets and documents in his spare time. Tony is also an academic proofreader, experienced in reading, editing, and formatting over 3 million words of personal statements, resumes, reference letters, research proposals, and dissertations. Before joining How-To Geek, Tony formatted and wrote documents for legal firms, including contracts, Wills, and Powers of Attorney. Tony is obsessed with Microsoft Office! He will find any reason to create a spreadsheet, exploring ways to add complex formulas and discover new ways to make data tick. He also takes pride in producing Word documents that look the part. He has worked as a data manager in a secondary school in the UK and has years of experience in the classroom with Microsoft PowerPoint. He loves to encounter problems in Microsoft Office and use his expertise and legal-level training to find solutions. Outside of the Microsoft world, Tony is a keen dog owner and lover, football fan, astrophotographer, gardener, and golfer. For years, I tried to organize my Gmail inbox after emails arrived. A few labels and filters changed that completely: I cleaned up old messages, automated the emails I receive every day, and now spend far less time filing things away manually. I set this up using Gmail in a desktop web browser. While labels and filters apply across your account, some options and notification behavior can differ in the Gmail mobile apps. Gmail labels work differently from folders One email can belong to multiple categories I spent a long time treating Gmail labels like traditional folders. I would create a category, move messages into it, and repeat the process whenever a new type of email appeared. But Gmail labels aren't really folders. They work more like tags, allowing the same email to belong to multiple categories at the same time. Messages that arrive in your inbox have the "Inbox" label by default, which you can see by opening the email and looking next to the subject line. Applying a custom label adds another category on top of that—it doesn't remove the "Inbox" label. For example, an email from PayPal can have the "Inbox" label, a broad "Money" label, and a specific "PayPal" label all at the same time. That means I can find it under any of those labels without creating duplicate copies. However, if you drag an email from your inbox into a label, Gmail removes the "Inbox" label altogether while retaining any other labels already attached. For example, dragging the PayPal email into the "Money" label removes the "Inbox" label, but keeps the "Money" and "PayPal" labels. Once you understand that distinction, filters make much more sense. Instead of manually applying labels to every email, they automate the process of categorizing messages and deciding whether the Inbox label should remain. Gmail filters can label your existing emails Clean up years of messages without selecting them one by one Labels make emails easier to categorize, but manually applying them soon becomes another chore. Filters solve that problem by applying labels automatically. There are several ways to create a filter, but I prefer to start with Gmail's search bar. It lets me check exactly which messages Gmail will affect before I turn that search into a rule: Search Gmail for the type of email you want to organize, and review the results and refine your search if necessary. Click the Show search options button in the search bar. Click Create filter. Check Apply the label and select an existing label or create a new one. This method applies one label per filter, but you can create additional filters using the same search criteria if you want to apply more labels. Check Also apply filter to matching conversations, so the filter applies to existing emails as well as incoming ones. Now, when you click Create filter for a second time to confirm, Gmail applies the label to match existing emails and automatically labels future messages that meet the same criteria. Once you've done this for one label, repeat the process for the other types of emails you want to organize, like receipts, newsletters, travel confirmations, and two-factor authentication emails. If you want the same emails to receive more than one label, create another filter using the same search criteria and apply the additional label. Setting everything up can take some time, but the advantage is that you can clean up emails that have built up over years without manually selecting hundreds of messages. Gmail filters can keep your inbox tidy Decide which messages stay visible Applying filters is only half of the solution. At this stage, my emails are correctly labeled, but they are still appearing in my inbox. To stop this from happening, I can optionally tell Gmail to remove the Inbox label automatically. I'm showing how to add this setting to an existing filter, but you can also enable it during the initial filter setup. After clicking Show search options and choosing Create filter, you'll find this option alongside the other filter actions. To edit an existing filter: Click the Settings cog and select See all settings. Open Filters and blocked addresses. Find the relevant filter and click Edit. Click Continue. Then choose how Gmail should handle matching emails: Check Skip the Inbox (Archive it). Check Also apply filter to matching conversations if you want Gmail to apply this change to matching emails that are already in your account. Click Update filter. After this, any matching emails disappear from my inbox because Gmail removes the "Inbox" label. And crucially, the next PayPal email I receive will automatically get the filtered labels, bypassing my inbox entirely. Be careful when you skip the inbox It's worth thinking carefully about which messages you want to apply this setting to. Archived emails are still searchable and remain available under their labels, but they no longer appear in your inbox. In my setup, this also means I don't get notifications for them on my devices. But that trade-off works for me. My workflow is to filter incoming email into labels and regularly check the left-hand label pane for anything that needs attention. Gmail shows labels in bold when they contain unread messages, which gives me a quick way to see what's arrived. If a message arrives that doesn't match one of my existing filters, it remains in my inbox until I decide where it belongs. Over time, those exceptions help me identify new categories that might be worth creating filters for. You don't have to automate everything. If you want certain emails to remain visible in your inbox, you can apply a label without selecting Skip the Inbox. My Gmail inbox finally runs itself For years, I treated my inbox like a filing cabinet, sorting messages after they arrived. The biggest change was letting Gmail handle the repetitive work for me. Labels organize messages, filters apply the right rules automatically, and I spend far less time deciding where every email belongs.
I spent years organizing Gmail the hard way. Filters changed everything
Full Article
Original Source
Read the full article at Howtogeek →KhanList aggregates and links to publicly available news content. We do not host full articles from third-party sources. Always verify important information with original sources.