
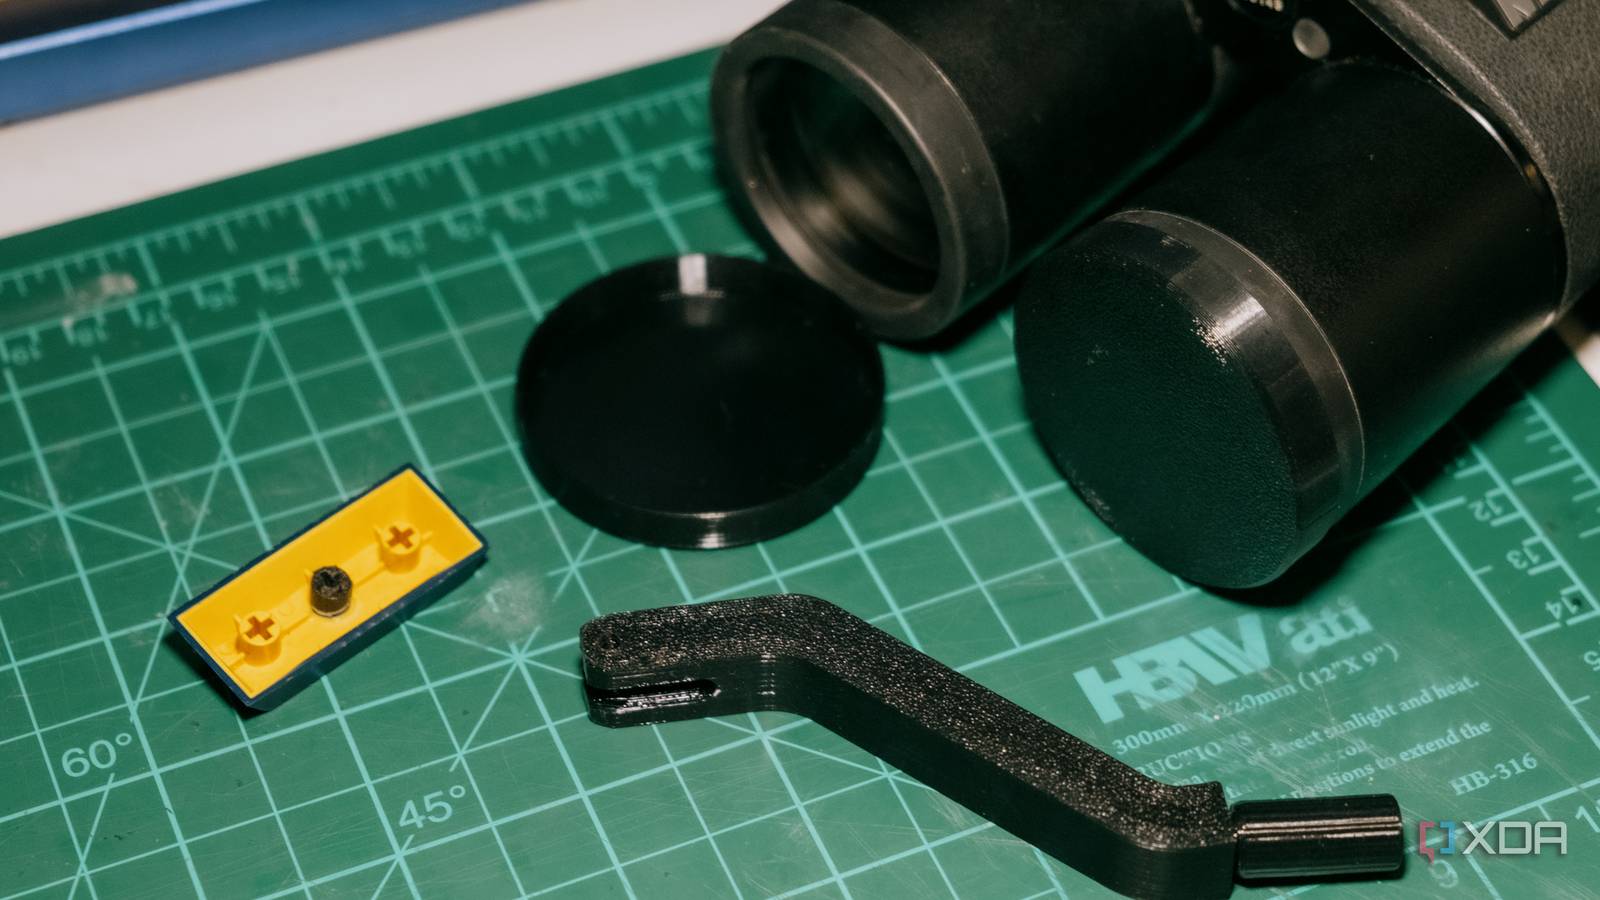
Published Sep 13, 2026, 11:00 AM EDT Jhet has gamified his life as a skill collector. He has skills ranging from woodworking and leatherwork all the way to CAD and electronics. He loves optimizing and customizing his experience with his stuff; fixing, modifying, and optimizing them to fit his needs. He has previously written for MakeUseOf.com and showcases his projects on his TikTok and YouTube channels. He is also an avid PC gamer with over 4000 hours in various FPS games and aim trainers. There are many small parts in the things we buy that break, and you often can’t buy just that one part. I’ve avoided buying whole new items because I can fix them with a 3D-printed replacement. It’s also especially great for rare and discontinued products, avoiding the hunt and price premium for them. My left shift key, saving me $50 or more It’s priceless if you can’t find original replacements Keycap stems can wear down over time with repeated use, especially when held down hard for long periods. I managed to reinforce the cracks on the stabilizer stems, but the switch stem crumbled and needed replacing. I drilled away the remaining stem with a rotary tool, getting the bottom as flush as I could. I tried to align it manually on my first attempt, but that caused the stem to be slightly askew and bound up the stabilizers; it was very fatiguing on the pinky. On my second attempt, I remodeled it with a closed top so I could mount the stem onto the switch first, then dab a little CA glue onto the printed part, and then quickly mount the keycap over the stabilizers so it’s perfectly aligned as the glue sets. This worked perfectly. My keycaps are no longer in production, and even knock-offs that match the original’s colors are hard to come by. An original set of just the modifier keys would’ve cost $50 when they were in group buy. This print saved me from having to scour the market and find rare replacements that might even cost more than SRP. If you don't care about preserving your original keycaps, you could just print your own keycaps. My missing hubcaps for $20 You don’t always have to reprint mistakes I’m the third owner of my car, and it only came with one remaining hubcap. I lived with this for a while until I got my resin printer. This was one of the first projects I worked on for my car. The modeling process was pretty straightforward; just measure everything and put it into CAD. The Mitsubishi logo was especially fun to model; I used to draw it as a child using a ruler, and now I actually get to use that practice in real life. Resin can show fine and crisp details, and you won't get the stair-stepping on the curved surface, so it's perfect for this application. I did mess something up, though; the curved shape made the snap-fit features too narrow since I followed the curvature instead of specifying its own angle. However, I decided not to print a new one because resin printing is a pain to deal with. I went ahead and painted it white to match my wheels, and then used a silicone putty to stick it on. Camera tripod elevator crank handle for $10 Making sure the replacement is stronger than the original This Sony tripod has been missing the crank handle for a few years, making it frustrating to raise and lower. I’ve only recently made a fix for it after years of just dealing with it. You can buy replacement handles for many tripods, but many tripods don’t have replacement handles for sale. In modeling this, I added an angle and offset so it doesn't bump into the tripod legs. I also modeled it in three separate pieces so they can be printed in their best and strongest orientations. After a test fit, I realized a bit of the end was preventing the rod from going through; after a quick trim with a box cutter, the metal nail goes straight through. This was printed in PETG since it's a functional part that sees a lot of use. The old crank just used plastic detents, and while this made it cheaper to produce and easier to assemble at the factory, it makes for a common failure point. Using a nail ensures that failure point is extremely strong. Headband retaining clips for my headphones for $10 Some parts could even make you money The Philips SHP 9500 is one of the most popular budget open-back headphones, and it features a removable headband cushion so you can wash it separately. The only problem is that the retaining clips for the headband are easily broken. I have two friends who also have the same headphones, and they faced the same problem. I’m the go-to 3D printing guy amongst our friends, so they sent me a model they wanted me to print, and it was horrible; it wasn’t even symmetric. I took matters into my own hands and measured the remaining unbroken clip I had and modeled it, beefing up the snap-fit features to make sure it wouldn’t snap easily. I tested it by repeatedly removing and installing them, and they’ve held up well. This not only saved me money, but it actually made me money after my friends paid me; and mine is much stronger than what you can buy on the market. Lens covers for my vintage binoculars It’s better to print what you can’t buy at all I enjoy collecting old, high-quality binoculars from popular camera brands. I currently have two Nikon binoculars from the 80s, and one 2000s image-stabilizing pair of binoculars from Canon. I buy them from Japan surplus shops, and they’re often missing their lens caps. This is by far the easiest on this list, as it’s just a bunch of shallow cups of varying sizes. It’s as simple as grabbing a pair of calipers and measuring the diameter, then offsetting them by the wall thickness desired. I printed a total of eight caps for two of my binoculars, and from opening up Fusion to putting them on my binoculars, it only took a total of an hour and 30 minutes; an hour of which was spent waiting for the print. It’s hard to put a price on this, as I don’t think there’s a market for specific models of discontinued binoculars, but there is other value in having lenses properly protected from scratches and dust. A 3D printer is an appliance of the future 3D printers used to be novel pieces of tech, reserved only for DIYers and tinkerers. However, 3D printers are much cheaper and can produce quality parts that can help you save money and keep broken items out of the trash. You may need to learn CAD, but you can also buy or download models for free, or even hire someone to make them; so before you throw something away, think about how you might get it working again by printing a fix.
I saved over $100 by 3D printing these 5 replacement parts
Full Article
Original Source
Read the full article at Xda-developers →KhanList aggregates and links to publicly available news content. We do not host full articles from third-party sources. Always verify important information with original sources.