
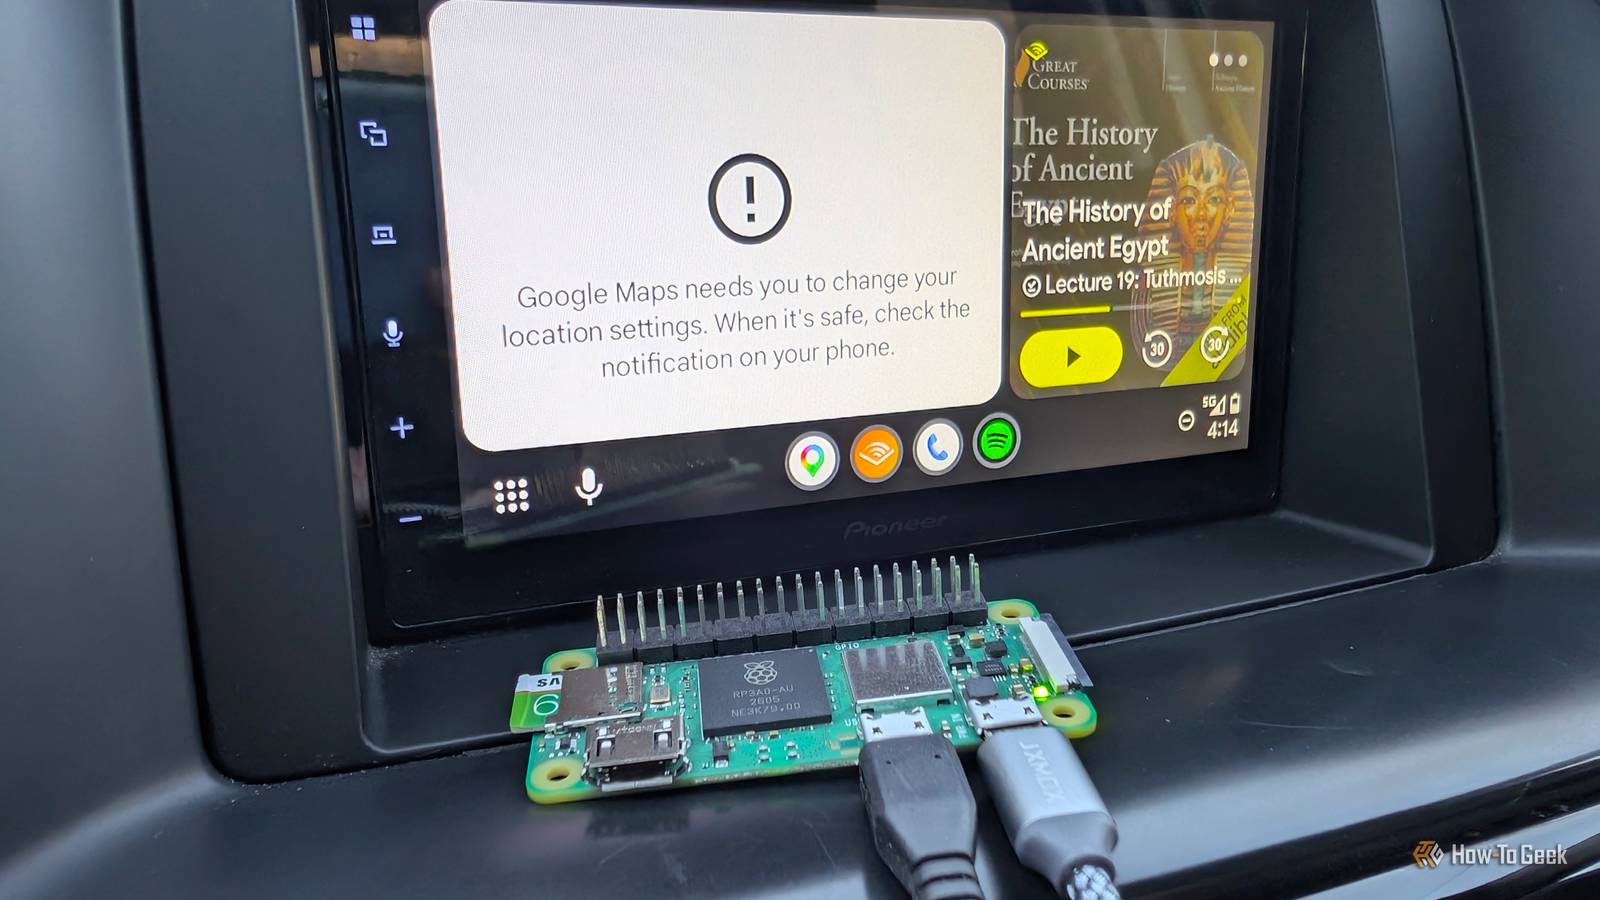
Published Nov 3, 2026, 10:00 AM EST Nick Lewis is an editor at How-To Geek. He has been using computers for 20 years --- tinkering with everything from the UI to the Windows registry to device firmware. Before How-To Geek, he used Python and C++ as a freelance programmer. In college, Nick made extensive use of Fortran while pursuing a physics degree. Nick's love of tinkering with computers extends beyond work. He has been running video game servers from home for more than 10 years using Windows, Ubuntu, or Raspberry Pi OS. He also uses Proxmox to self-host a variety of services, including a Jellyfin Media Server, an Airsonic music server, a handful of game servers, NextCloud, and two Windows virtual machines. He enjoys DIY projects, especially if they involve technology. He regularly repairs and repurposes old computers and hardware for whatever new project is at hand. He has designed crossovers for homemade speakers all the way from the basic design to the PCB. Nick enjoys the outdoors. When he isn't working on a computer or DIY project, he is most likely to be found camping, backpacking, or canoeing. Plenty of cars and aftermarket head units from the last decade support Android Auto, but many of them require a USB connection to work. There are commercial wireless adapters, but they start at around $30; some cost significantly more. I built a cheaper alternative using an old Raspberry Pi Zero 2 W—which cost $15—and an open-source project. The entire thing took less than an hour and worked perfectly. How does a Pi Zero 2 W enable wireless Android Auto? The Pi becomes an intermediary In order to enable wireless Android Auto, you effectively turn the Pi Zero 2 W into an intermediary by flashing an open-source project called WirelessAndroidAutoDongle. WirelessAndroidAutoDongle is basically a tiny, purpose-built Linux image that contains a kernel, Wi-Fi and Bluetooth drivers, and a bit of software to handle relaying information between your phone and your Android Auto head unit. In practice, all you need to do is connect your Pi to your head unit via USB and your phone over Bluetooth and Wi-Fi. It can then send Android Auto's data back and forth as needed. A few Pis don't work I'm using a Pi Zero 2 W because I had a spare on hand, but you aren't limited to that. WirelessAndroidAutoDongle works with: Raspberry Pi Zero W Raspberry Pi Zero 2 W Raspberry Pi 3 A+ Raspberry Pi 4 Even if I'd had my choice of Pis for this project, I'd still have opted for the Pi Zero 2 W. It is small, consumes relatively little power, and isn't expensive. When you can find it in stock, the Pi Zero 2 W still costs $15, and you only need an 8GB microSD card. The Pi Zero W would also work, but I'd be concerned about a CPU bottleneck in some situations. The Pi 3 A+ and the Pi 4 are both large, power-hungry, and "overkill" for this project. Building a Pi-based wireless Android Auto dongle Make sure to use the right USB port on a Pi Zero 2 W To begin, you'll need a supported Raspberry Pi, a microSD card, and a microUSB cable that supports data (for a Pi Zero or Zero 2 W.) If you try to use a charge-only cable, this will not work. The Pi needs to be able to communicate with the head unit using USB. Begin by downloading the image from the WirelessAndroidAutoDongle release page. The image comes compressed as an XZ file, so you'll need to decompress it first if you're using anything other than Raspberry Pi Imager. With the image extracted, open up the Raspberry Pi Imager (or the software of your choice), select the Pi you're using, and then select Use custom at the bottom of the list of images. Use the browser to point to the image file you just extracted, then follow the steps. Once you've finished burning the image, you can open up the microSD card and edit aawgd.conf to change your Wi-Fi country code. Now, pop the microSD card into the Pi you're using and bring it, your phone, and a microUSB cable to your car. Connecting your Pi and your phone to your car You only need to pair once Once you're in your car, plug the microUSB cable into the centermost microUSB port of the Pi Zero 2 W. If you look carefully on the silkscreen (the writing on the PCB), the microUSB port you want to use is labeled USB. That port is the one that can handle data and allows your Pi to connect using USB On-The-Go (USB-OTG). USB-OTG allows your Pi to act like a device that has been connected rather than a separate computer. Then, pair your phone with the Pi over Bluetooth first. The Bluetooth connection you're looking for will be named something like "WirelessAADongle-####," where the hashtags are replaced by letters and numbers. It may also appear as AndroidAuto-Dongle. Once paired over Bluetooth, your phone will automatically connect to the Pi's Wi-Fi network and Android Auto will appear on the head unit. If you get a "Looking for Android Auto" message, I'd recommend swapping the cable first. If you try to connect to the Wi-Fi network and are prompted for a password, that means you need to retry the Bluetooth connection again. My current setup sits on the dash, but you could also stow a Pi Zero 2 W behind the head unit (if it has a USB connector back there) or in your center console. A Pi makes a reliable Android Auto dongle Much to my surprise, the Pi Zero 2 W dongle worked perfectly for the entire time I tested it. In total, I turned my car (and the Pi) on and off more than 20 times. It worked correctly every single time, and without much delay either. In fact, Android Auto appeared immediately once my head unit started up, which means that the Pi actually boots and connects faster than my car's head unit can start. I didn't notice any lag while navigating, listening to music, or using speech-to-text. If you want wireless Android Auto and you have a spare Raspberry Pi Zero 2 W available, I'd strongly recommend trying it. It has been every bit as reliable as a commercial unit.
I made my car’s Android Auto wireless with a $15 Raspberry Pi in under an hour
Full Article
Original Source
Read the full article at Howtogeek →KhanList aggregates and links to publicly available news content. We do not host full articles from third-party sources. Always verify important information with original sources.