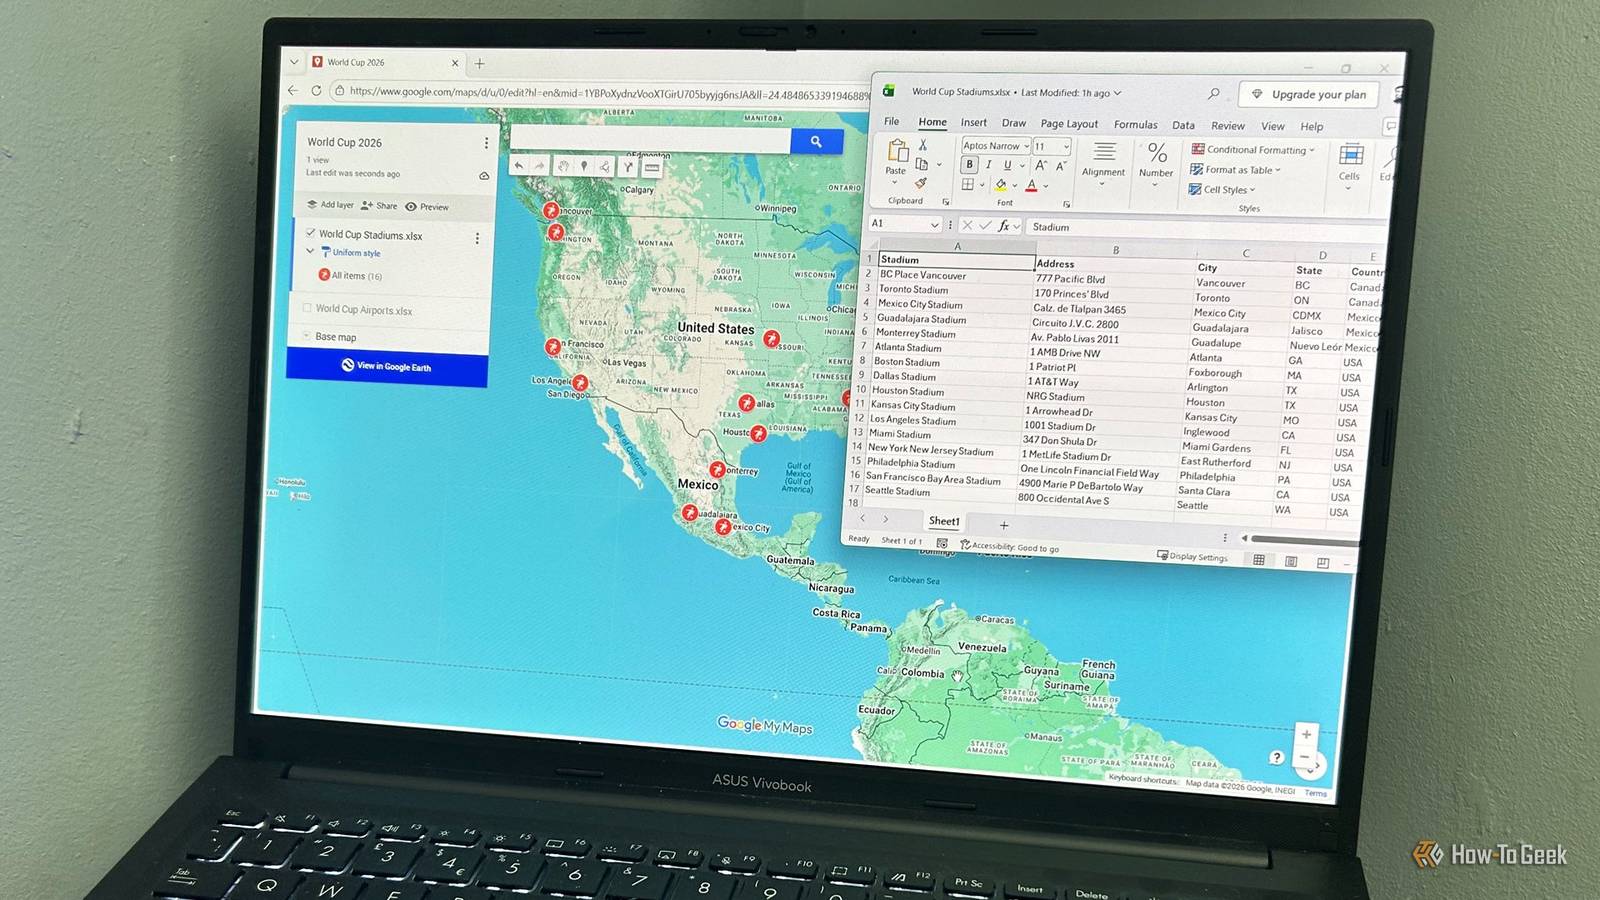
Published Jul 29, 2026, 1:00 PM EDT Tony Phillips is an experienced Microsoft Office user with a dual-honors degree in Linguistics and Hispanic Studies. Prior to starting with How-to Geek in January 2024, he worked as a document producer, data manager, and content creator for over ten years, and loves making spreadsheets and documents in his spare time. Tony is also an academic proofreader, experienced in reading, editing, and formatting over 3 million words of personal statements, resumes, reference letters, research proposals, and dissertations. Before joining How-To Geek, Tony formatted and wrote documents for legal firms, including contracts, Wills, and Powers of Attorney. Tony is obsessed with Microsoft Office! He will find any reason to create a spreadsheet, exploring ways to add complex formulas and discover new ways to make data tick. He also takes pride in producing Word documents that look the part. He has worked as a data manager in a secondary school in the UK and has years of experience in the classroom with Microsoft PowerPoint. He loves to encounter problems in Microsoft Office and use his expertise and legal-level training to find solutions. Outside of the Microsoft world, Tony is a keen dog owner and lover, football fan, astrophotographer, gardener, and golfer. I use Excel for pretty much everything. So when I wanted to keep track of the 2026 FIFA World Cup stadiums, my first instinct was to open a spreadsheet and start building a list. The problem was that a table full of addresses didn't give me a clear picture of where those venues actually were. That's when I discovered Google My Maps could turn my Excel file into something far more useful: an interactive map with custom markers, photos, and shareable links. After seeing how well it worked, I've since used the same idea for everything from planning trips to organizing customer visits and keeping track of places I need to revisit. Get your spreadsheet ready first Clean data makes better maps Google My Maps uses your column headings during the import process, so setting up your spreadsheet properly saves a lot of hassle. You can download my spreadsheet if you'd like to follow along. When you click the link, you'll find the download button in the top-right corner of your screen. If you're starting from scratch, use my layout as a guide when setting up your own sheet. Following these rules of thumb helped me ensure the import would run smoothly: Keep data on one sheet: All data meant for a single map layer must live in one worksheet. Include clear headers: Your top row needs distinct column headers, so Google knows which column holds address info and which holds names. My sheet contains five columns: Stadium, Address, City, State, and Country. Each row represents one location. Provide sufficient detail: In many cases, providing just a city and country is enough. However, including the full street address reduces ambiguity. Once everything is set up, save your workbook. Microsoft 365 Personal OS Windows, macOS, iPhone, iPad, Android Free trial 1 month Microsoft 365 includes access to Office apps like Word, Excel, and PowerPoint on up to five devices, 1 TB of OneDrive storage, and more. Import your spreadsheet into My Maps Google does the hard work If your Excel workbook contains multiple sheets, Google My Maps imports data from the first sheet by default. Once you've checked that the data you want to import is at the front of your workbook, open your browser, navigate to Google My Maps, and sign in with your Google account. Then: Click Create a New Map in the top-left corner. Click Import under the Untitled layer panel. Click Browse to select a file from your computer, or drag your saved XLSX file into the box. Google asks you two quick questions to identify your location columns and marker names: In the first pop-up, check the boxes for the columns that define your locations (like Address, City, State, and Country), then click Continue. In the second pop-up, select the single column you want to use for naming your map markers (for this project, the Stadium column). Click Finish to process the file. Your spreadsheet entries will now appear as individual markers on the map. Customize your map beyond the basics Stand out at a glance A sea of default blue pins isn't much easier to scan than an Excel sheet. To make the map visually useful at a glance, you can change how those markers look. By clicking the paint bucket icon next to All items, you can change the color and shape of all placemarks at once. In my project, I switched the markers to soccer player icons to match the tournament theme. However, if your spreadsheet contains different categories—like customers, stores, and suppliers—you can style by column instead. Simply select an individual marker and click the Edit icon to give specific locations their own color or icon. With an individual item's detail card still open, you can also add an image or video, get directions to that location, or delete the marker altogether. I added photos of the stadiums so anyone exploring the map could immediately picture the venue. I also tested adding stadium names as labels (Uniform style > Set labels > Stadium). However, because you can't turn off the default place labels, the map quickly became too cluttered, so I decided to leave custom labels disabled for this project. Finally, I switched the Base map to Terrain view. This wasn't essential, but I liked how it made the landscape around some of the venues easier to visualize. Your map doesn't have to stop at the initial import Expand your project Once your main dataset is on the map, you can add extra information or adjust your entries as you go. Add another layer I realized I also wanted to see which airports were closest to each venue. To do this, I created a second Excel workbook containing airport addresses and imported it as a new layer: Click Add layer in the left panel. Click Import under the new layer box. Select your second Excel file, then repeat the same import steps as earlier to choose your location columns and marker names. Google My Maps names each layer using the imported file name, so I made sure my workbooks had clear names before importing them. That gave me separate Stadiums and Airports layers on the same map, which I could toggle on and off by clicking the checkbox next to each layer whenever I needed a cleaner view. Edit the imported data Whether you want to correct a typo or add another entry, updating your local Excel file won't change what's on the map. Instead, you can make edits right inside your browser: Click the three dots next to a layer name. Select Open data table. Click inside any cell to edit text. Right-click a row to delete it or add another one above. If you make several changes to your Excel file after importing it, you don't need to start over. Click the three dots next to your layer, hover over Reimport and merge, and follow the prompts to update your map with the latest data. Choose who gets to explore it Once everything looks right, name your map and decide who gets access to it: Click Untitled map to rename it. Click the Share button beneath the title. Enable Anyone with this link can view if you want people with the URL to access your map. Turn on Let others search for and find this map on the internet if you want it to be publicly discoverable. Click the Copy Link icon to share your map, or select Share on Drive to add specific people and manage who can view or edit it. A spreadsheet can be more than a grid I started this project just wanting a better way to view World Cup stadium locations, but I ended up finding a useful new way to work with any spreadsheet built around places. If you'd rather keep everything inside Excel, however, you can use Excel's 3D Maps feature to explore geographic data and create interactive tours without leaving your workbook.
Google Maps took my Excel spreadsheet to the next level with this little-known tool
Full Article
Original Source
Read the full article at Howtogeek →KhanList aggregates and links to publicly available news content. We do not host full articles from third-party sources. Always verify important information with original sources.