
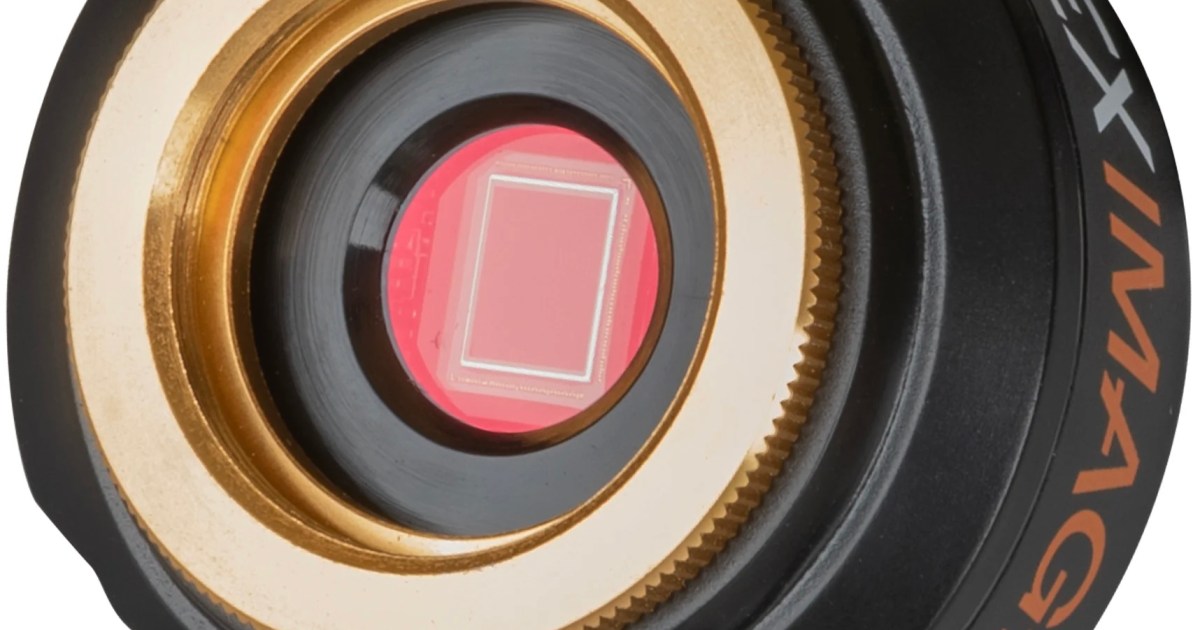
Credit: Celestron Since their debut nearly two decades ago, Celestron’s NexImage cameras have introduced many amateurs to solar-system astrophotography. Starting as modified webcams, the series evolved with higher resolution, faster frame rates, and improved sensitivity, culminating in models like the NexImage 5 and 10 — and now, the NexImage 20. Celestron’s latest incarnation continues that tradition, pushing the family firmly into the modern era of high-resolution CMOS (complementary metal-oxide semiconductor) sensors and high-speed data transfer, while keeping the simplicity that has always made the line so popular. Under the hood Built around an Onsemi AR2020 20-megapixel CMOS sensor, the NexImage 20 is, at its heart, a small USB camera optimized for close-up work on the Moon, planets, and the Sun. Physically, the NexImage’s sensor is housed in a compact ABS plastic body measuring only 1.87 inches (4.8 centimeters) in diameter and weighing just 2 ounces (57 grams) with an aluminum connection ring and an optical window that includes a built-in IR-cut filter. The filter helps to produce sharp, true-color images. The camera ships with a 1¼” nosepiece that threads onto the camera via a connection ring. It also includes a 10-foot (3 meters) USB-A-to-USB-C cable for powering the camera directly from the computer. That means you don’t need to add a separate power supply to the list of equipment you need to bring outside. The NexImage 20’s high-speed USB 3.0 connection delivers maximum frame rates with minimal latency. This combination of fast data transfer, a sensitive modern sensor, and small pixels designed to capture fine detail places the camera among today’s leading solar system imagers. Its straightforward mechanical interface also makes it easy to use, whether you simply slide it into a 1¼” focuser or attach it by C-thread for a more permanent setup. The NexImage 20’s sensor measures about 7.3 by 5.4 millimeters and delivers a 5240×3840 active-pixel array for 20-megapixel resolution. Each 1.4-micrometer pixel enables extremely fine sampling at long focal lengths, ideal for capturing subtle details under steady seeing. Its back-illuminated design boosts sensitivity, revealing faint cloud bands on Jupiter and delicate lunar shading. Dark filaments arc across the chromosphere, tracing the Sun’s complex magnetic field structure, in this image taken with the Celestron NexImage 20. Credit: Phil Harrington Software and setup Like all of Celestron’s planetary cameras, the NexImage 20 operates with a computer running the company’s iCap software and requires a true USB 3.0 connection for full data speed. A Windows 10 or 11 system is recommended. The telescope should be on a stable tracking mount to keep the target centered during capture. Achieving critical focus is vital; a Bahtinov mask or fine-focus knob helps. The NexImage 20 can also serve as an autoguider, extending its usefulness beyond lunar and planetary imaging. I encountered one glitch — caused by Windows, not the NexImage. Following the NexImage 20’s setup instructions, I installed the driver and iCap software. But I kept getting an error saying, “Live mode cannot be started.” After some digging, I discovered that updating the driver in Windows Device Manager moved the NexImage from “Cameras” to “Imaging Devices.” Problem solved. If you encounter the same issue, this fix should resolve it. Getting started is straightforward. After attaching the camera in place of an eyepiece, connect it to the computer and launch iCap. While iCap offers auto control settings, I found that manually setting exposure time, gain, and frame rate resulted in better results. In practice, this translates into surprisingly crisp live views that make focusing and framing easy, even before any processing. The software also offers a region-of-interest (ROI) function, which allows you to crop the active area of the sensor to increase the frame rate and later shorten processing speed when stacking images. This feature is especially useful when capturing the planets, as it concentrates bandwidth on the portion of the frame that matters. Typical exposure times range from fractions of a millisecond for bright lunar targets to several tens of milliseconds for dimmer planets. Adjust gain so that the image remains well below saturation, ensuring that bright regions retain their structure without washing out. Crater rays stretch outward from the rim of Copernicus Crater, one of the Moon’s most recognizable geological features, in this image captured by the Celestron NexImage 20. Credit: Phil Harrington. Getting the most from your data Like most high-resolution planetary cameras, the NexImage 20’s field of view is optimized for close-up work, so full-disk lunar or solar images may require mosaics. By capturing multiple images and stitching them together in software such as Microsoft’s free Image Composite Editor, you can create a full-disk mosaic showing remarkable detail. The goal during capture is not to obtain a single perfect frame but to record hundreds or thousands of short exposures that can later be aligned and stacked. This approach takes advantage of brief moments of steady seeing, when atmospheric turbulence temporarily relaxes and sharp detail becomes visible. Even before stacking and post-processing, I was amazed at the clarity of the views on my screen. Images of craters Clavius, Tycho, Copernicus, and other lunar tourist stops were especially impressive. Jupiter and Saturn were also striking. I found that, in general, it was better to record several short video runs rather than one long sequence. Doing so makes it easier later to analyze and discard poor-quality data affected by wind gusts or passing clouds. RELATED: Which filter should I use? Once the videos are recorded, post-processing begins. iCap saves the video files in formats compatible with popular stacking software such as RegiStax or AutoStakkert. These free programs analyze each frame, rank them by sharpness, align the best ones, and average them together. The learning curve of these tools can appear steep at first, but tutorials on YouTube make the process more user-friendly. The resulting stacked images reveal much finer detail than any single frame. Subsequent sharpening through wavelet filters or deconvolution techniques enhances the final result. But as with everything in life, moderation is key. It’s easy to get carried away and over-sharpen images, which can create artificial halos or odd edge artifacts that detract from an otherwise excellent image. Here are a few additional techniques I found helpful for maximizing performance. First, keep the gain as low as possible to reduce noise. Next, record when seeing is steady and the target is high. And finally, avoid imaging right after sunset when the air is turbulent. As with any camera, your success ultimately depends on the entire optical system. Proper collimation of the telescope’s optics is essential. Even a slight misalignment can blur fine details. Jupiter’s swirling cloud bands and three of its Galilean moons shine in this image taken with the Celestron NexImage 20. Credit: Phil Harrington The verdict The NexImage 20’s simplicity makes it easy to get superb results the first night out. It delivers detailed views of Jupiter’s cloud belts, Saturn’s rings, the Sun’s ever-changing surface, and the rugged topography of the Moon that rival images taken with far more expensive equipment. In the end, the NexImage 20 represents both an evolution and a reaffirmation of Celestron’s original idea that astrophotography should be within reach of anyone with a telescope and a computer. It carries forward the accessible spirit of the early NexImage cameras, but brings the power of modern CMOS imaging into that familiar package. I found the NexImage 20 to be one of the most enjoyable and capable planetary cameras I’ve used in years, offering outstanding performance for its price. Whether you’re taking your first steps into astrophotography or are an experienced imager, I’d suggest giving the NexImage 20 a try. It earns my highest praise. PRODUCT INFORMATION Celestron NexImage 20 Solar System Color Imager Type: Color cameraSensor: Onsemi AR2020 Back-Illuminated CMOSSensor size: 7.3mm x 5.4mmResolution: 5240×3840 (20 megapixels)Exposure range: 0.0001 to 10 secondsData/power port: Type-C USB 3.0Mounting: 11/4″ barrel and C-threadWeight: 2.0 oz. (57 g)Price: $449.95 Contact: Celestron2835 Columbia St.Torrance, CA 905031-800-421-9649Celestron.com Phil Harrington is an Astronomy magazine contributing editor and the author of more than a dozen books on astronomy.
Celestron’s NexImage 20 makes planetary imaging affordable and fun
Full Article
Original Source
Read the full article at Astronomy →KhanList aggregates and links to publicly available news content. We do not host full articles from third-party sources. Always verify important information with original sources.