
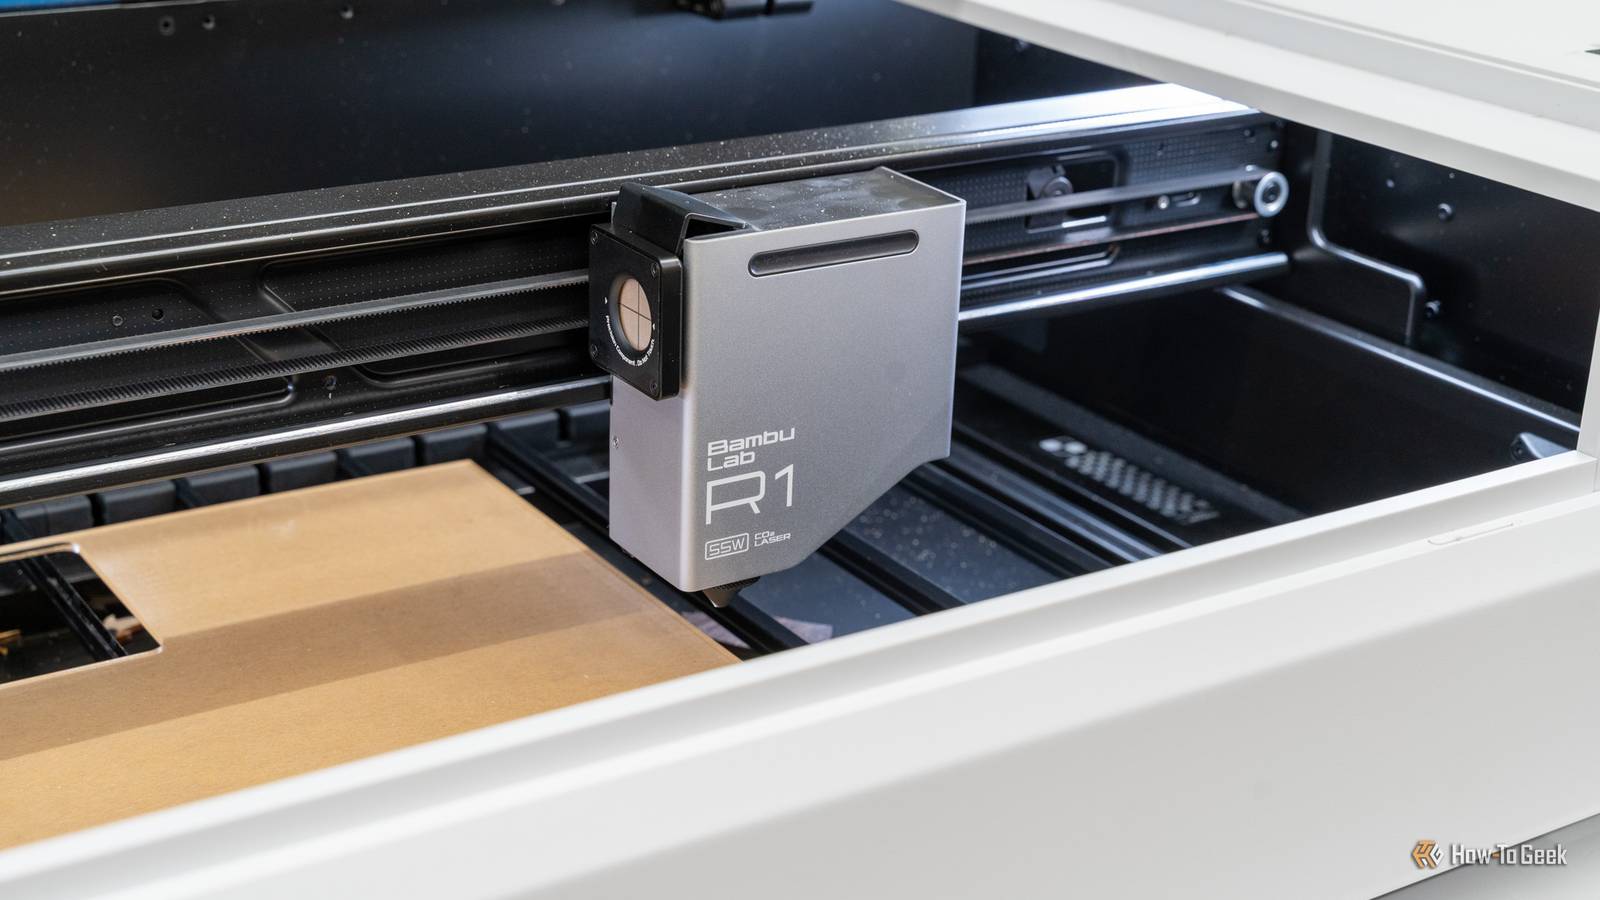
Bambu Lab might be best known for its 3D printers, but today, it's taking the next step in conquering the maker space with the R1. The Bambu Lab R1 is the brand's first dedicated laser with a 55W CO2 glass tube, and after spending a few weeks with it, I am thoroughly impressed. Bambu Lab R1 CO2 Laser 9/10 Brand Bambu Lab Laser Power CO2 Working Area 600x300mm Screen Yes, touchscreen The Bambu Lab R1 is the brand's first-ever dedicated laser engraver/cutter. As a 55W CO2 laser, the R1 offers some unique specs, including being the first CO2 laser with self-aligning mirrors. Add to that a fantastic camera, accurate placement, capable cutting, and more, and Bambu Lab's entry to the CO2 laser space is one a great one. Pros & Cons Automatic mirror alignment Exceptionally easy setup Accurate camera placement Strong cutting and engraving performance Large optional passthrough capacity Cumbersome multistage software workflow Price and availability The Bambu Lab R1 is available to purchase directly from Bambu Lab for $2,499. Specifications 9/10 Brand Bambu Lab Laser Power CO2 Working Area 600x300mm Screen Yes, touchscreen Software Bambu Suite Connectivity Wi-Fi, USB Bambu Lab's entry into the dedicated laser space is better than I ever imagined I expected a diode system based on the H-series printers, but that's not what Bambu Lab had in mind When I first got the email from Bambu Lab about a dedicated laser, I immediately thought it would be a mid-range diode laser like the one on the H-series printers. A 20W or 40W diode, maybe a 2W or 5W IR, and a 3D printer-like frame. I was wrong. The Bambu Lab R1 is a completely different animal. It's a 55W CO2 glass tube-powered laser that runs circles around any diode. It has fantastic cutting performance, a pass-through system for doing larger projects, a very sleek design, and features I've never seen in any laser before. The work area of the Bambu Lab R1 is 600 x 300mm, which is around 23.6 x 11.8 inches. Without the riser base installed, you have a max height of 21mm/0.83 inches with the knife slats, and 59.8mm/2.35 inches without the slats. Installing the riser lets you work with items up to 210.66mm/8.29 inches tall. Bambu Lab also has a conveyor system that allows you to do up to 600 x 3000mm, or 23.6 x 118.1 inches long, which is nearly 10 feet in length. There will also be a rotary for doing tumblers if that's something you're interested in working with. Both the conveyor and rotary systems require the riser base to be used. This is the easiest laser I’ve ever set up CO2 lasers used to require complicated setup — not anymore I've been using lasers for about five years now, and for around four years, I've been using CO2 lasers. With a CO2 laser, there's a tube in the back of the laser that (typically) shoots out the left side of the machine, hitting a mirror, which bounces the beam to another mirror, bouncing to a third mirror before focusing through the lens to the material. If that sounds complicated — it is. I hate mirror alignment. On my first CO2 laser, which was a K40, I never could get the mirrors to stay aligned. I fought for hours with it, and after they became aligned, they would quickly go out of alignment. My next system, a larger 80W CO2 laser, kept alignment, but I would still spend over an hour typically trying to align it. With the xTool P3, I thought I had gone to heaven because alignment was so simple. Alignment became something I didn't dread, and I actually enjoyed dialing in because it would give a better cut result. In typical Bambu Lab fashion, though, Bambu Lab took one of the most annoying parts of owning a CO2 laser and made it simple. The R1 has a special tool that I have no idea how it works, but it does. There's a little target that you mount on the head of the Bambu Lab R1, and it handles mirror alignment for you. I watched it work in amazement the first time it ran. On the touchscreen, it showed a picture of a bullseye and a green dot in the center when it was aligned, or a red dot wherever it hit if it wasn't aligned. To my amazement, when it wasn't aligned, it fixed itself. That's right, the Bambu Lab R1 aligned the mirrors itself. This is something I never expected to see, but it does make sense. If the laser can know where the beam is hitting, it can align the beam path for you. I ran several projects and then re-ran the alignment calibration, and it stayed perfectly aligned. While I saw a few red dots the first time around, I saw zero on subsequent runs, which is very good. The rest of the setup of the Bambu Lab R1 was equally easy, though most lasers are fairly simple to set up. Unboxing was simple; the overall hardware is premium and great, and I love how they do the exhaust hose. Bambu also includes antifreeze and a funnel in the box alongside instructions on how much antifreeze to use depending on how cold it gets in your region. Overall, the most difficult part of setting up any CO2 laser is mirror alignment, and Bambu Lab just made that something I don't have to worry about anymore. The camera turns placement into a non-issue Accuracy is its strong suit Cameras in lasers used to be for guidance only, and not actual precise work. The camera in the Bambu Lab R1 is not that way. I was able to use the camera to lay things out exactly as I wanted them, down to the sub-millimeter. For instance, I set a piece of plywood in the bed and had it take a picture. I then used the auto layout tool, which worked decently well, and it put the graphic on the very edge of the plywood. I figured I'd give it a shot and see how it came out. I expected it to be a millimeter or two off — but I was wrong. It was exactly on the edge. There was a very, very small portion that wasn't burned as it rounded the edge, but it was extremely precise. The reason I say that the auto layout tool worked just decently well is that I wish it would default to giving a millimeter or two of clearance around the graphic in the placement. Instead, it often sets it at the very edge of the piece, which means that even the slightest misalignment can produce an uneven edge. Outside of that, though, I found the camera to be spot-on in every instance I used it — which was every instance I used the machine. There wasn't a single time when I didn't use the camera for alignment, and not one time did it let me down. A 55W laser shouldn’t feel this capable I was surprised by its performance at every turn As I've said, I've used a lot of lasers over the years. For CO2, I've used a 40W and two 80W units. So, being a 55W machine, I expected the Bambu Lab R1 to run decently slower than my 80W CO2 machine that's got 25W more power. However, the Bambu Lab R1 simply ran fantastically. I had a few instances where it didn't cut all the way through some material, but I suspect that was the material and not the R1 because I have that same problem with my 80W occasionally. I was only working with 1/8-inch material, but it worked great with it. Around 80–90% power at 20–25 mm/s is what it took for me to get through most of the 1/8-inch plywood I was cutting. Bambu Lab actually has a solid starter library of settings, and they worked surprisingly well for cutting. On the engraving side of things, I had to tweak things a bit to get the engraves to my liking, but overall, the cut settings were spot on. Running acrylic was a big test for me. Bad settings will ruin an acrylic cut faster than anything, and the default Bambu Lab settings in Bambu Suite worked perfectly. The edge looks great, and it dropped right out. I will note that there is no honeycomb tray here; it's a knife bed. I used to swear by honeycomb trays, but after using a knife bed in my other laser for the past year, I've come to really like it because it allows things to drop through much more easily. Bambu Lab also has three lenses for the R1. It ships with the S lens, but there is also an M and L depending on how thick of material you need to cut with. The S lens is designed for more fine detail, smaller text, photos, and crisp engraving. The M lens is more of a general-purpose lens to balance cutting and engraving, and the L lens is for cutting thicker material. All of the projects you see in this review were made with the S lens, both on engraving and cutting. I wish Bambu would make Bambu Suite easier to use I really wish we could all agree on a standard workflow If you didn't know, Bambu Lab actually has two pieces of software. Bambu Studio is what runs its 3D printers, and Bambu Suite runs the lasers and cutters. I'm not a fan of that. I wish the software was unified in the way that other manufacturers do it, but it's not. Bambu Suite isn't all that great to me. I found the workflow to be a bit cumbersome. You start out by loading in the graphics and choosing whether they're cut, engrave, or score. You also determine what graphics are attached (grouped) or not. Then, you move onto the placement and settings page, where it takes the enabled graphics from the previous page and shows the laser bed with the image the camera takes for placement. This is also where you choose the settings for the engrave/cut/score. I really wish all of these options lived on the same page, where you imported the graphic into the same workspace where you were placing it, and then you chose there whether something was an engrave, score, or cut. Hopefully, now that Bambu Lab has a dedicated laser out, they'll start working to make the software more aligned with other industry-standard software out there, like LightBurn and xTool Studio. Should you buy the Bambu Lab R1? Credit: Patrick Campanale / How-To Geek If you're looking for the easiest-to-use CO2 laser on the market, then the Bambu Lab R1 is definitely the best one I've ever used. While the software leaves something to be desired for me, it does work well and resembles other cutting software like Cricut Design Space. The Bambu Lab R1 offers superb cutting and engraving performance for a 55W machine, tons of capabilities, and the most seamless and simple setup I have ever experienced in a laser. It also has an extremely small form factor for its power and size, which was a big surprise to me. I definitely think the Bambu Lab R1 is going to be a game-changer in the laser world, and it will become a staple in many workshops, I believe. Coming in at $2,499, it's priced more competitively than other 55W CO2 lasers out there, but with more capabilities and easier setup. Compared to GlowForge, it's a bargain, as the 45W Glowforge Pro HD costs $7,999. I think the Bambu Lab R1 is the perfect machine for those who already have a 3D printer and want to expand their horizons to a more powerful laser engraver/cutter. While Bambu Suite might not work the way I want it to, it is still very usable and capable. At the end of the day, if you want a simple-to-use laser, then the Bambu Lab R1 is probably one of the best on the market today. Bambu Lab R1 CO2 Laser 9/10 Brand Bambu Lab Laser Power CO2 Working Area 600x300mm Screen Yes, touchscreen The Bambu Lab R1 is the brand's first-ever dedicated laser engraver/cutter. As a 55W CO2 laser, the R1 offers some unique specs, including being the first CO2 laser with self-aligning mirrors. Add to that a fantastic camera, accurate placement, capable cutting, and more, and Bambu Lab's entry to the CO2 laser space is one a great one.
Bambu Lab R1 review: The easiest CO2 laser I’ve ever used
Full Article
Original Source
Read the full article at Howtogeek →KhanList aggregates and links to publicly available news content. We do not host full articles from third-party sources. Always verify important information with original sources.