
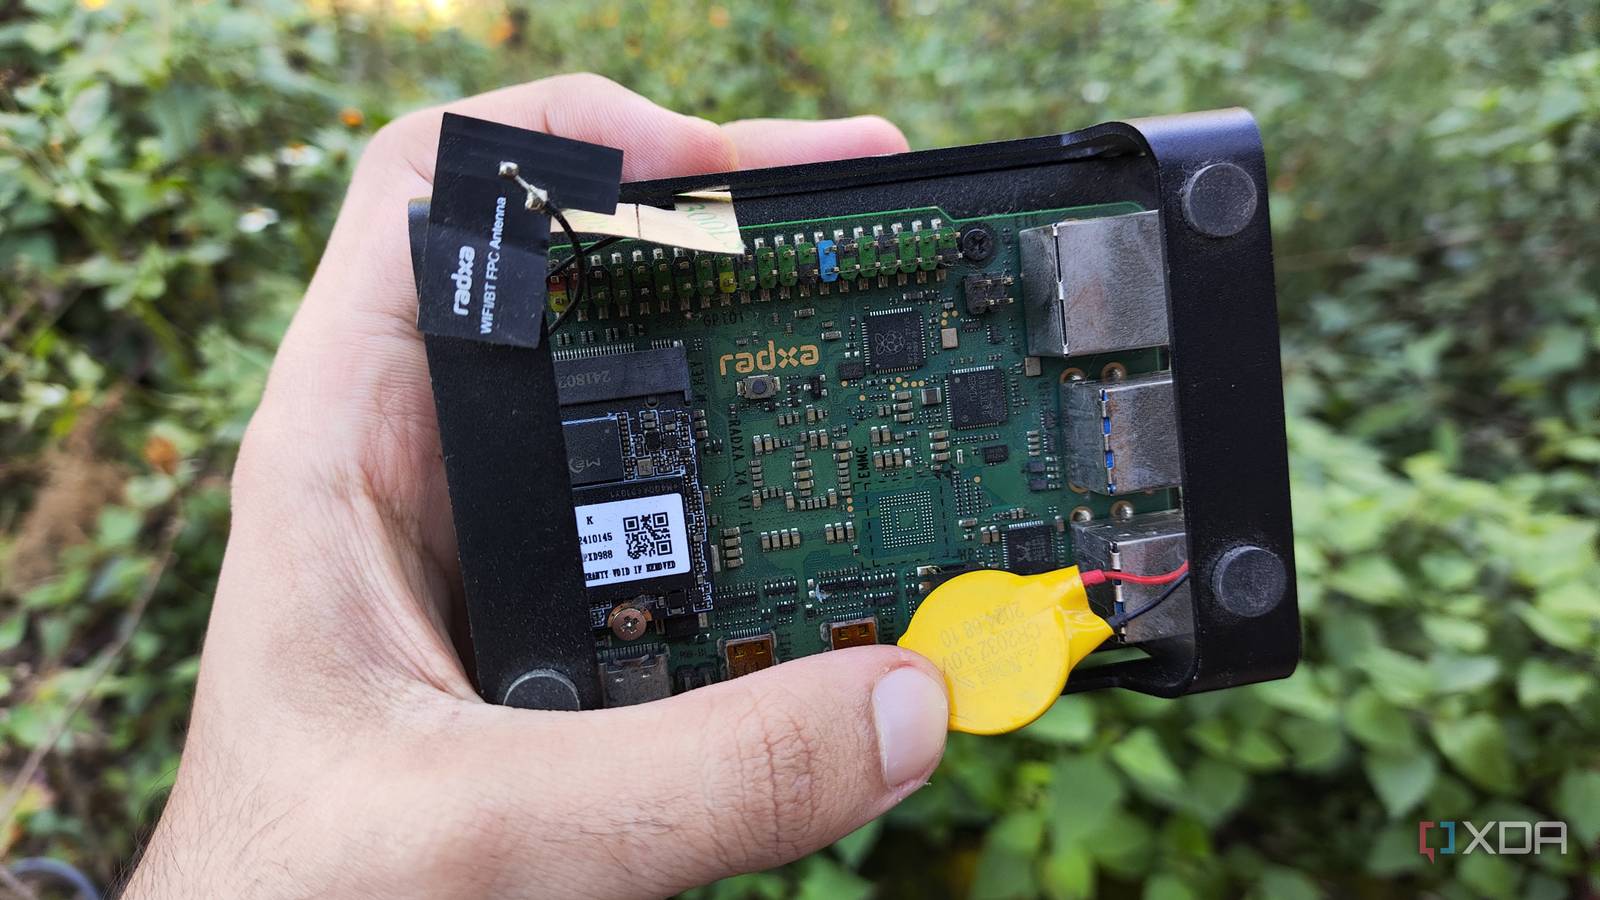
Published Nov 5, 2026, 1:00 PM EST Ayush Pande is a PC hardware and gaming writer. When he's not working on a new article, you can find him with his head stuck inside a PC or tinkering with a server operating system. Besides computing, his interests include spending hours in long RPGs, yelling at his friends in co-op games, and practicing guitar. I’ve been a fan of self-hosting my own tools and getting rid of cloud-based utilities ever since I built my first Proxmox server, and this addiction also extends to my home lab management services. On the networking front, I’ve got a dedicated OPNsense firewall, Nginx-powered local proxy manager, NetBox IPAM system, and AdGuard ad-blocker. Likewise, my Homarr dashboard, Gotify notification hub, and Pulse monitoring agents are responsible for ensuring my FOSS suite remains accessible at all times. Then there’s the local Network Time Protocol server that I recently deployed on a single-board computer. Although it’s a budget-friendly setup that would benefit from dedicated GPS modules, my NTP server is more than enough to ensure all the devices in my tinkering arsenal sync to the same clock. I decided to use an RTC-equipped SBC for my local NTP server That way, my self-hosted time server could still be of use if I lose Internet connectivity When it comes to deploying a local NTP server, I have a couple of options at my disposal. Technically, I could opt for a simple time server that uses the built-in wireless connectivity on the host to fetch data from public NTP servers, and this would even work with the cheap ESP32 modules I’ve grown to love over the last couple of months. However, one random shutdown is all it’d take for my microcontrollers and cheap SBCs to drift, and my devices would have to wait for the NTP host to connect to the Internet before they get the right time stats. And in case a botched project brings down my Internet connection, my time server could start to drift and mess up the stats for the rest of my server nodes. So, I needed a doohickey to provide the offline timekeeping my devices might need when my Internet goes down. A Raspberry Pi 5 would be a decent option for this project, as it has a real-time clock built into its power-management IC. But since I often flash different distros onto this tiny tinkering board for my projects, I decided to pivot to a different single-board computer for this project. As such, I went with the Radxa X4, which not only houses half my networking tools, but also has a dedicated RTC module hanging under the case. Don’t get me wrong, the time server would still rely on upstream servers for the most part. But adding an RTC module into the equation ensures that it can keep providing relatively accurate readings even when the Internet goes down. As for the utility of this project, a local NTP server would help synchronize the clocks on all my server nodes, containers, and backup rigs. That way, I’d be able to eliminate clock drift on offline-only rigs, have my PBS instances receive snapshots at precise intervals, and get matching timestamps across my monitoring and logging tools for the entirety of my home lab. Chrony serves as the heart of this project It meshes well with the RTC module on my pint-sized companion Since Chrony meshes well with RTC modules and remains fairly easy to set up on Linux workstations, I decided to base my NTP server around this utility. For reference, I’ve got a Debian instance configured on my Radxa X4, so I simply pulled the necessary packages for this project with the sudo apt install chrony -y command. Before I could dive into the NTP config files, I wanted to confirm that Debian detected the underlying RTC module, so I ran the ls /dev/rtc* and sudo hwclock --show commands. With the SBC reporting the correct time, I quickly ran the /etc/chrony/chrony.conf command to enter the Chrony settings file and added the following code: allow 192.168.0.0/24rtcsync local stratum 8makestep 1.0 3 For reference, the allow parameter lets Chrony serve its NTP magic on the 192.168.0.0/24 subnet, while rtcsync ensures the SBC writes the system time to the RTC module periodically. The local stratum 8 line forces Chrony to continue serving as the NTP server even when the Internet goes down, and the makestep 1.0 3 line acts as a failsafe by stepping the clock to the right time if the offset is greater than 1 second. Once I was satisfied with the config tweaks, I ran sudo systemctl restart chrony to reboot the service before executing sudo systemctl enable chrony to start the NTP server automatically upon boot. With the local time server configured, it was time to start adding it to my tinkering rigs. Most of my home server rigs use Proxmox, which already ships with Chrony. So, I entered nano /etc/chrony/sources.d/local-radxa.sources into the Shell tab of my PVE node to create a new config file and appended the following code to connect it to my SBC-powered NTP host: server 192.168.0.27 iburst prefer Running chronyc tracking and chronyc sources -v confirmed that my Chrony server was working in tip-top shape. On my Linux VMs and non-Proxmox rigs, the connection process was largely the same, with the only difference being that I had to manually install Chrony before I could create a new file to point Chrony to use my local time server. It’s a budget-friendly setup, but it’s good enough for my home lab While my DIY setup keeps my self-hosting workstations and backup rigs in sync, I’ll probably add some upgrades to enhance its accuracy in the future. After all, a GPS/GNSS receiver module or a PTP-capable Network Card can provide more accurate time stats compared to my Internet + RTC-based server. But until I go hunting for used components on eBay, I’ll continue to rely on my budget-friendly time server. Chrony
An SBC runs my home's time server, and every device finally agrees on what time it is
Full Article
Original Source
Read the full article at Xda-developers →KhanList aggregates and links to publicly available news content. We do not host full articles from third-party sources. Always verify important information with original sources.