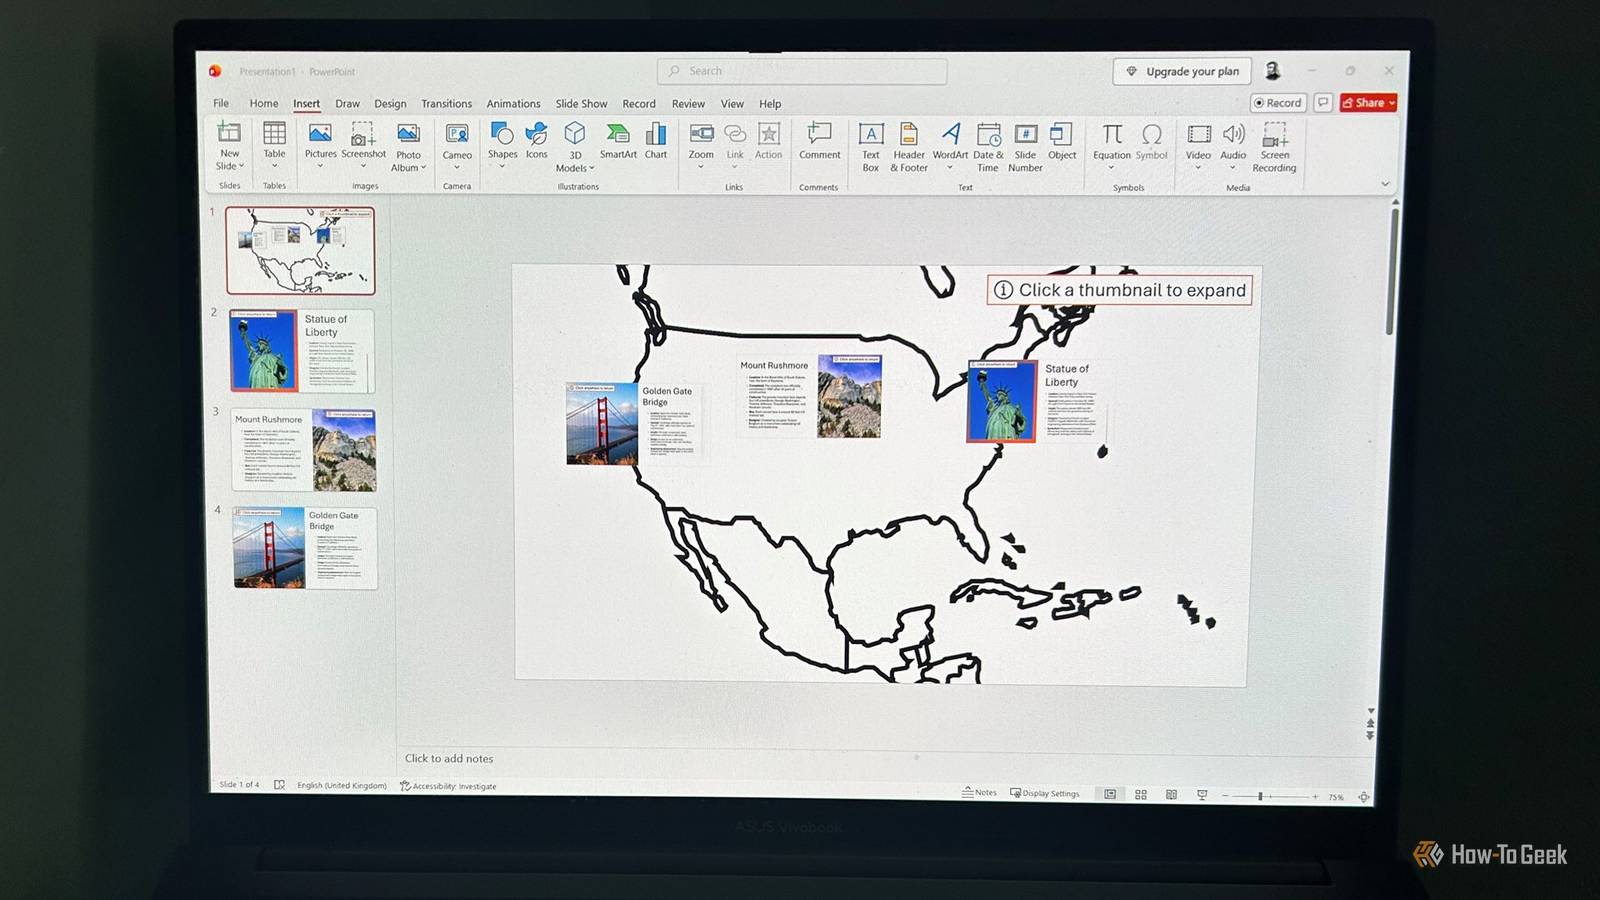
Published Jul 17, 2026, 11:30 AM EDT Tony Phillips is an experienced Microsoft Office user with a dual-honors degree in Linguistics and Hispanic Studies. Prior to starting with How-to Geek in January 2024, he worked as a document producer, data manager, and content creator for over ten years, and loves making spreadsheets and documents in his spare time. Tony is also an academic proofreader, experienced in reading, editing, and formatting over 3 million words of personal statements, resumes, reference letters, research proposals, and dissertations. Before joining How-To Geek, Tony formatted and wrote documents for legal firms, including contracts, Wills, and Powers of Attorney. Tony is obsessed with Microsoft Office! He will find any reason to create a spreadsheet, exploring ways to add complex formulas and discover new ways to make data tick. He also takes pride in producing Word documents that look the part. He has worked as a data manager in a secondary school in the UK and has years of experience in the classroom with Microsoft PowerPoint. He loves to encounter problems in Microsoft Office and use his expertise and legal-level training to find solutions. Outside of the Microsoft world, Tony is a keen dog owner and lover, football fan, astrophotographer, gardener, and golfer. Most people think of PowerPoint only as a tool for creating slide decks, but it's capable of much more. If you have some free time this weekend, these three hands-on projects will help you build more polished, interactive presentations while teaching you useful features along the way. Create immersive slides using 3D models and Morph transitions Turn static objects into seamless animations One of the easiest ways to make PowerPoint feel less like a traditional presentation tool is by combining its built-in 3D models with the Morph transition. When you do this, you can simulate smooth camera movements that make one slide flow naturally into the next. To get started, insert your 3D model and position it on the slide: In the Insert tab, click the top half of the 3D Models button. Browse through the categories or use the search bar to find an object. Once you've found what you're looking for, select it, then click Insert. Click and drag the circular rotation handle in the center of the 3D model to orient it to your starting perspective. Add any necessary text boxes, titles, or formatting to your slide. Once your starting slide is designed, you can use the Morph feature to animate the model's transition into a new view: Right-click your starting slide in the left-hand thumbnail pane and click Duplicate Slide. On the duplicated slide, use the rotation handle to turn the 3D model to the final perspective you want your audience to see. You can also move, resize, or adjust existing text boxes, shapes, and other elements to create additional changes between the two slides. With the second slide still selected, open the Transitions tab and click Morph. Morph only animates elements that exist on both slides. Any new text boxes, shapes, or images you add will fade in rather than moving smoothly into place, and they may appear before the transition has finished. Editing text inside an existing text box also simply replaces the text instead of morphing it. Now, press F5 to start the slideshow and watch the 3D model smoothly rotate and move between each view as you step through your slides. To add further movements, keep duplicating the final slide and changing the model's angle. When you do this, the Morph transition settings will automatically carry over to your new slides. Microsoft 365 Personal OS Windows, macOS, iPhone, iPad, Android Free trial 1 month Microsoft 365 includes access to Office apps like Word, Excel, and PowerPoint on up to five devices, 1 TB of OneDrive storage, and more. Build a custom countdown timer without sketchy add-ins Keep your audience on track Countdown timers are great for progress indicators, timed classroom activities, or any presentation that needs visual pacing. While you can create complex digital timers in PowerPoint or download third-party add-ins, this visual progress wheel is much quicker to build and gives your audience an easy way to see how much time remains at a glance. First, create the timer itself: Go to Insert > Shapes and choose the Oval. Hold Shift while dragging to draw a perfect circle on your slide. Copy and paste the circle, then drag the second circle directly on top of the first. Change the fill color of the top circle so it contrasts clearly with the one underneath. Select the top circle, open the Animations tab, and click the Animation Styles drop-down arrow. Choose the red Wheel exit animation. Now, configure how the timer behaves: In the Animations tab, click Animation Pane. Click the drop-down arrow next to the Oval animation and click Timing. Set Start to On Click and enter your preferred countdown length in seconds in the Duration field. Press F5 to preview your timer in action. Once you've built it, you can copy and paste both circles together into future presentations and update the Duration field to adjust the length. Create an interactive map using Slide Zoom Create a presentation that your audience can navigate themselves If you've ever been asked to skip ahead to a particular topic during a presentation, you'll know how awkward it can be to hunt through your slides. Slide Zoom solves that problem by turning PowerPoint into an interactive navigation hub, letting you jump between topics and then return to your main menu with a single click. The same technique also works brilliantly for self-guided presentations and interactive displays. First, create your map overview and destination slides, then use Slide Zoom to connect each location to its corresponding slide: Insert a clean image of a map on your overview slide (the first slide), along with a text box telling your audience where to click. Create separate slides for each location on your map and add the relevant details, images, or other information you want your audience to explore. Use large, clear slide titles so they are easy to see when you add them to your overview slide. Finally, add a text box telling viewers they can click anywhere to return to the main map. Go back to your overview slide and click Insert > Zoom > Slide Zoom. Check the boxes next to all of your destination slides (not the overview slide), then click Insert. Drag and resize the newly created slide thumbnails to place them over their corresponding locations on your map. Your Slide Zoom thumbnails don't have to sit directly on top of the locations they represent. If your map becomes crowded, move the thumbnails to an open area beside the map and add connector lines to point to each location. This keeps your navigation hub tidy and easier to use. At the moment, clicking a thumbnail on your overview slide will successfully zoom in on the relevant slide, but PowerPoint will continue forward in the presentation order afterward. To turn your map into a true navigation hub, configure each thumbnail to return to the overview slide: On your overview slide, select one of the thumbnail images. Open the contextual Zoom tab. Check Return to Zoom in the Zoom Options group. Repeat this step for each remaining thumbnail. Unfortunately, there's no way to apply this setting to multiple Zoom objects at once, so you'll need to repeat the process for every location. Now, press F5 to preview your interactive map. Click a thumbnail to jump to its information slide, then return to the overview and choose another location. Ready for your next project? These three projects show how a little experimentation can transform PowerPoint from a simple presentation tool into something far more interactive. If you enjoyed building these examples, you can keep building your Microsoft 365 skills with last weekend's Excel projects—each of which you can finish in 15 minutes.
3 surprisingly useful PowerPoint projects to try this weekend (July 17–19)
Full Article
Original Source
Read the full article at Howtogeek →KhanList aggregates and links to publicly available news content. We do not host full articles from third-party sources. Always verify important information with original sources.